
Outbound Messaging via CleverTap using LimeChat API
Overview
CleverTap allows sending WhatsApp campaign messages via webhooks. If you want to send a WhatsApp campaign to a specific segment created on CleverTap, you simply need to set up LimeChat’s webhook on CleverTap and create a webhook campaign!
Steps to create a webhook campaign on CleverTap
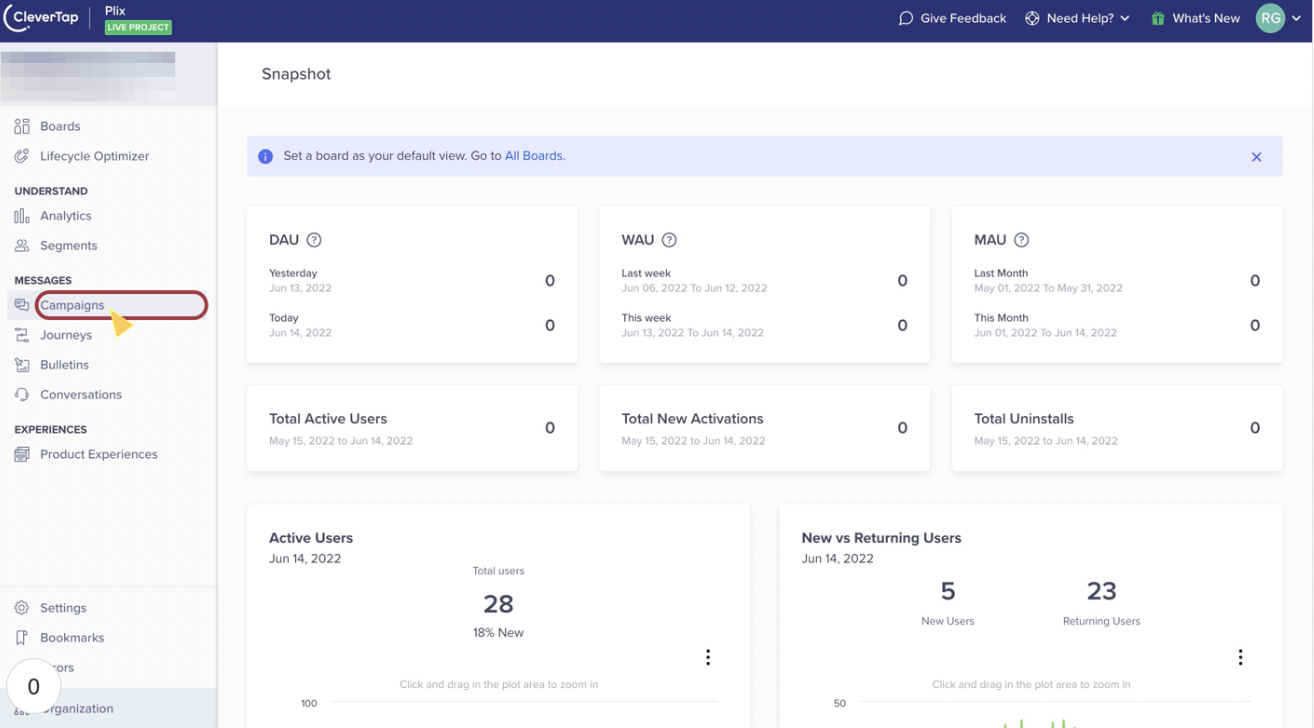
Go to https://eu1.dashboard.clevertap.com. Click on Campaigns.
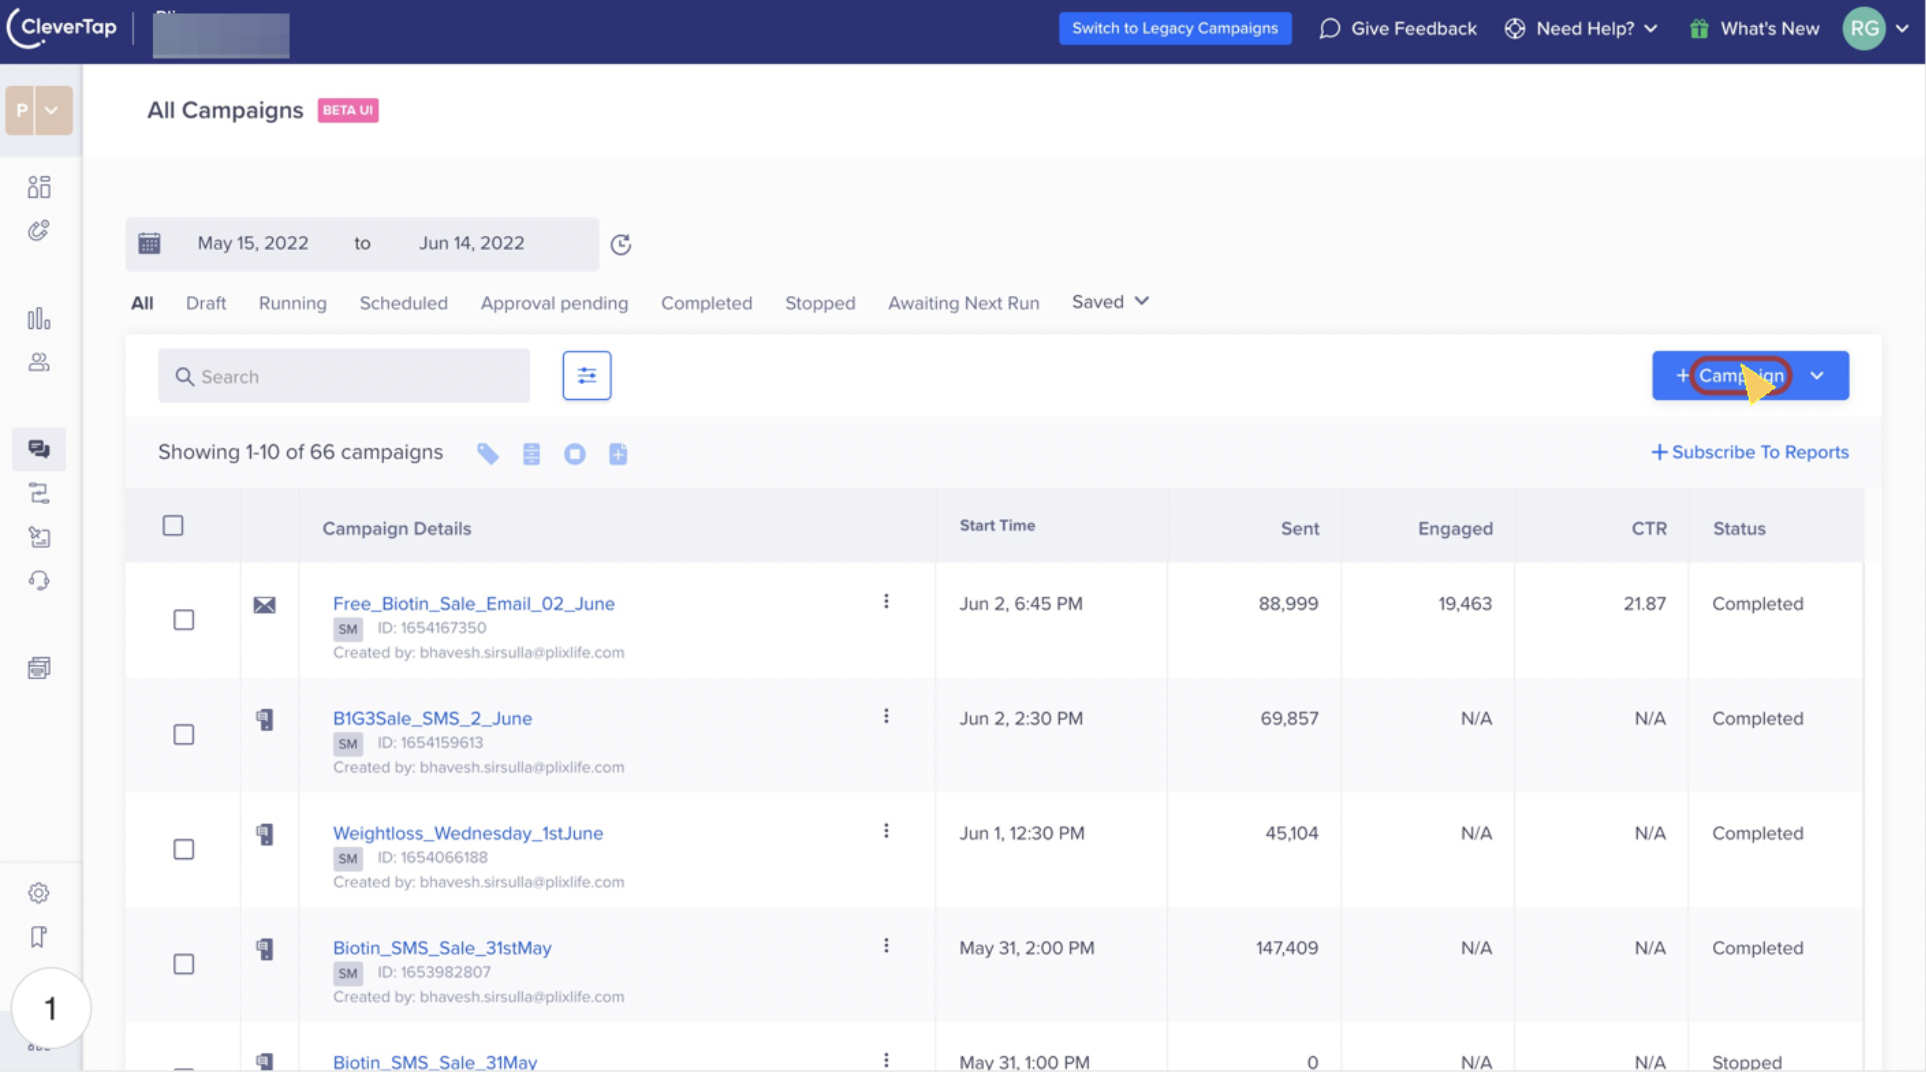
Click on +Campaign.
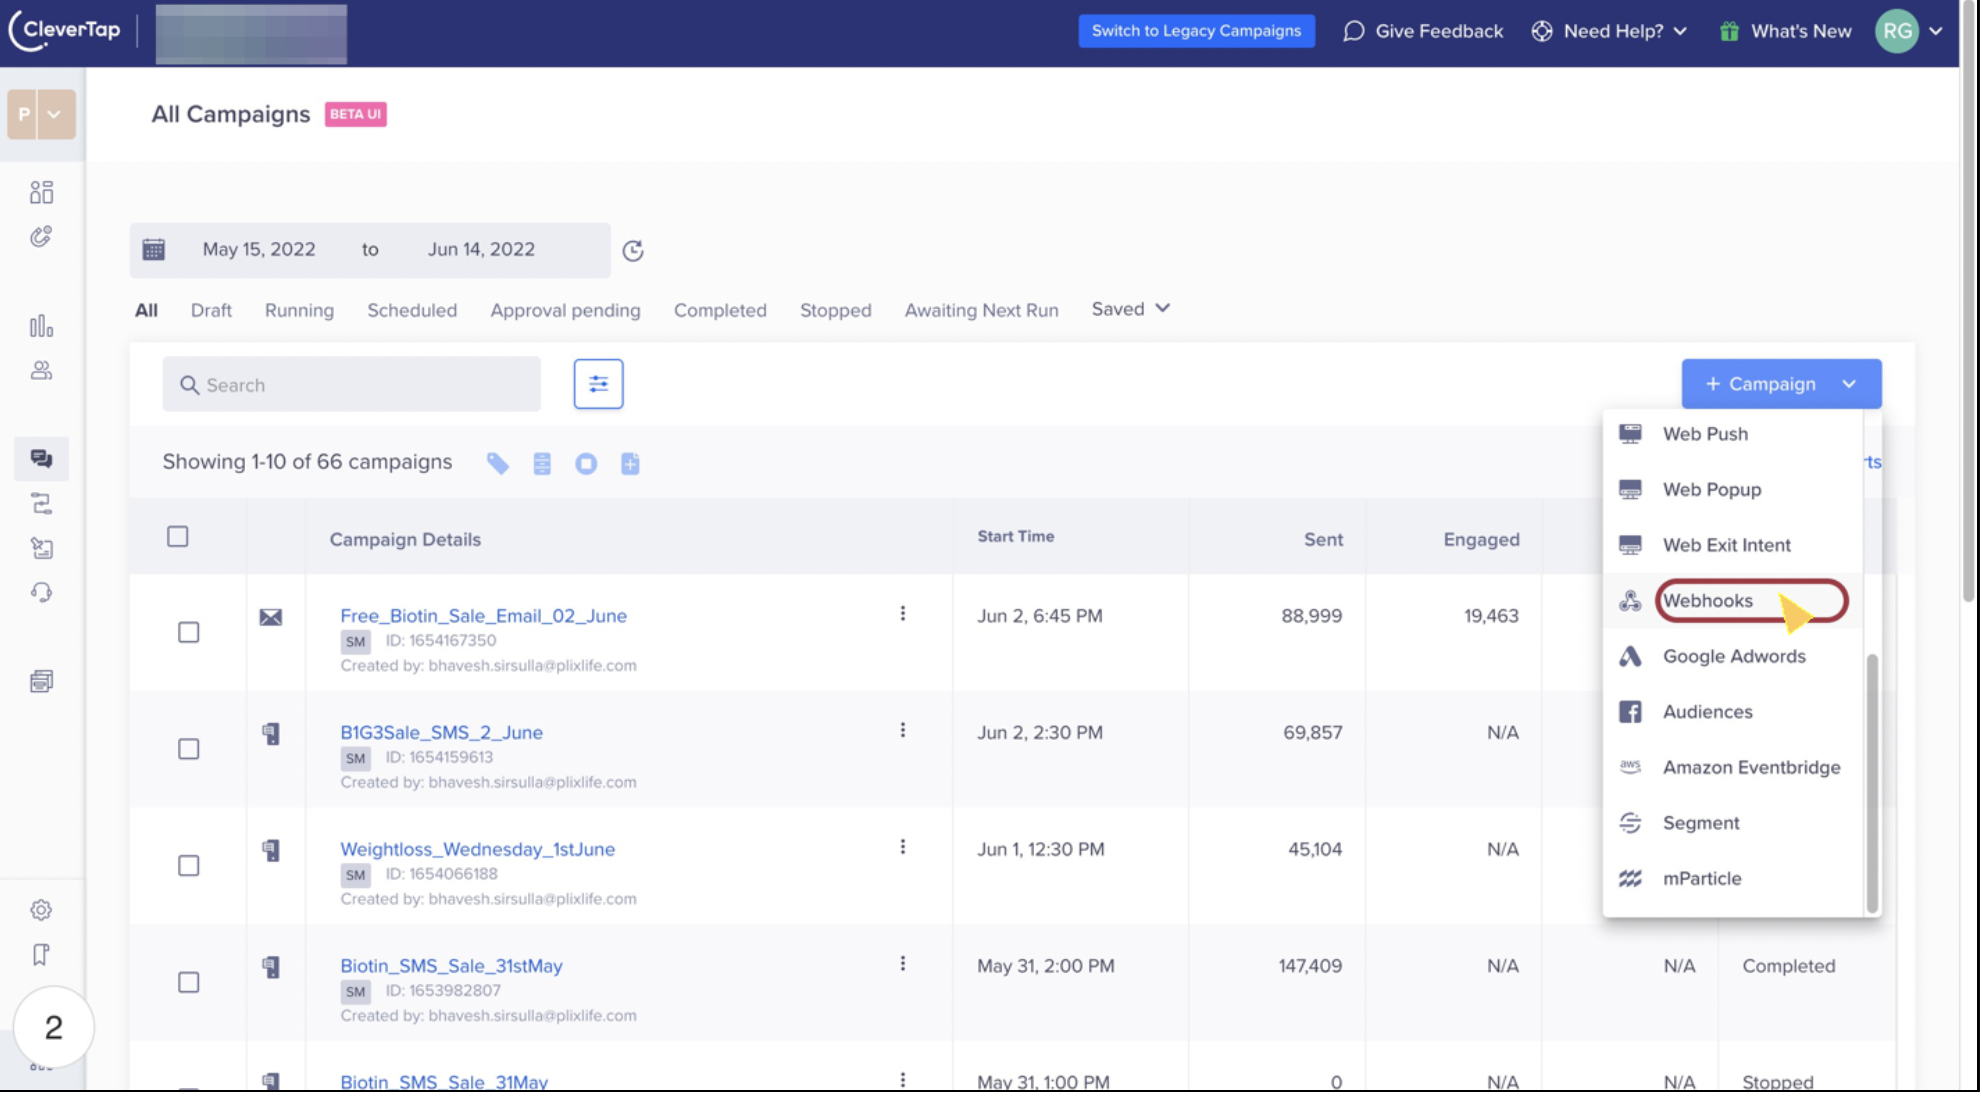
Select Webhooks from dropdown.
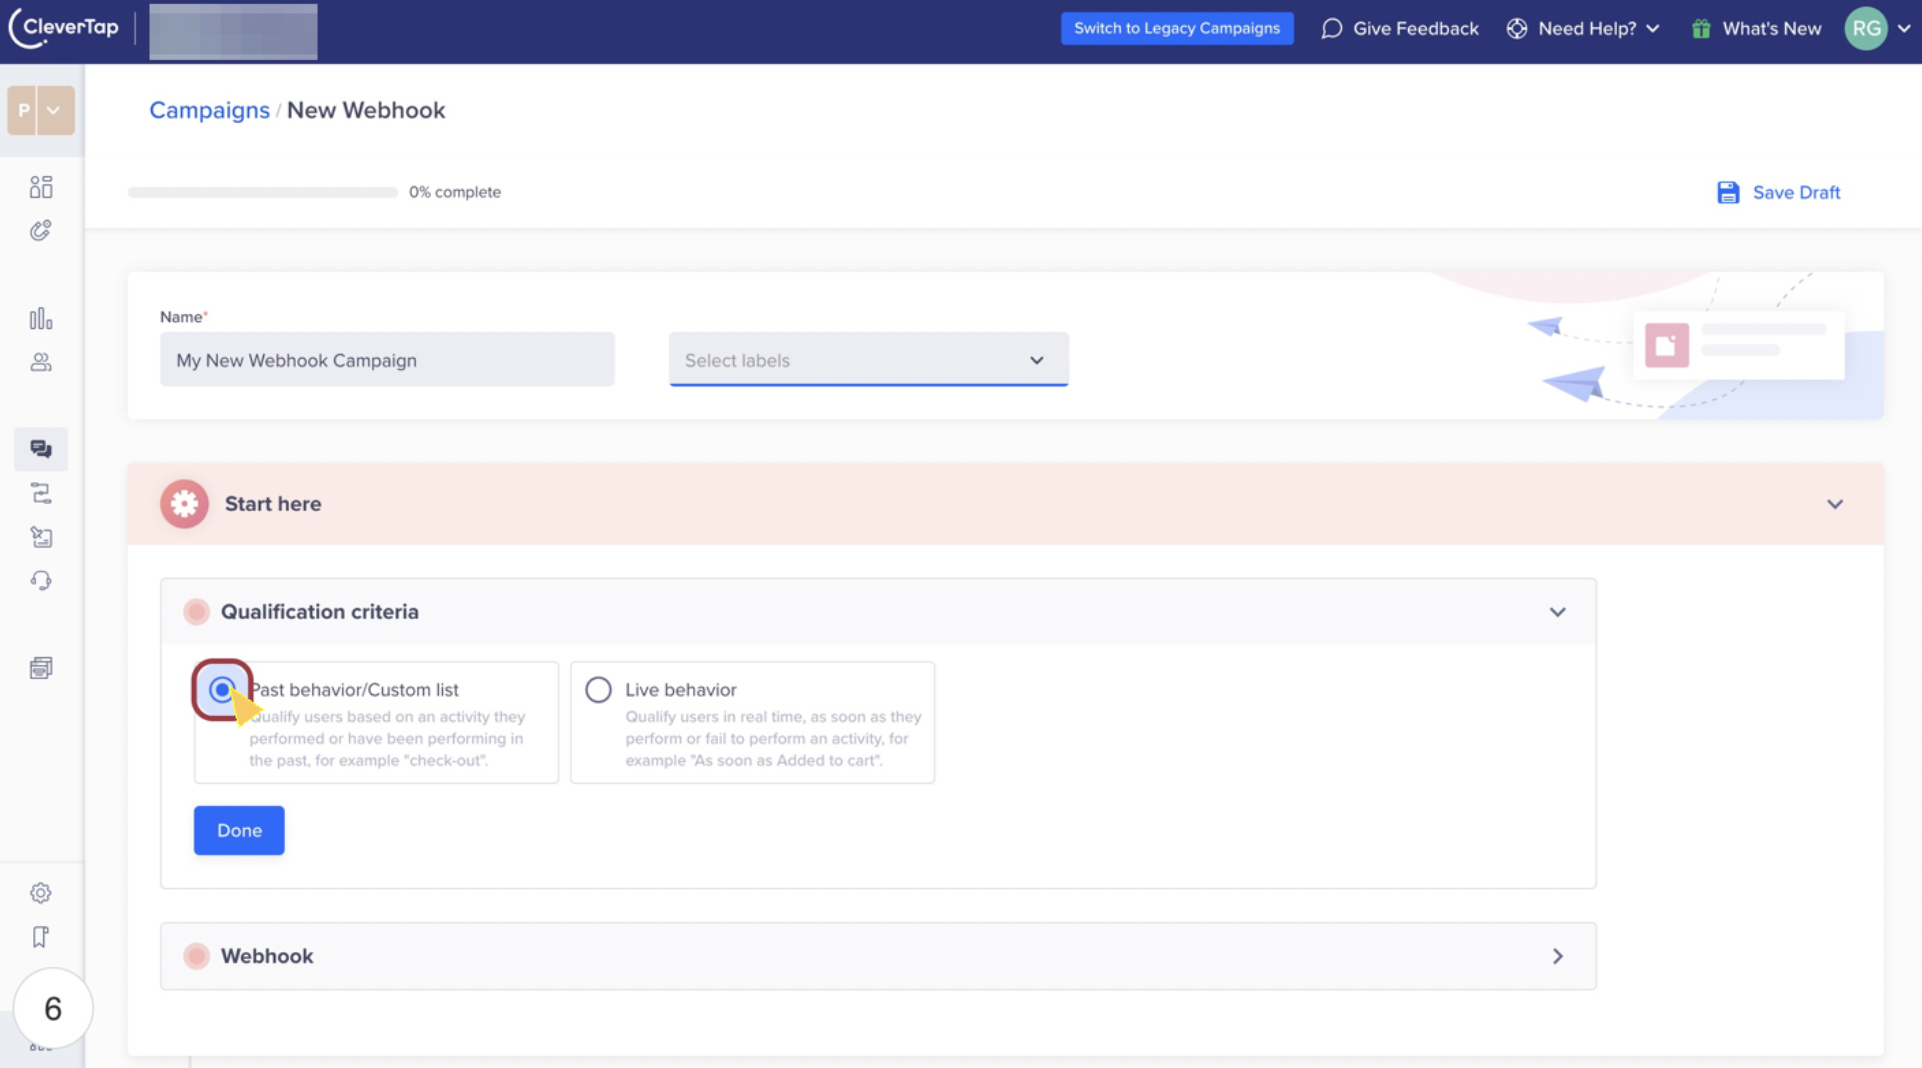
Select Qualification criteria.
- Based on Past behaviour/Custom list
- Based on Live behaviour
If you have already added the LimeChat webhook, then select it from the dropdown. Otherwise set up a new webhook by clicking on Add a new Webhook. (The steps to do this are described at the end of this article.)
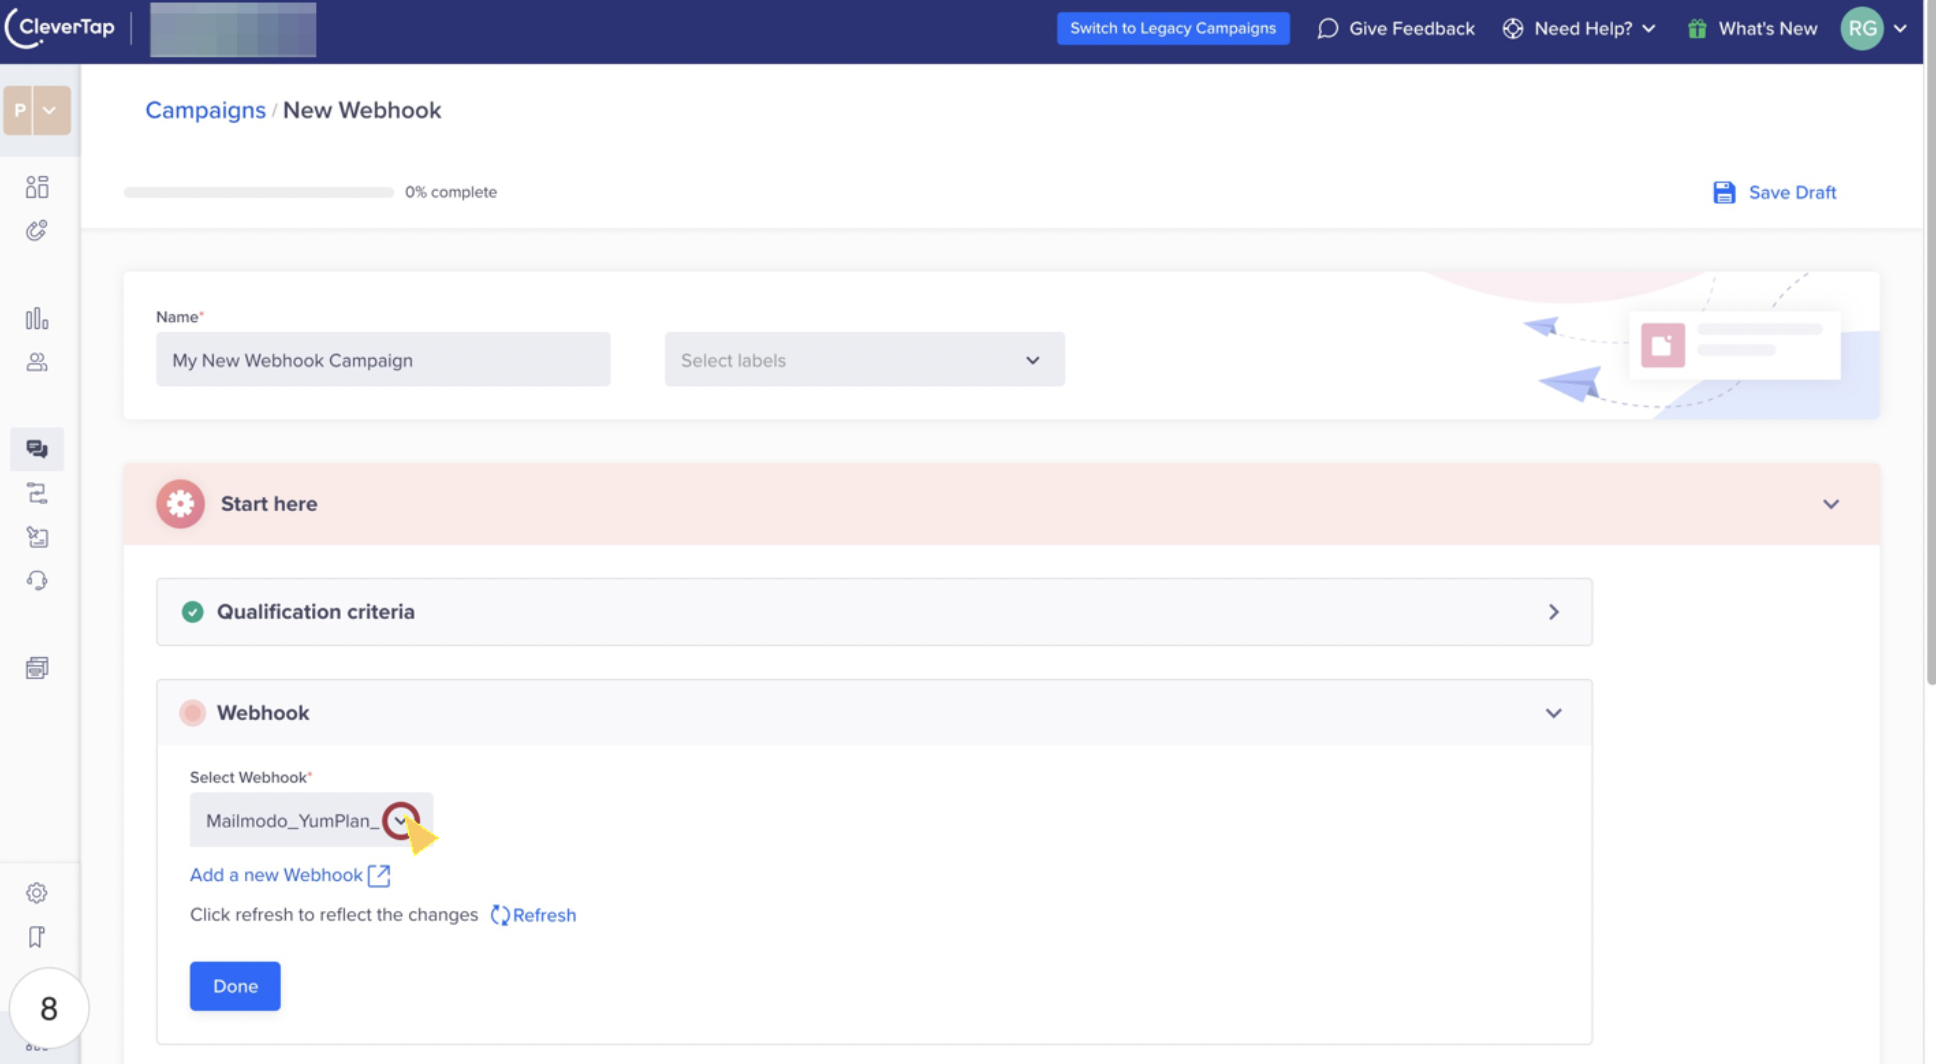
After setting up a new webhook, you will find it on the Select Webhook dropdown. Select the webhook and click Done.
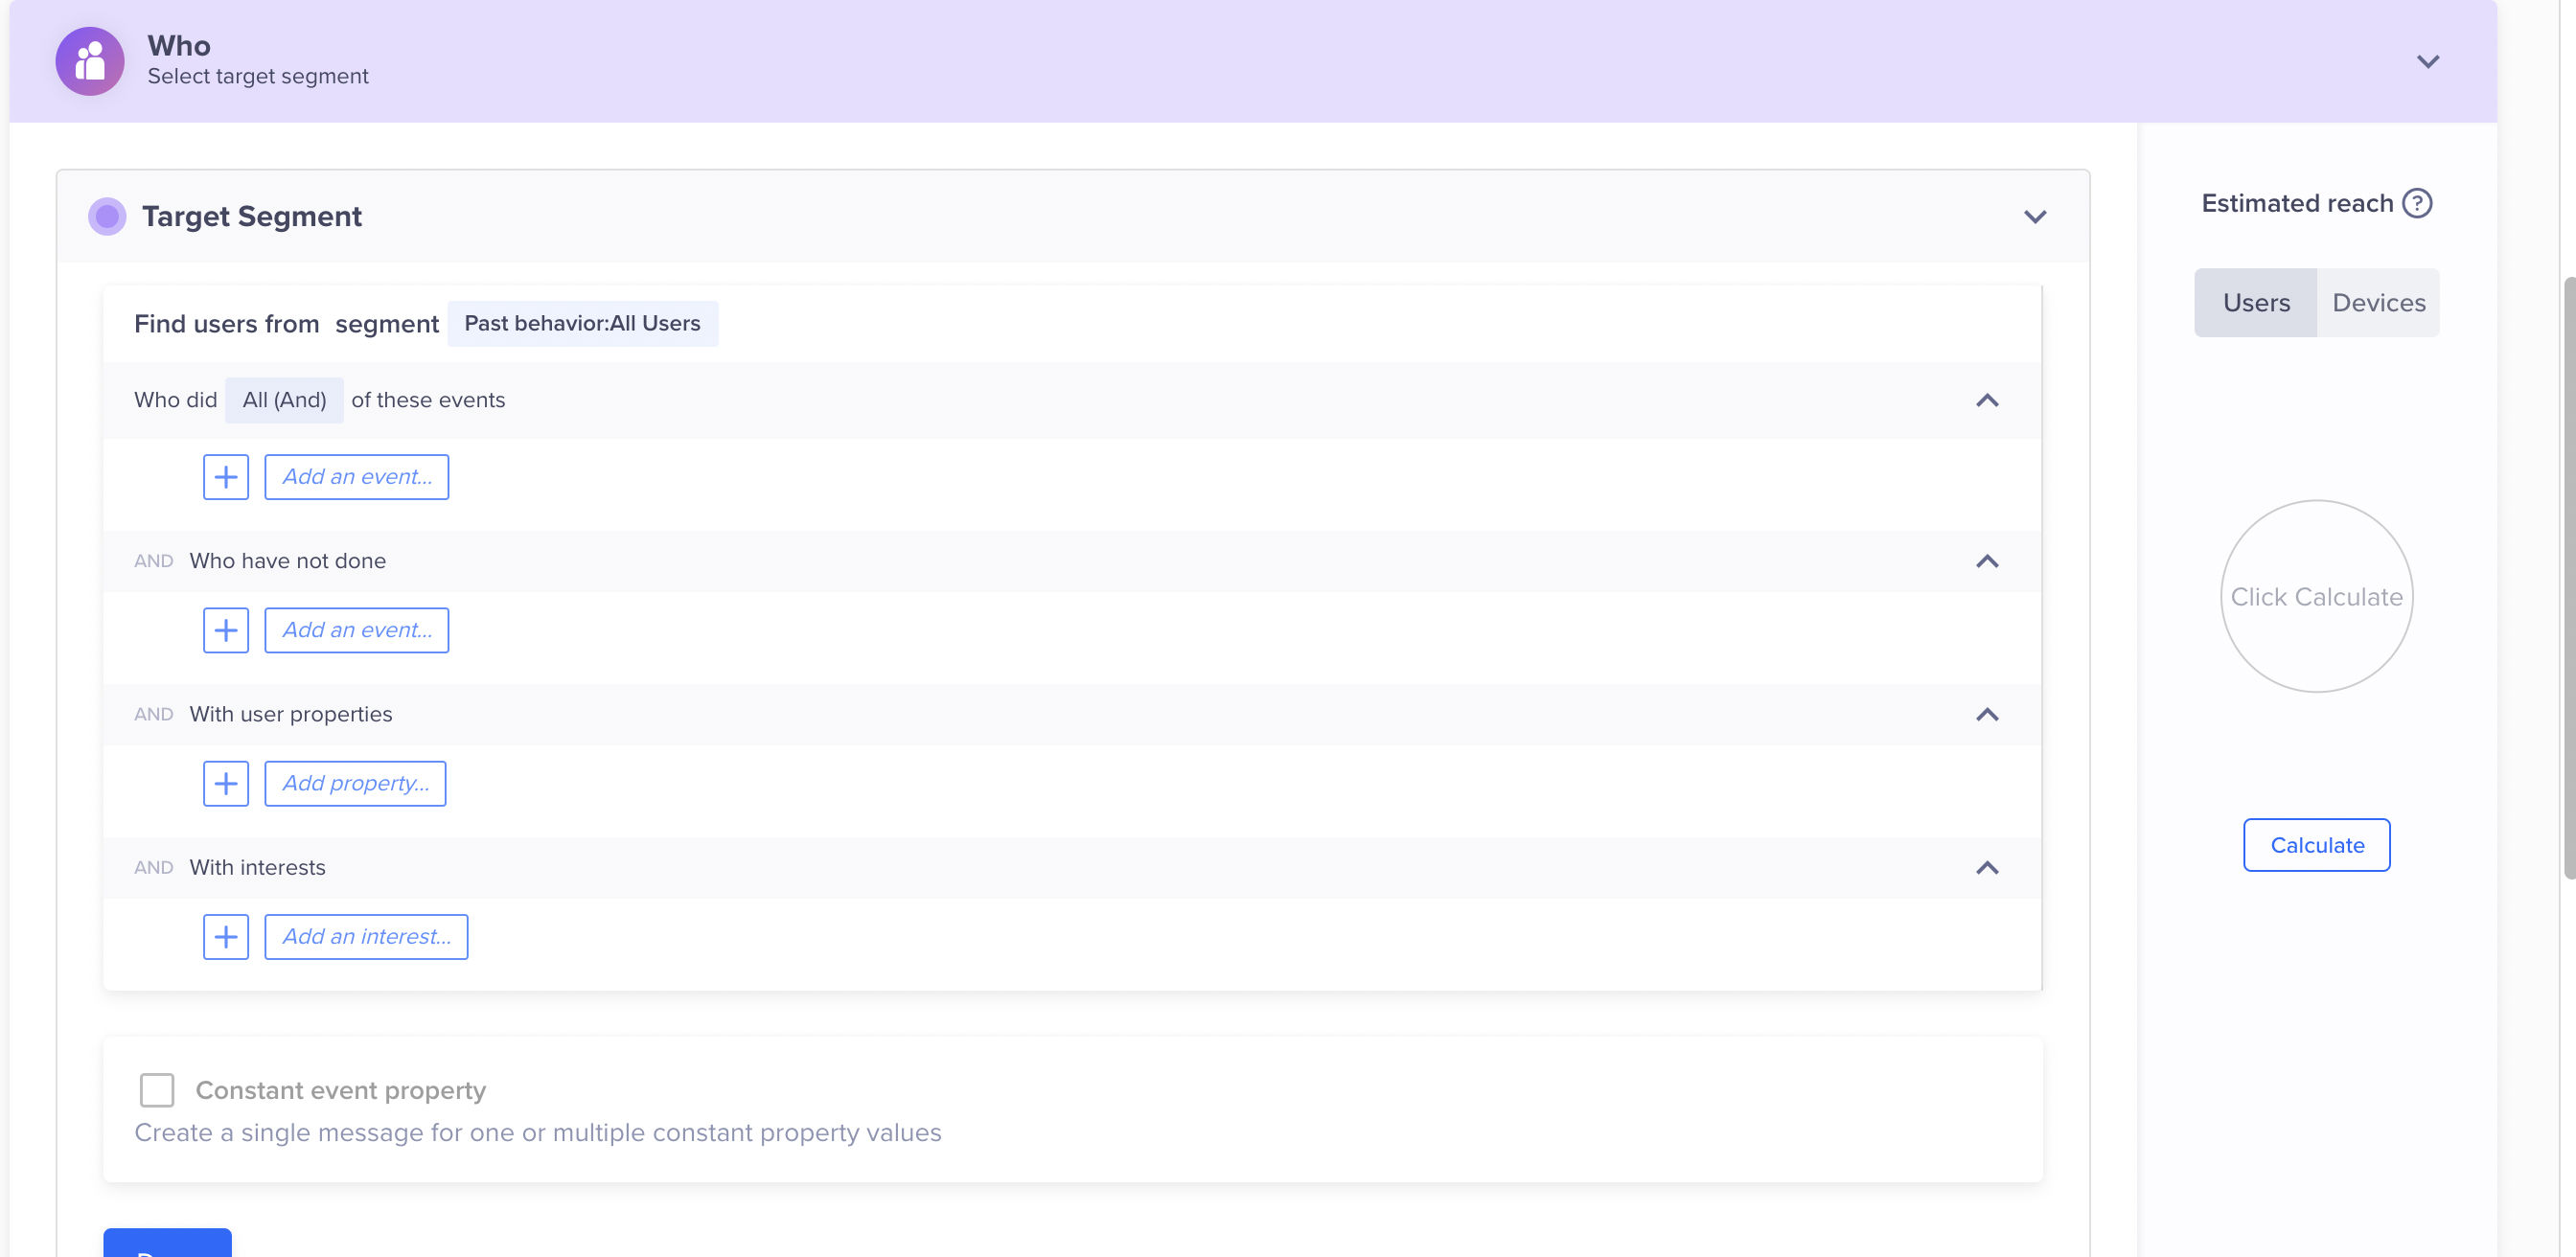
Select the segment you want to send the campaign via webhook.
The next step is to create a message. Click on Go To Editor.

As you already added Header, no need to add key-value pairs now
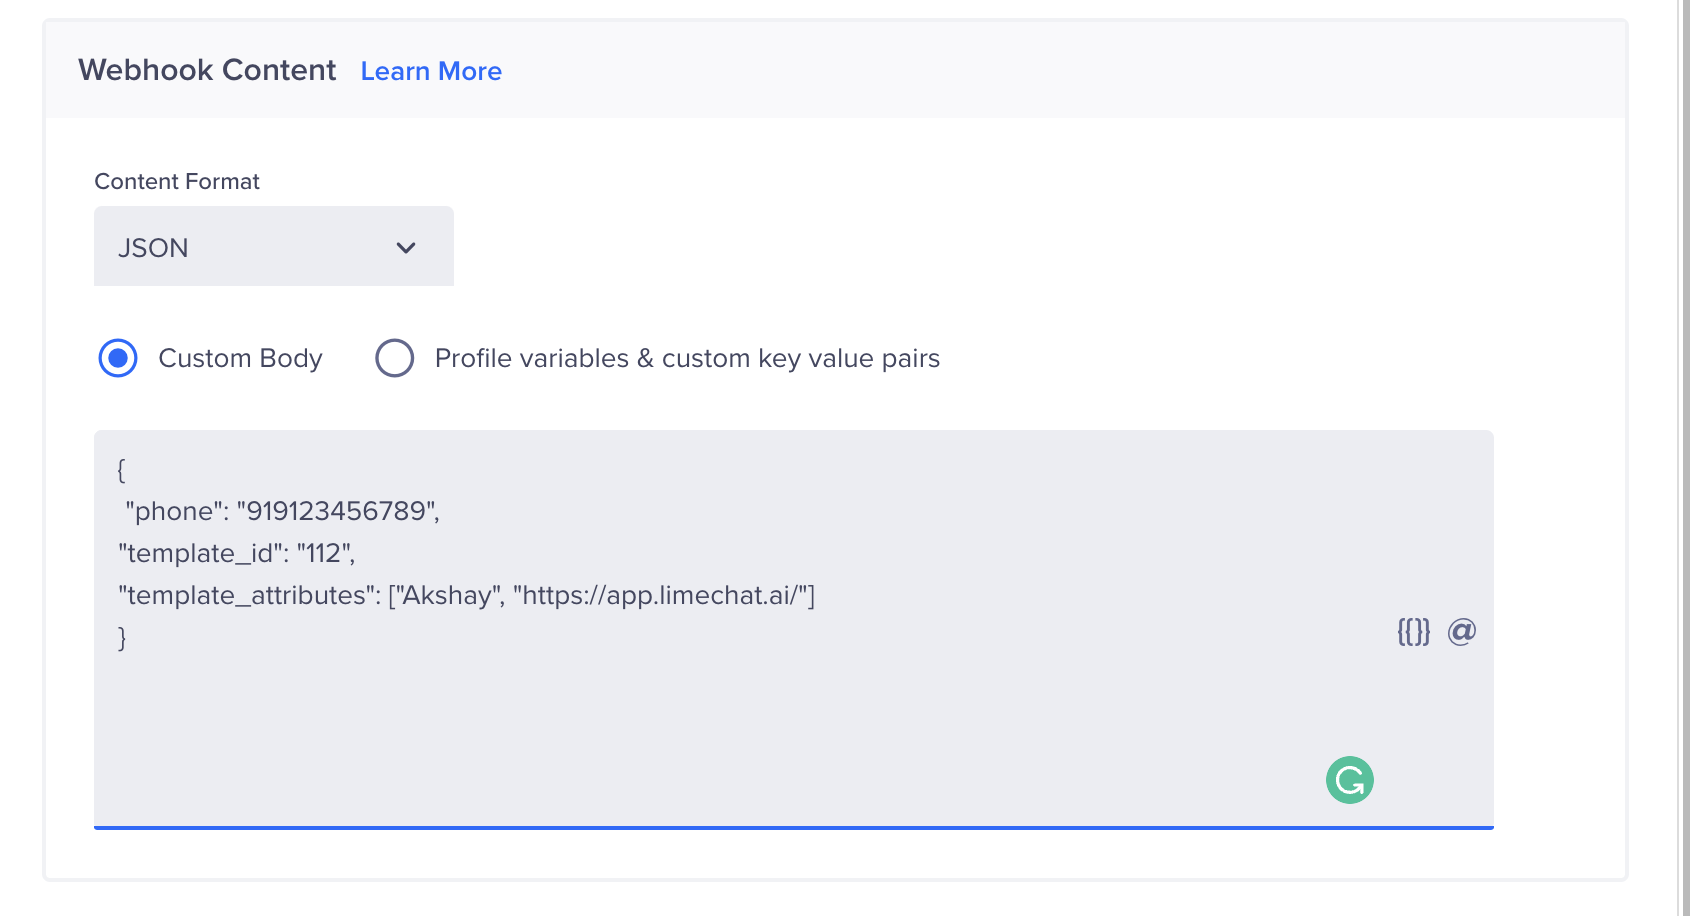
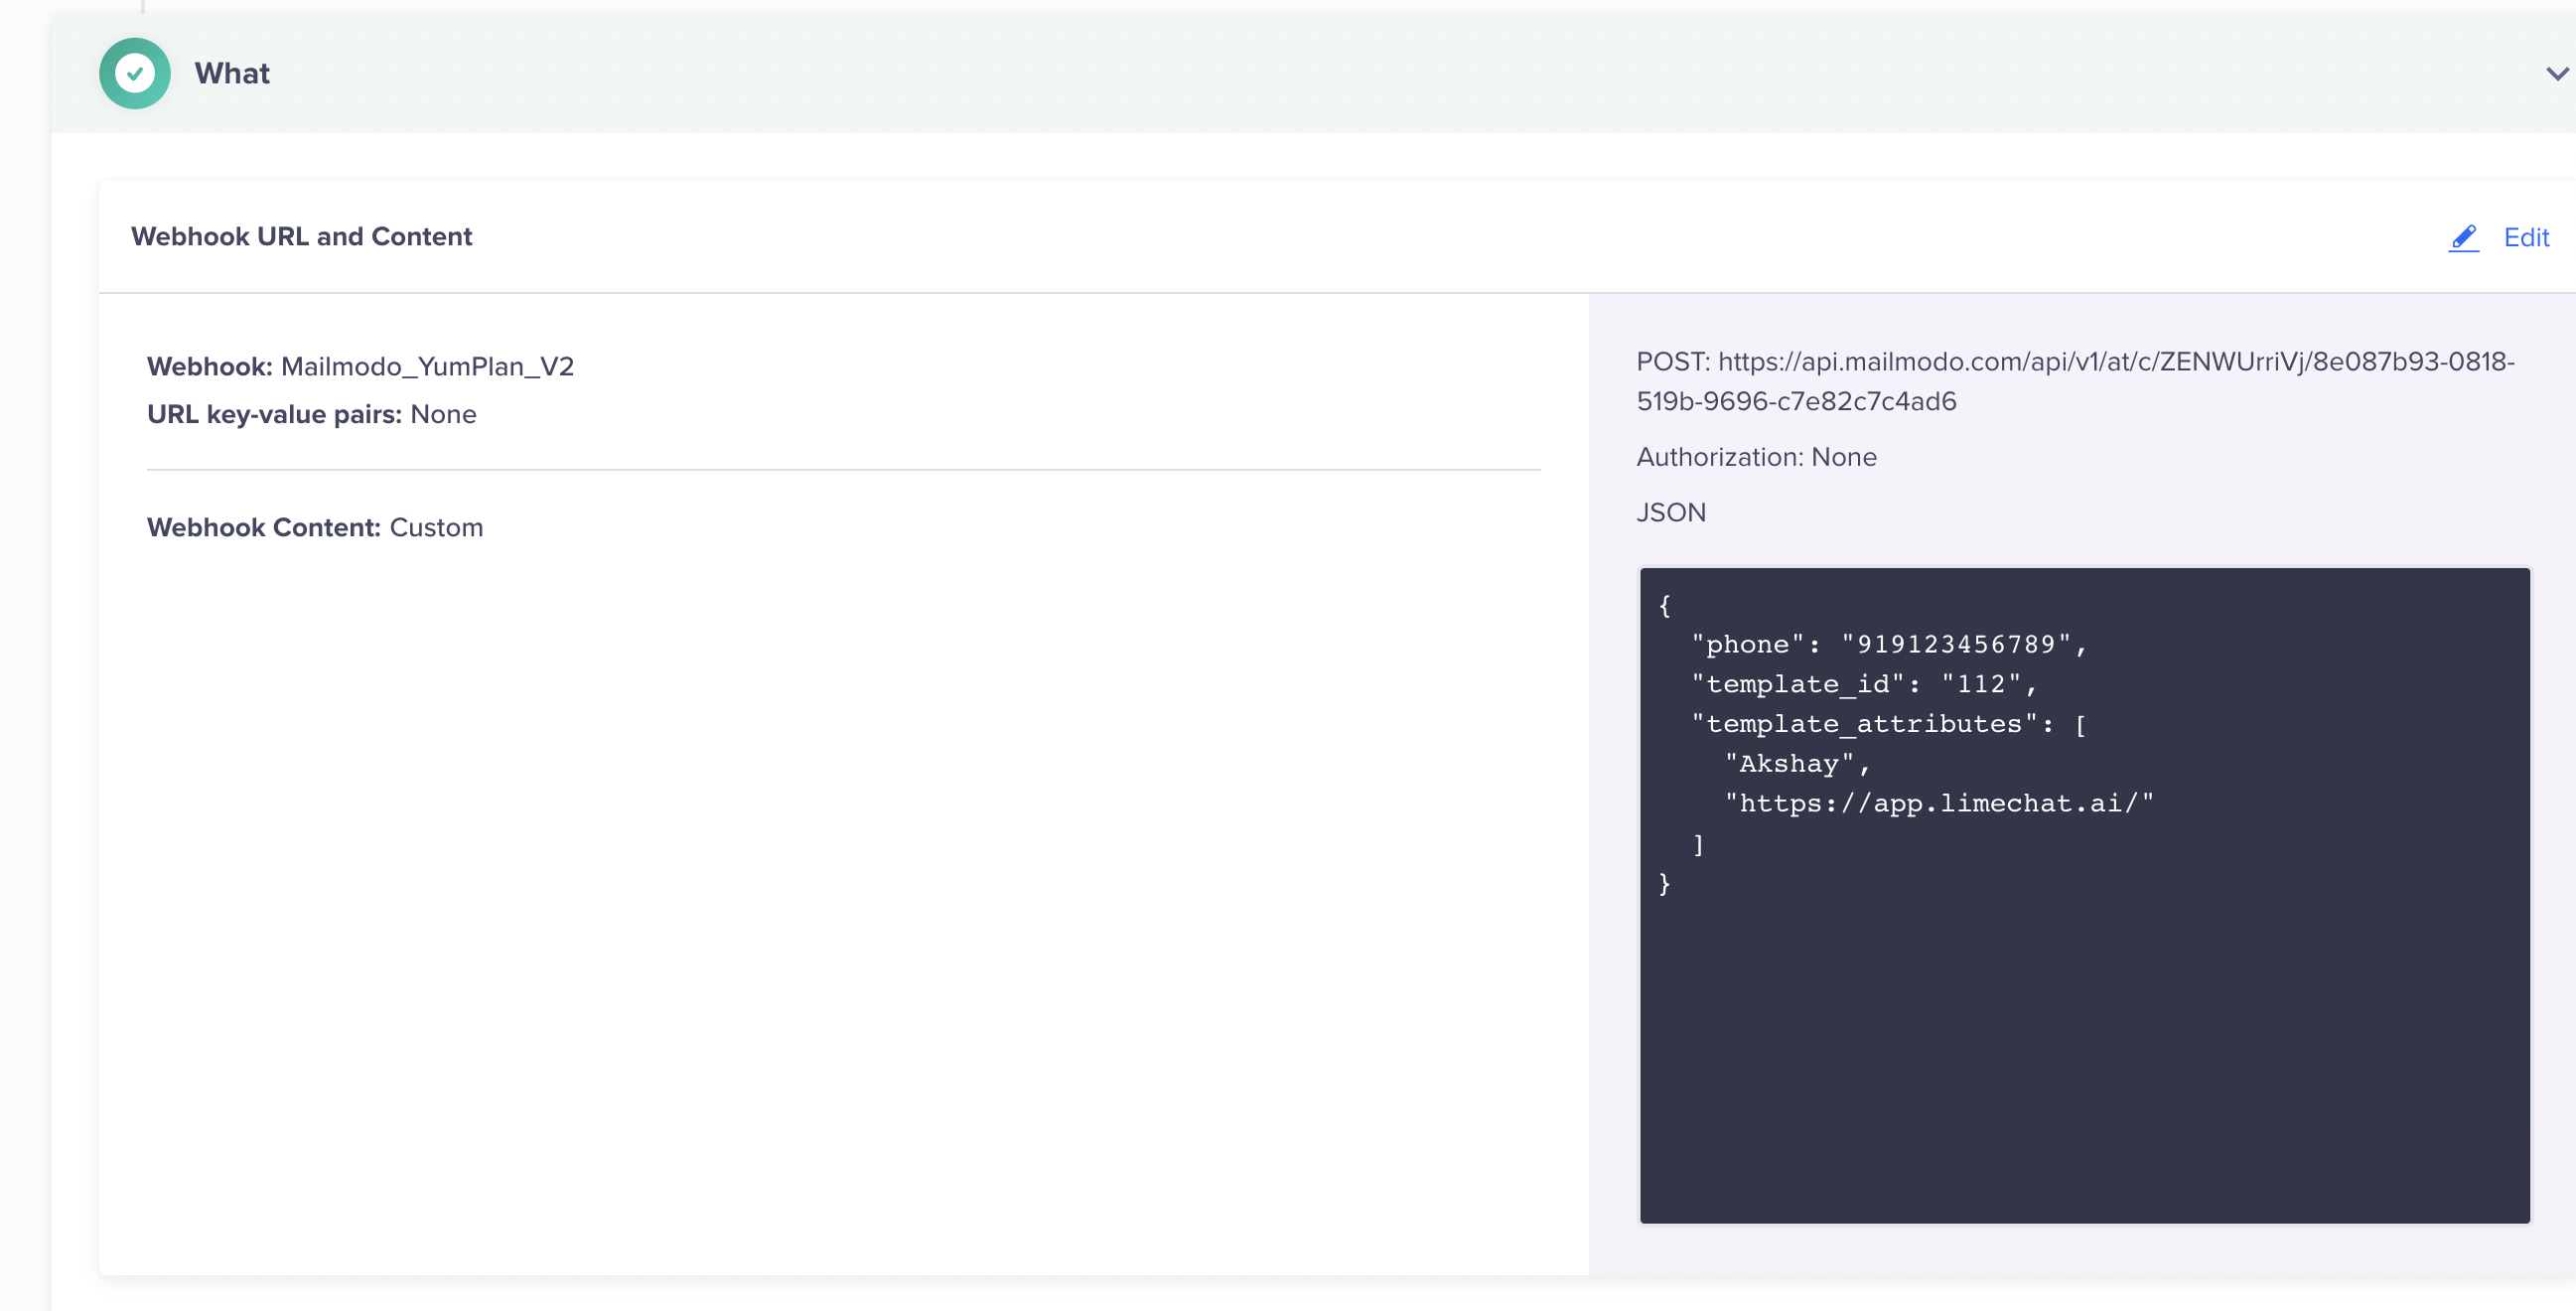
Now add webhook content.
The Content Format would be in JSON’ select Custom Body.
Shown below is the body content.
“phone”, “template_id”, & “template_attributes” are the mandatory fields.
{
  "phone": "919123456789", // (Required) Standard format ("919123456789") no spaces and special characters
  "template_id": "112", // (Required) template id of the template which you want to send out. you can find this right beside the template name on the LC Dashboard  in Settings > Templates
  "first_name": "Akshay", // (Optional). If provided, the conversation in the dashboard will store this for ease of use to agents.
  "email": "[abcxyz@](mailto:akshay.murkute@limechat.ai)[gmail.com](http://gmail.com/)", // (Optional). If provided, the conversation in the dashboard will store this for ease of use to agents.
  "template_attributes": [
    "Akshay",
    "[https://app.limechat.ai/](https://app.limechat.ai/)"
  ], // (Required)
  "status": "closed", // (Optional), this will define the status of the newly created conversation. It accepts following values: ["open", "closed", "resolved"]
  "additional_attributes": {}, // (Optional) accepts an JSON object to store additional attributes about the conversation in LC Database
  "contact_additional_attributes": {}, // (Optional) accepts an JSON object to store additional attributes about the contact created in LC Database
  "label": "" // Optional. This denotes the type of store notification: abandoned-checkout, re-order, etc. If provided, this label will be applied to the conversation in the dashboard. This would be helpful for analytics.
}
What is “template_attributes” in the Body content?
These are the variables that your template consists of. In the below example, your template has 2 variables. (Variables are denoted by {{1}}, {{2}},.....)
So in such cases, you will have to provide the values for the variables in front of them only. The number of variables present in the template should be directly proportional to the number of values provided for them. If not, then it will throw an error.
Example:. "template_attributes": ["Akshay", "https://app.limechat.ai/"],
Hi {{1}} 🙋🏻🙋🏻♀️
Greetings from Brand Name! Please let us know if you face any trouble checking out our website 👀
Click on the link below to checkout instantly 🚀 {{2}}
How to get a template ID?
Template ID is basically assigned to a template message that you wanted to send via WhatsApp. You will find IDs of all approved templates on the Limechat dashboard
- Go to Settings → Templates.
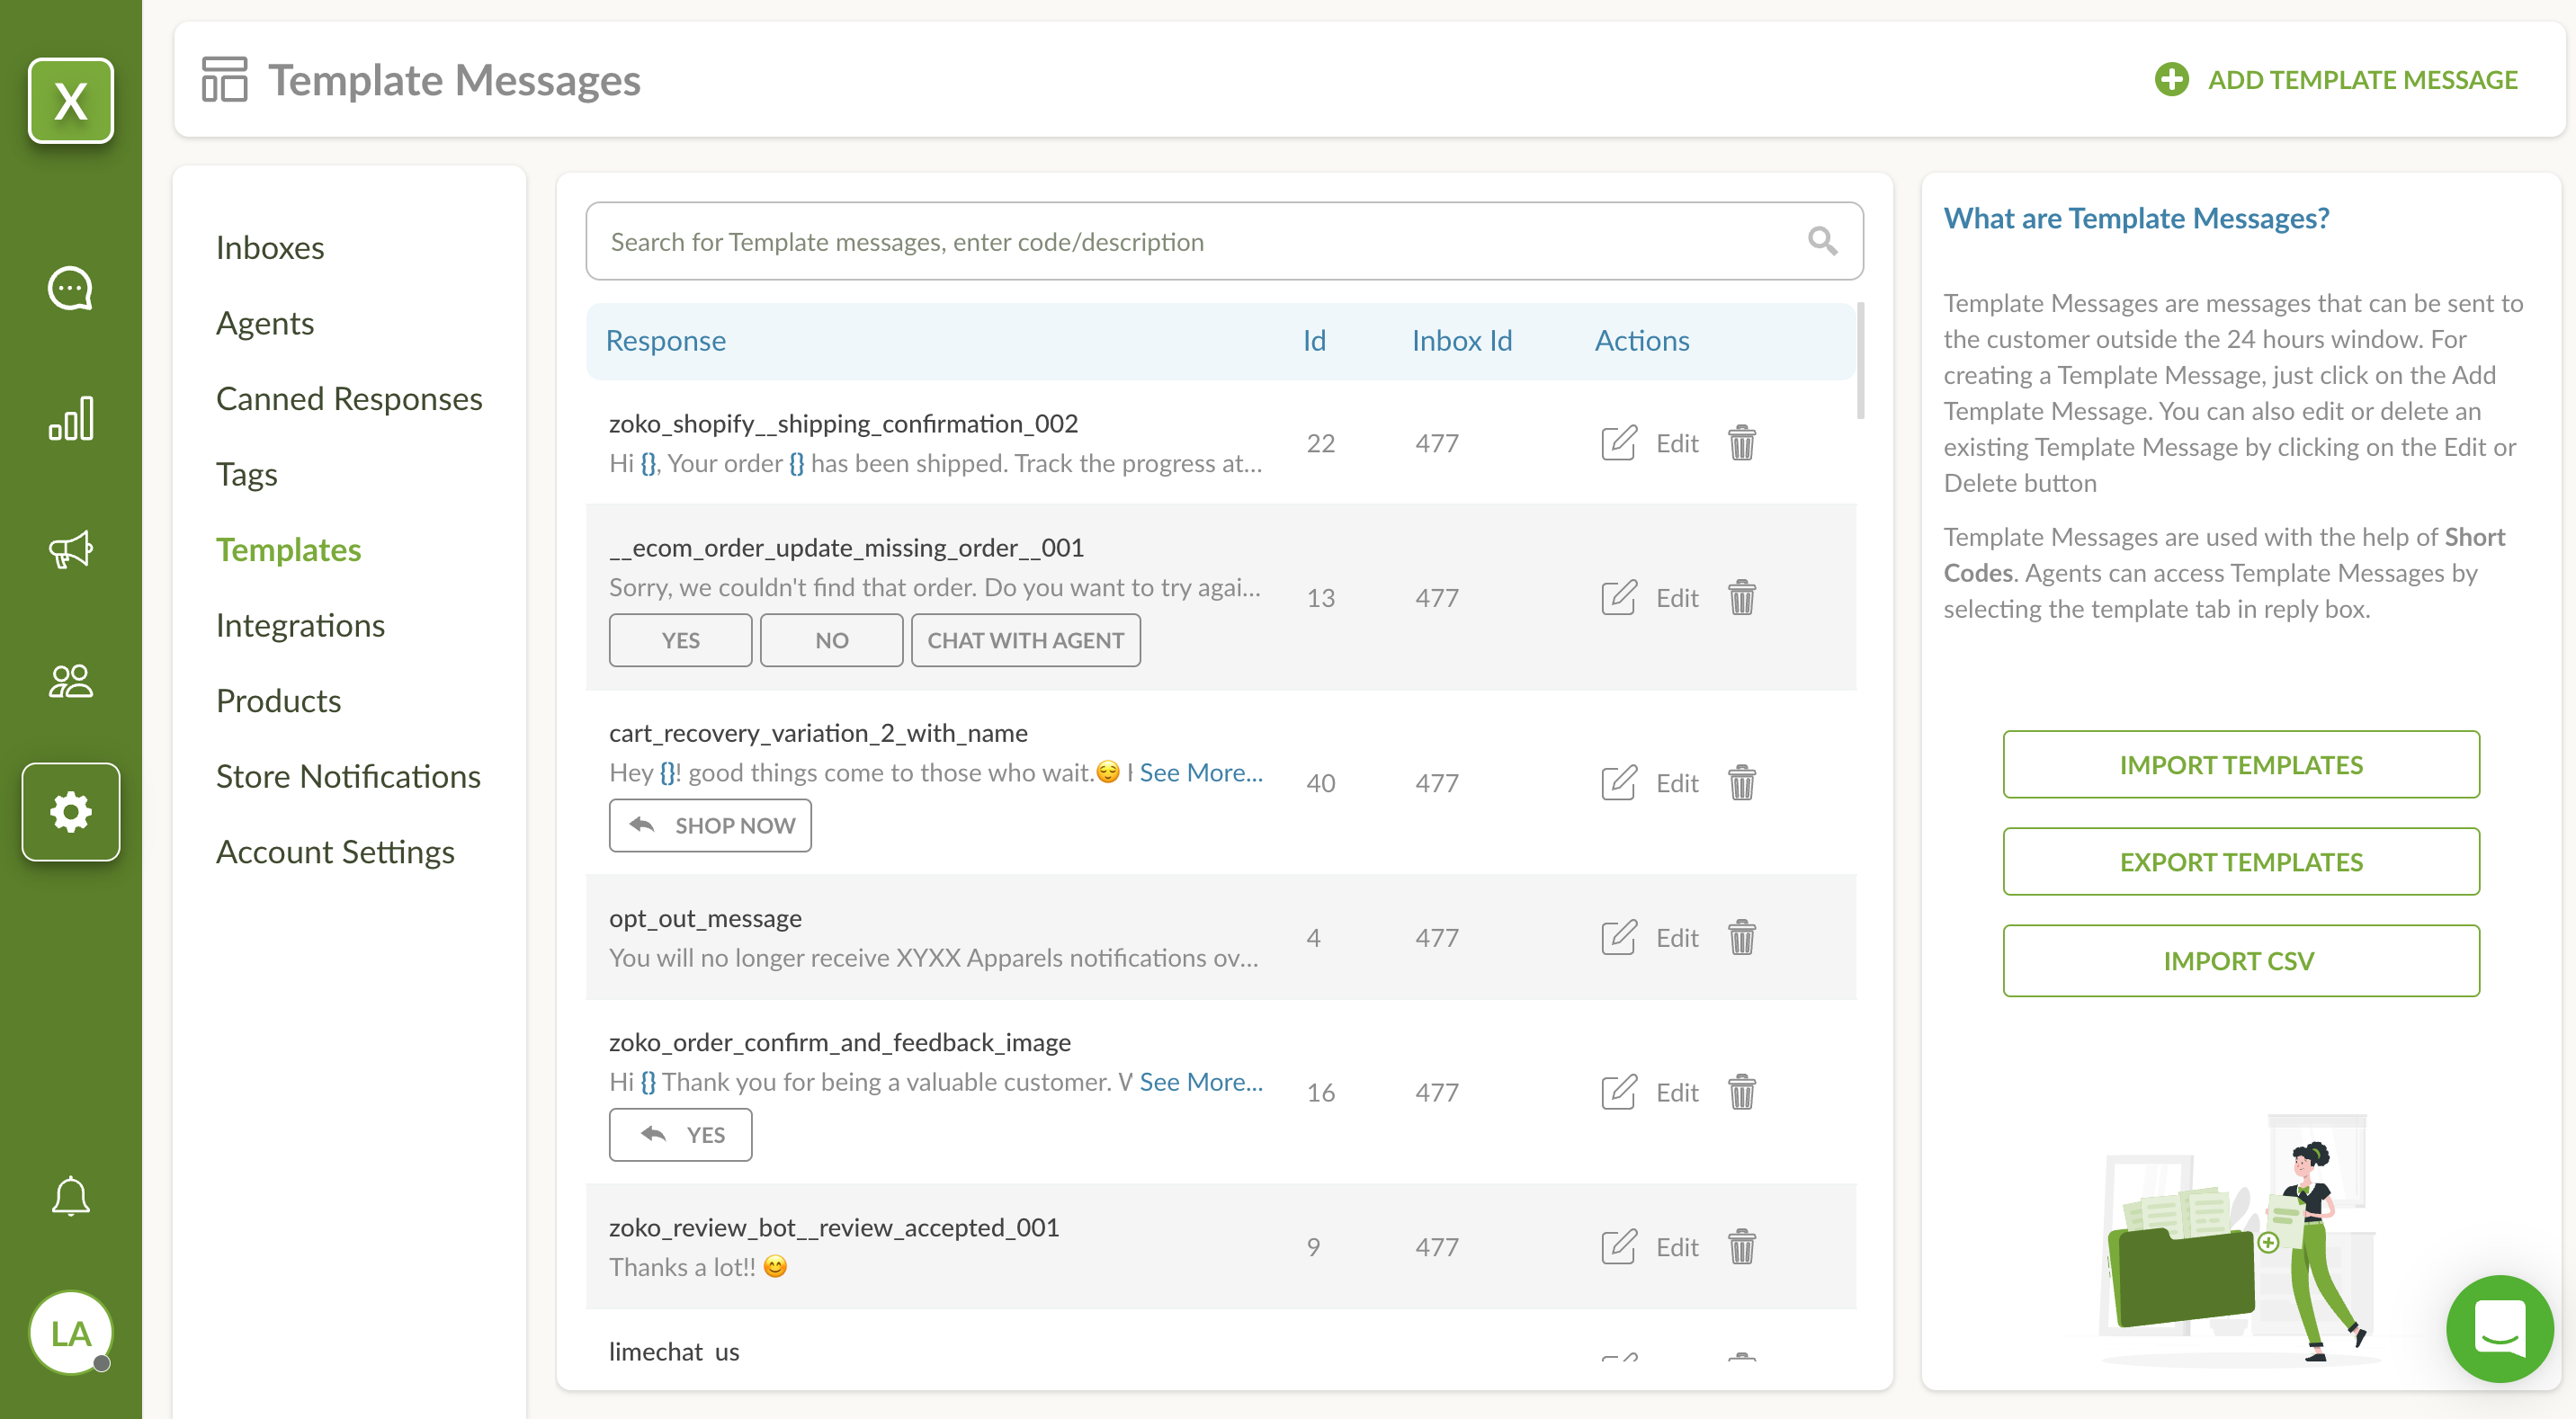
- Copy Id corresponding to the Response that you want to send as a campaign.
- This id is your template id
Add Custom Body in ythe grey box in JSON format. Add “phone”, “template_id”, & “template_attributes” as mandatory fields.
Click Done to save the webhook.
Review the content once.
Select a Delivery time, Delivery preference, and Publish the Campaign.
How to set Up a new Webhook in CleverTap dashboard
To set up your first CleverTap webhook, perform the following steps:
- Navigate to Settings > Engage > Channels > Webhooks.
- Click + Add Webhook.
- Create webhook template popup opens. Enter the details in the webhook template and click Save.
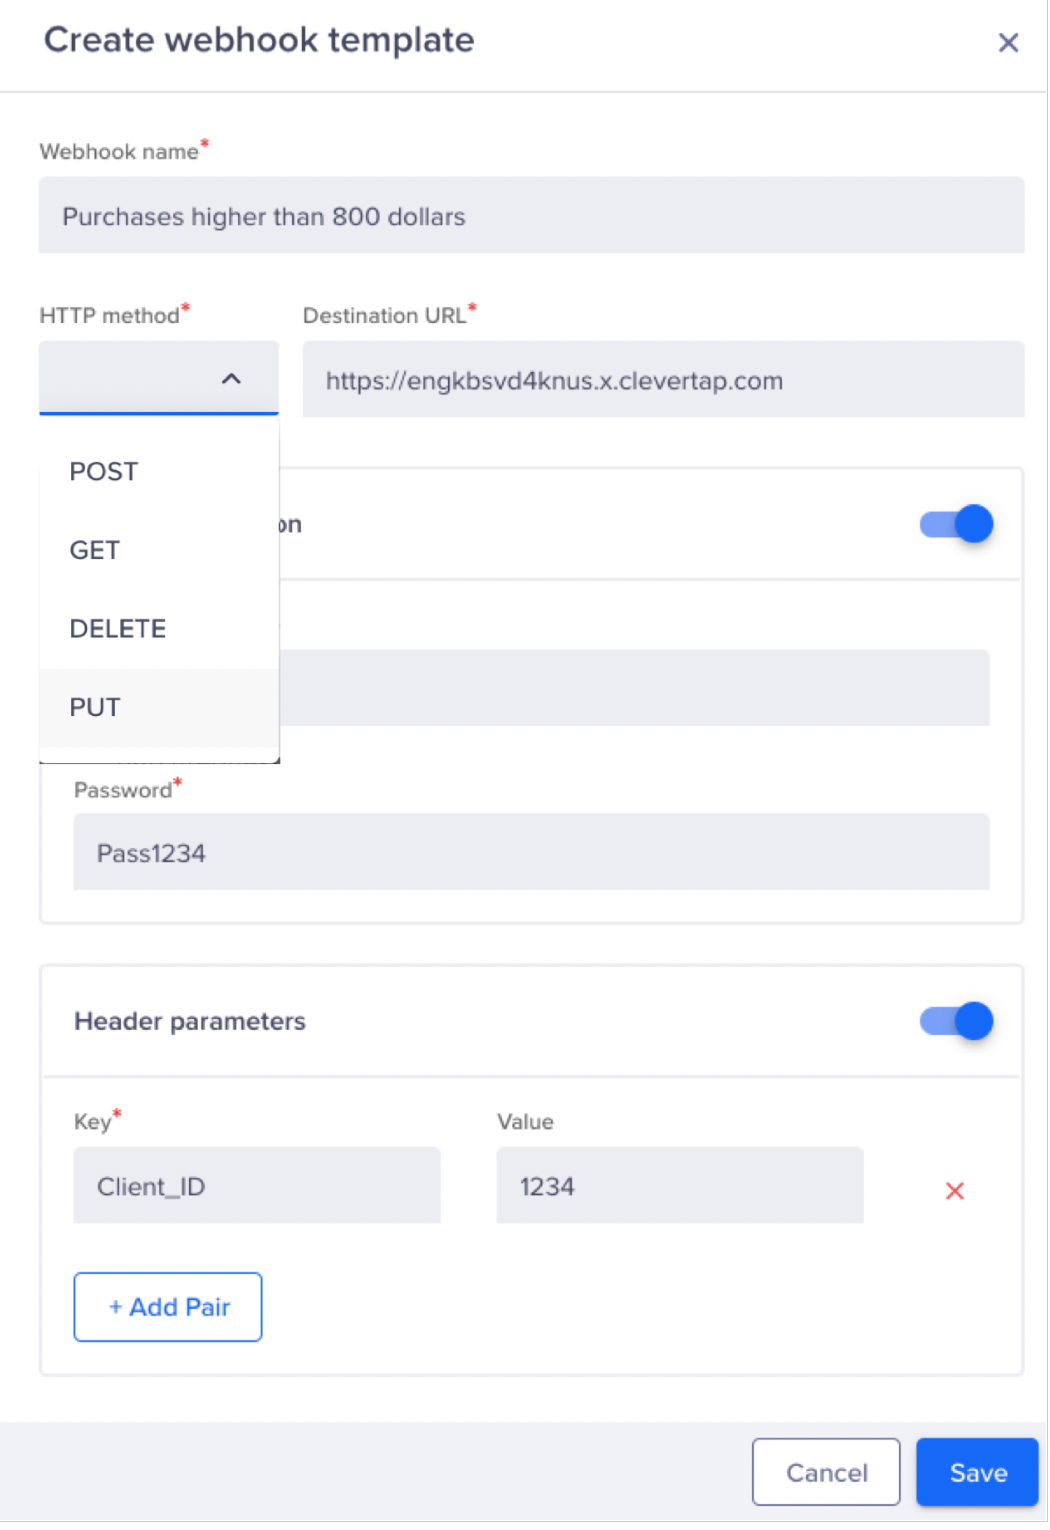
👉 Here HTTP method is going to be POST
👉 Destination URL - https://app.limechat.ai/api/v1/accounts/`<account_id>`/store_notifications/create_notification_limekit/
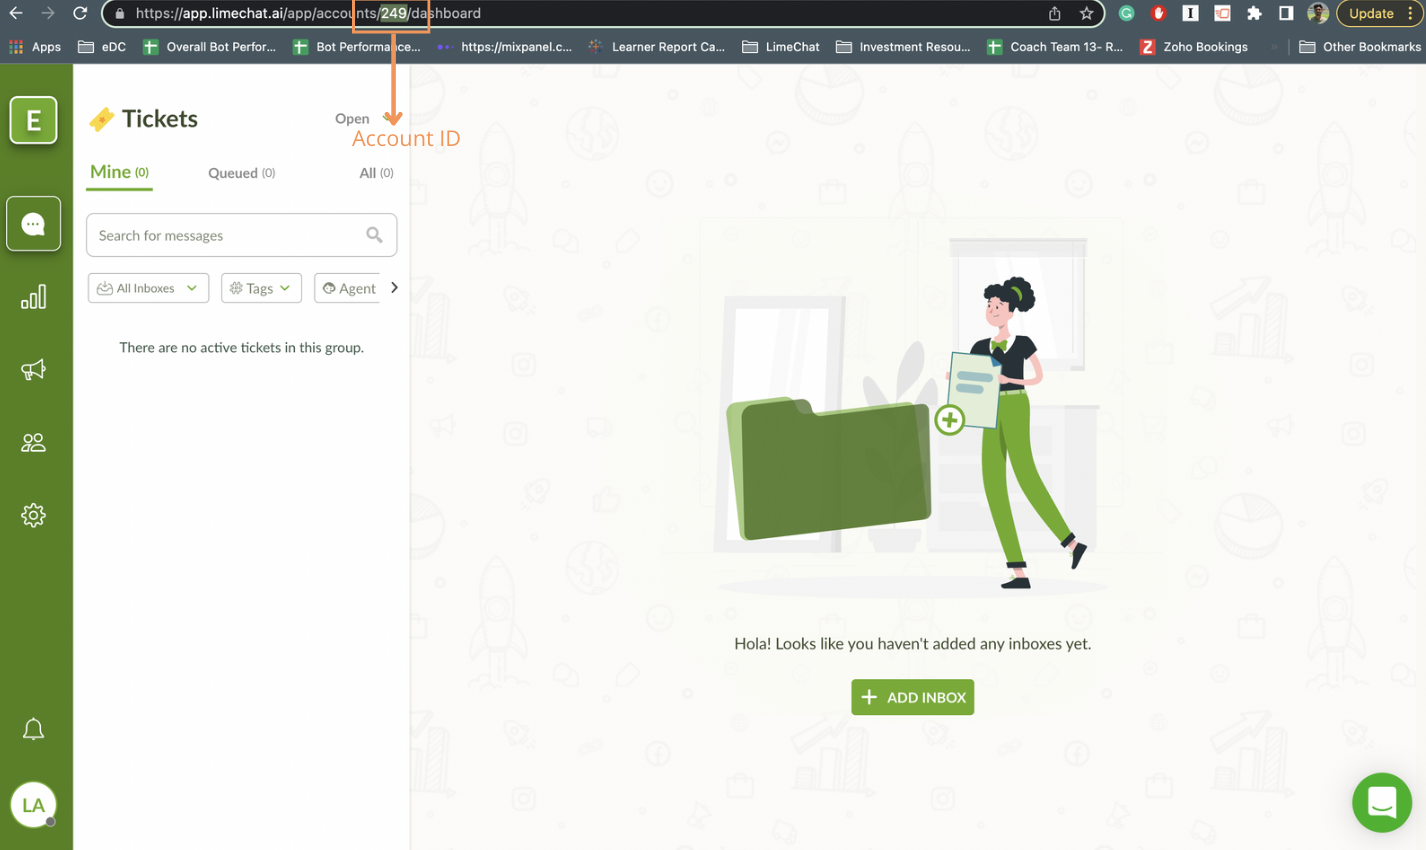
info
💡 Account_id, you can find it on the LimeChat Dashboard. Refer to the screenshot below.(Please make sure to change the account_id.)
👉 Under Header Parameter you need to put an API access token
Key -
api_access_token
Value - The access token you will get following the below steps.
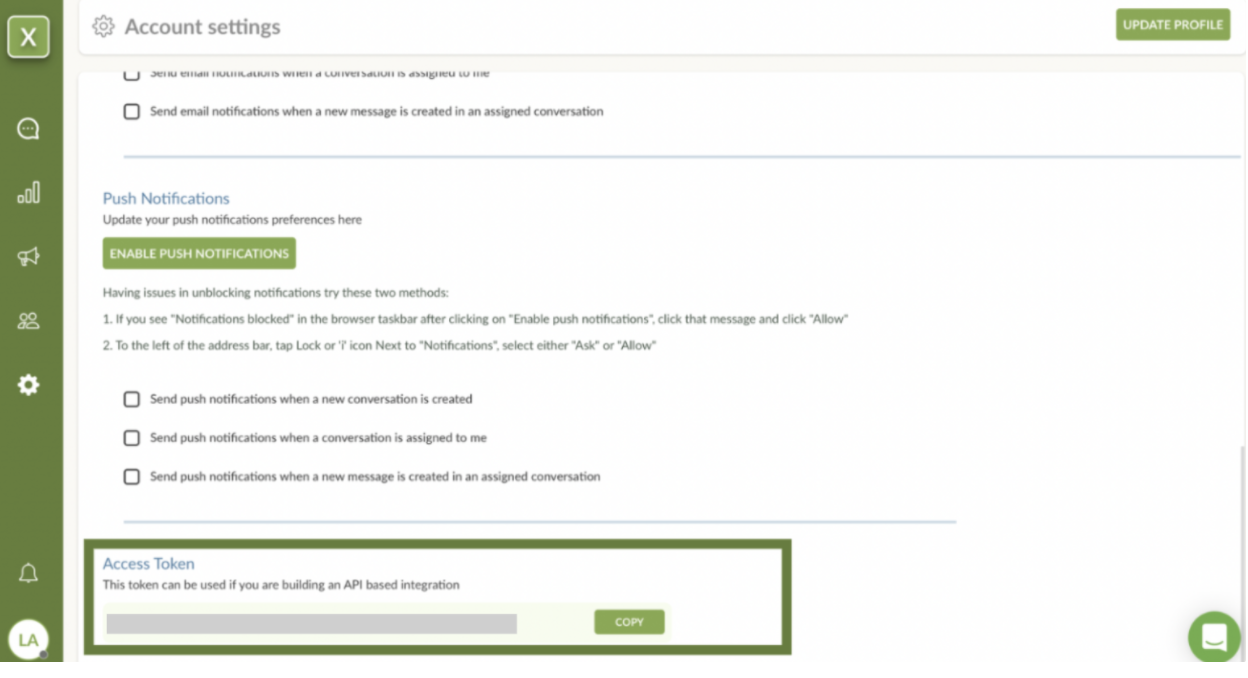
How to get an Access token?
The API access token can be found in the LimeChat dashboard. Follow the below steps:
Login to the LimeChat dashboard.
At the extreme bottom left, click on the profile picture and then click on Profile Settings.
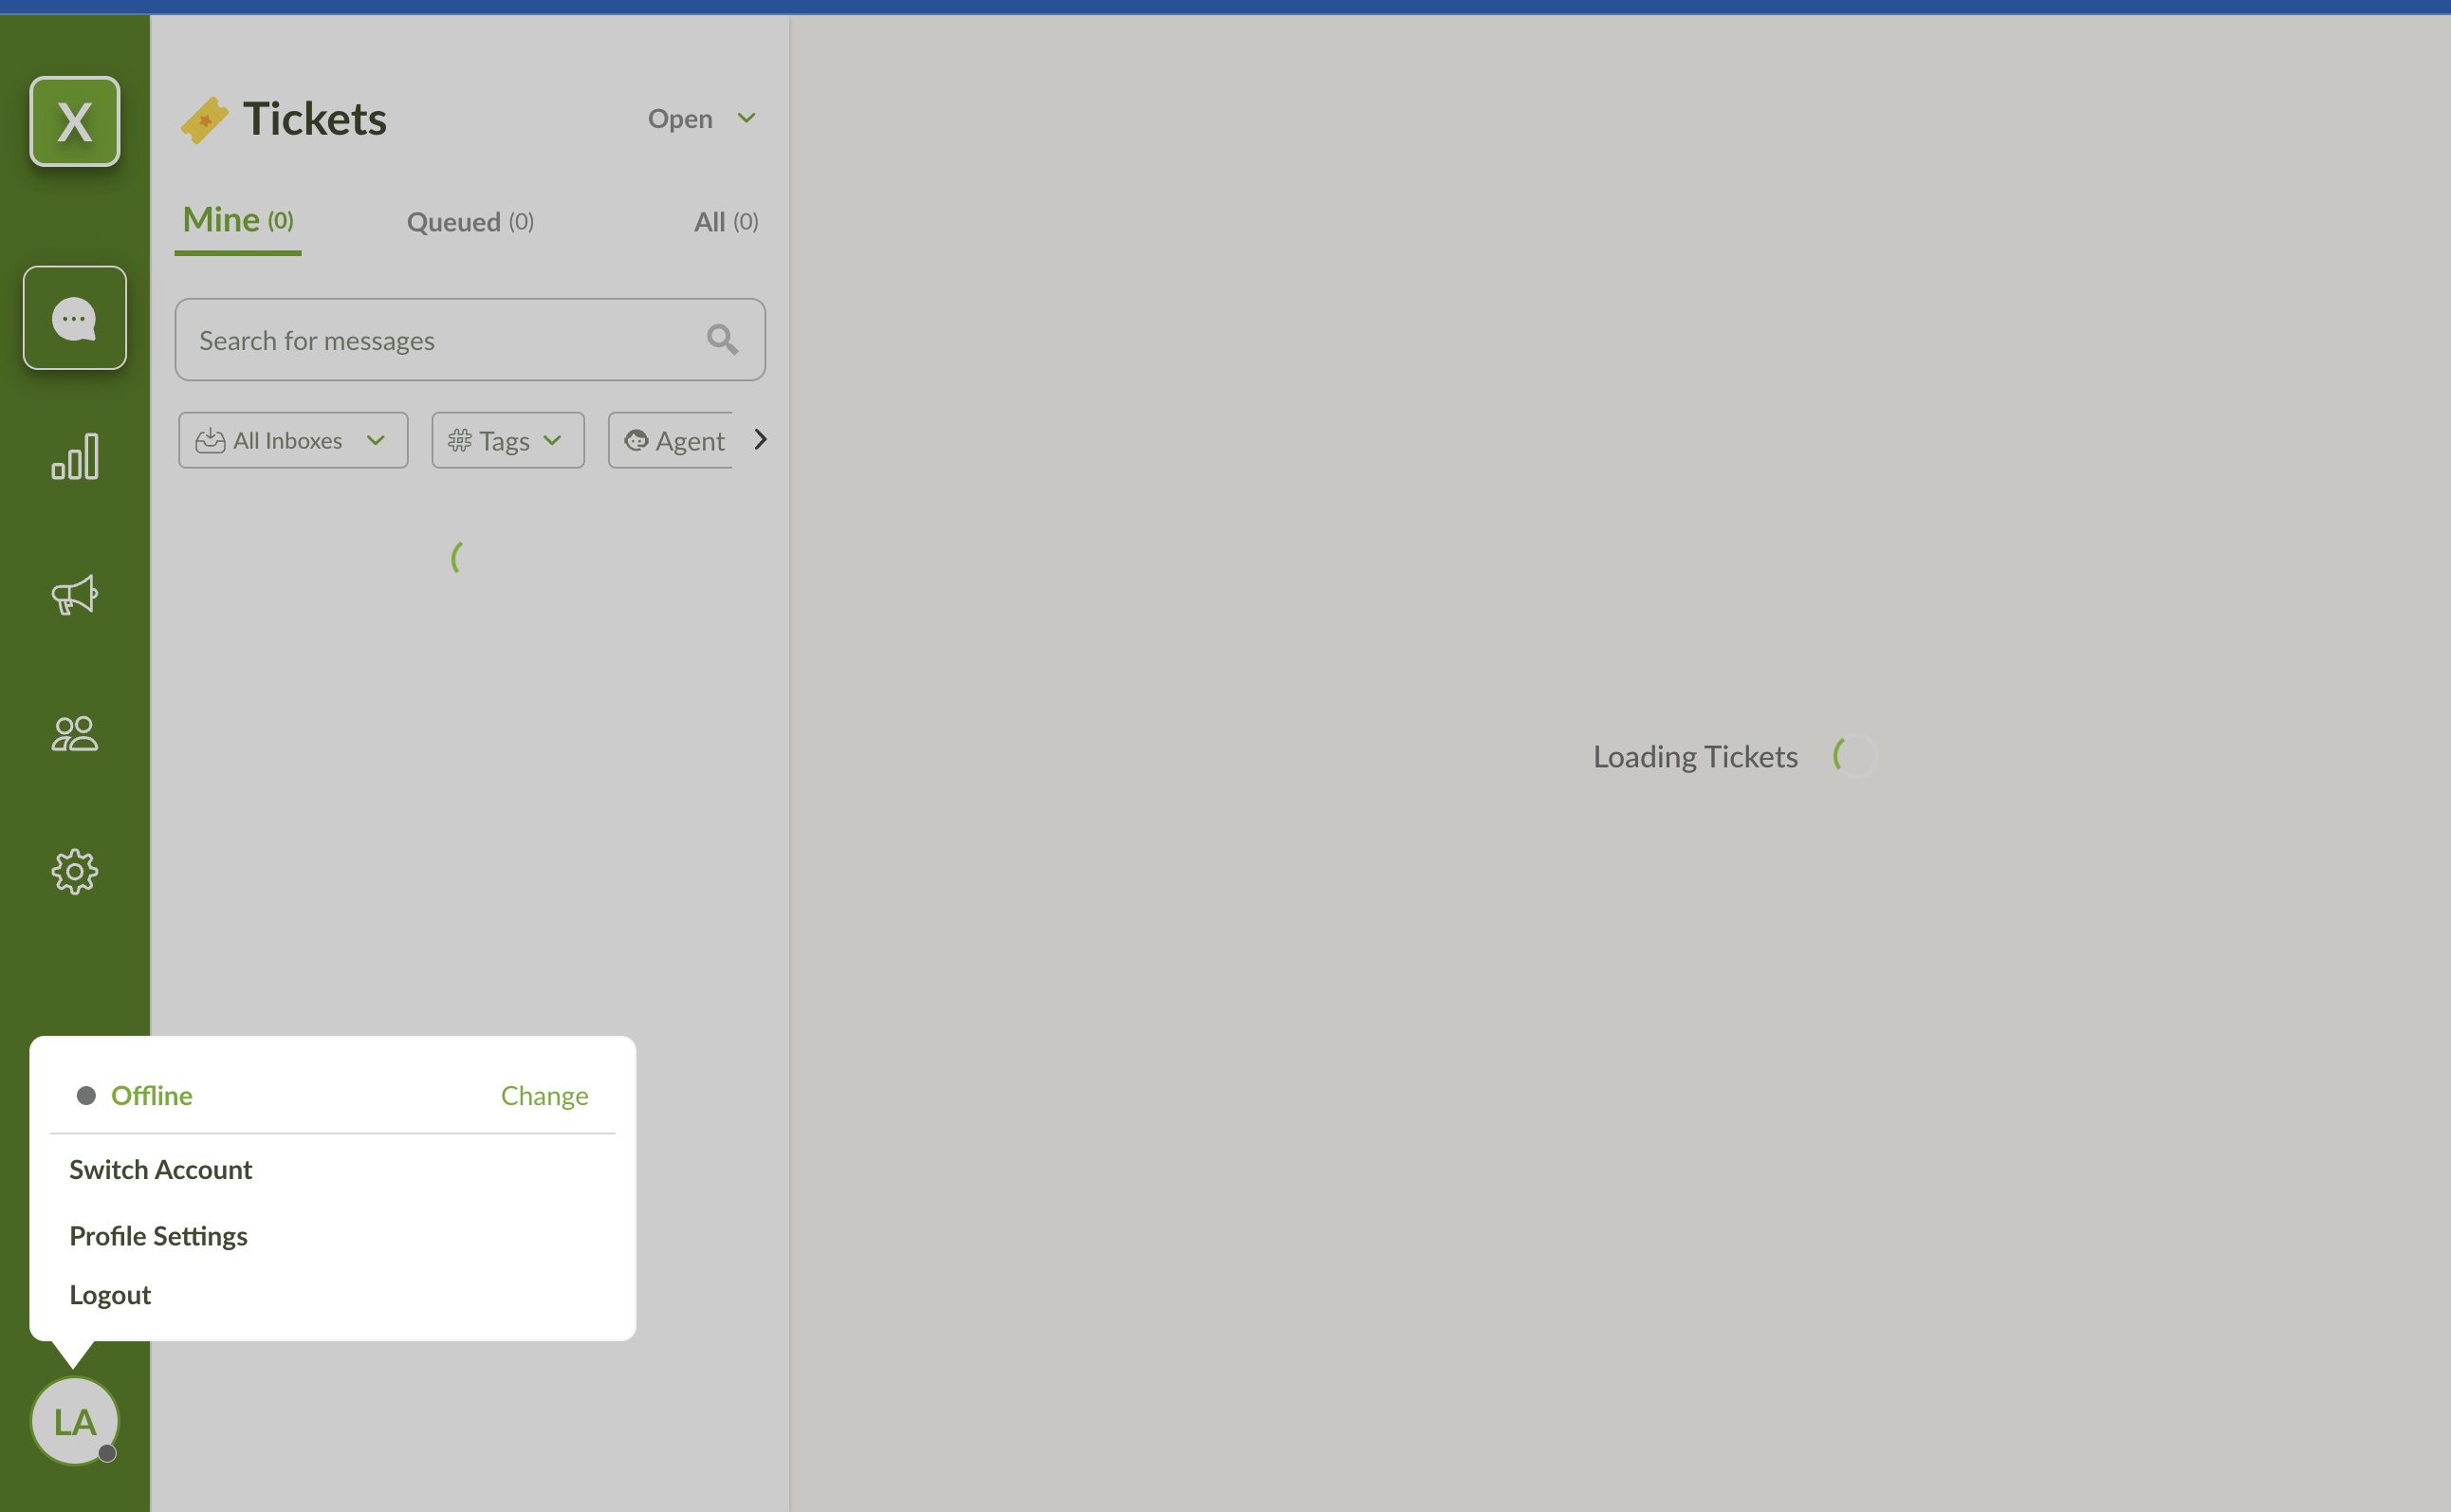
Scroll down to the bottom of this page and copy the Access Token.
Now you have added a new webhook!
After setting up a new webhook, you will find it on the select webhook dropdown. Select the webhook and click Done.
References
https://docs.clevertap.com/docs/webhooks-overview