Shopify Integration
How it works
By integrating Shopify with LimeChat you can:
- Perform Shopify actions from LimeChat Helpdesk such as refund, create, edit and cancel order. No need to switch screens over and over again.
- Display the customer’s last orders from Shopify when you receive a message.
- Share order details and recommend products to a customer.
Setup instructions
To connect your Shopify account to LimeChat:
Click here to open the LimeChat Shopify App listing page on the Shopify App Store.

There you will be able to install the app on your store, which will redirect you to the limechat helpdesk sign-up page if you don't have an account. If you already have an account you will be either logged in automatically or redirected to the log-in page.

Log in to your helpdesk account and the shopify integration will be set up!
Shopify Actions
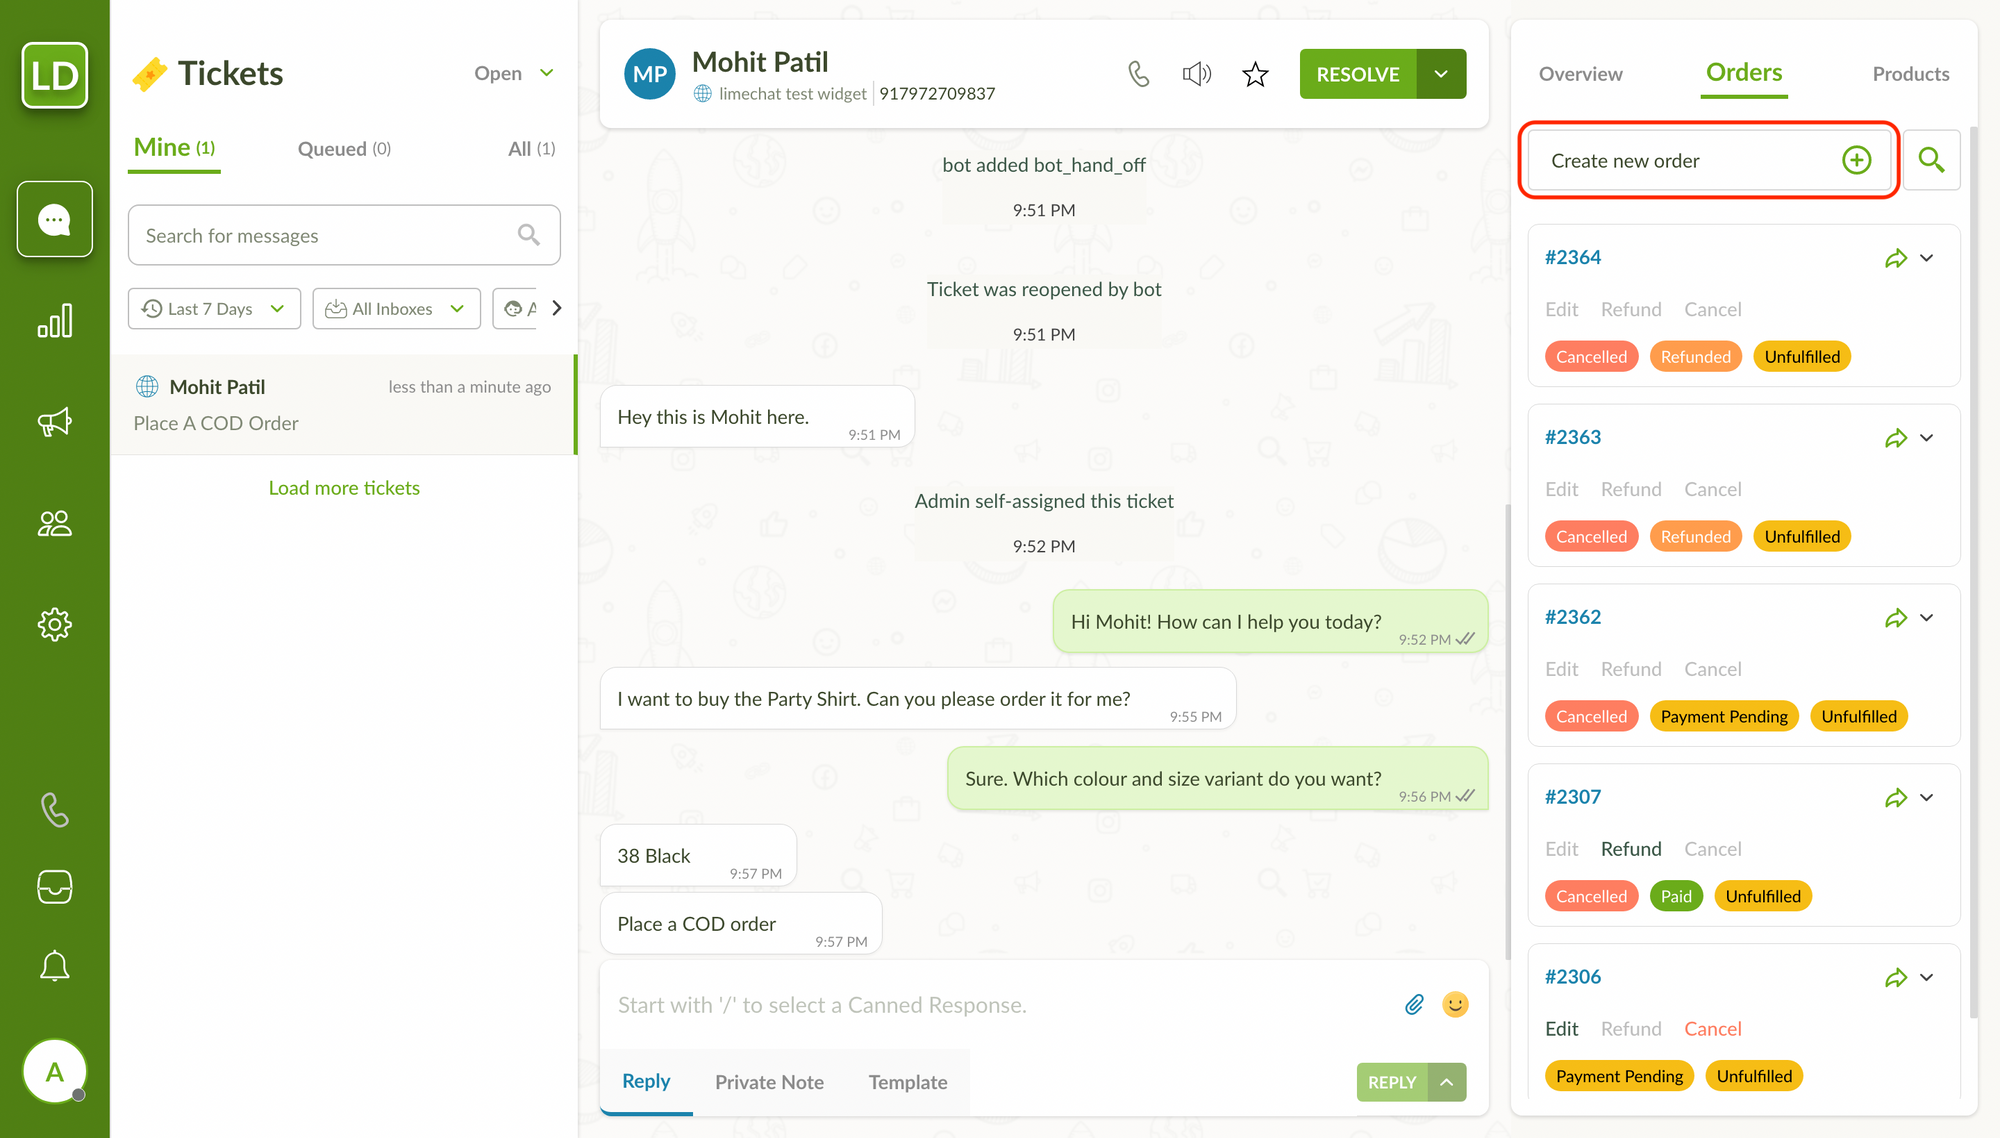
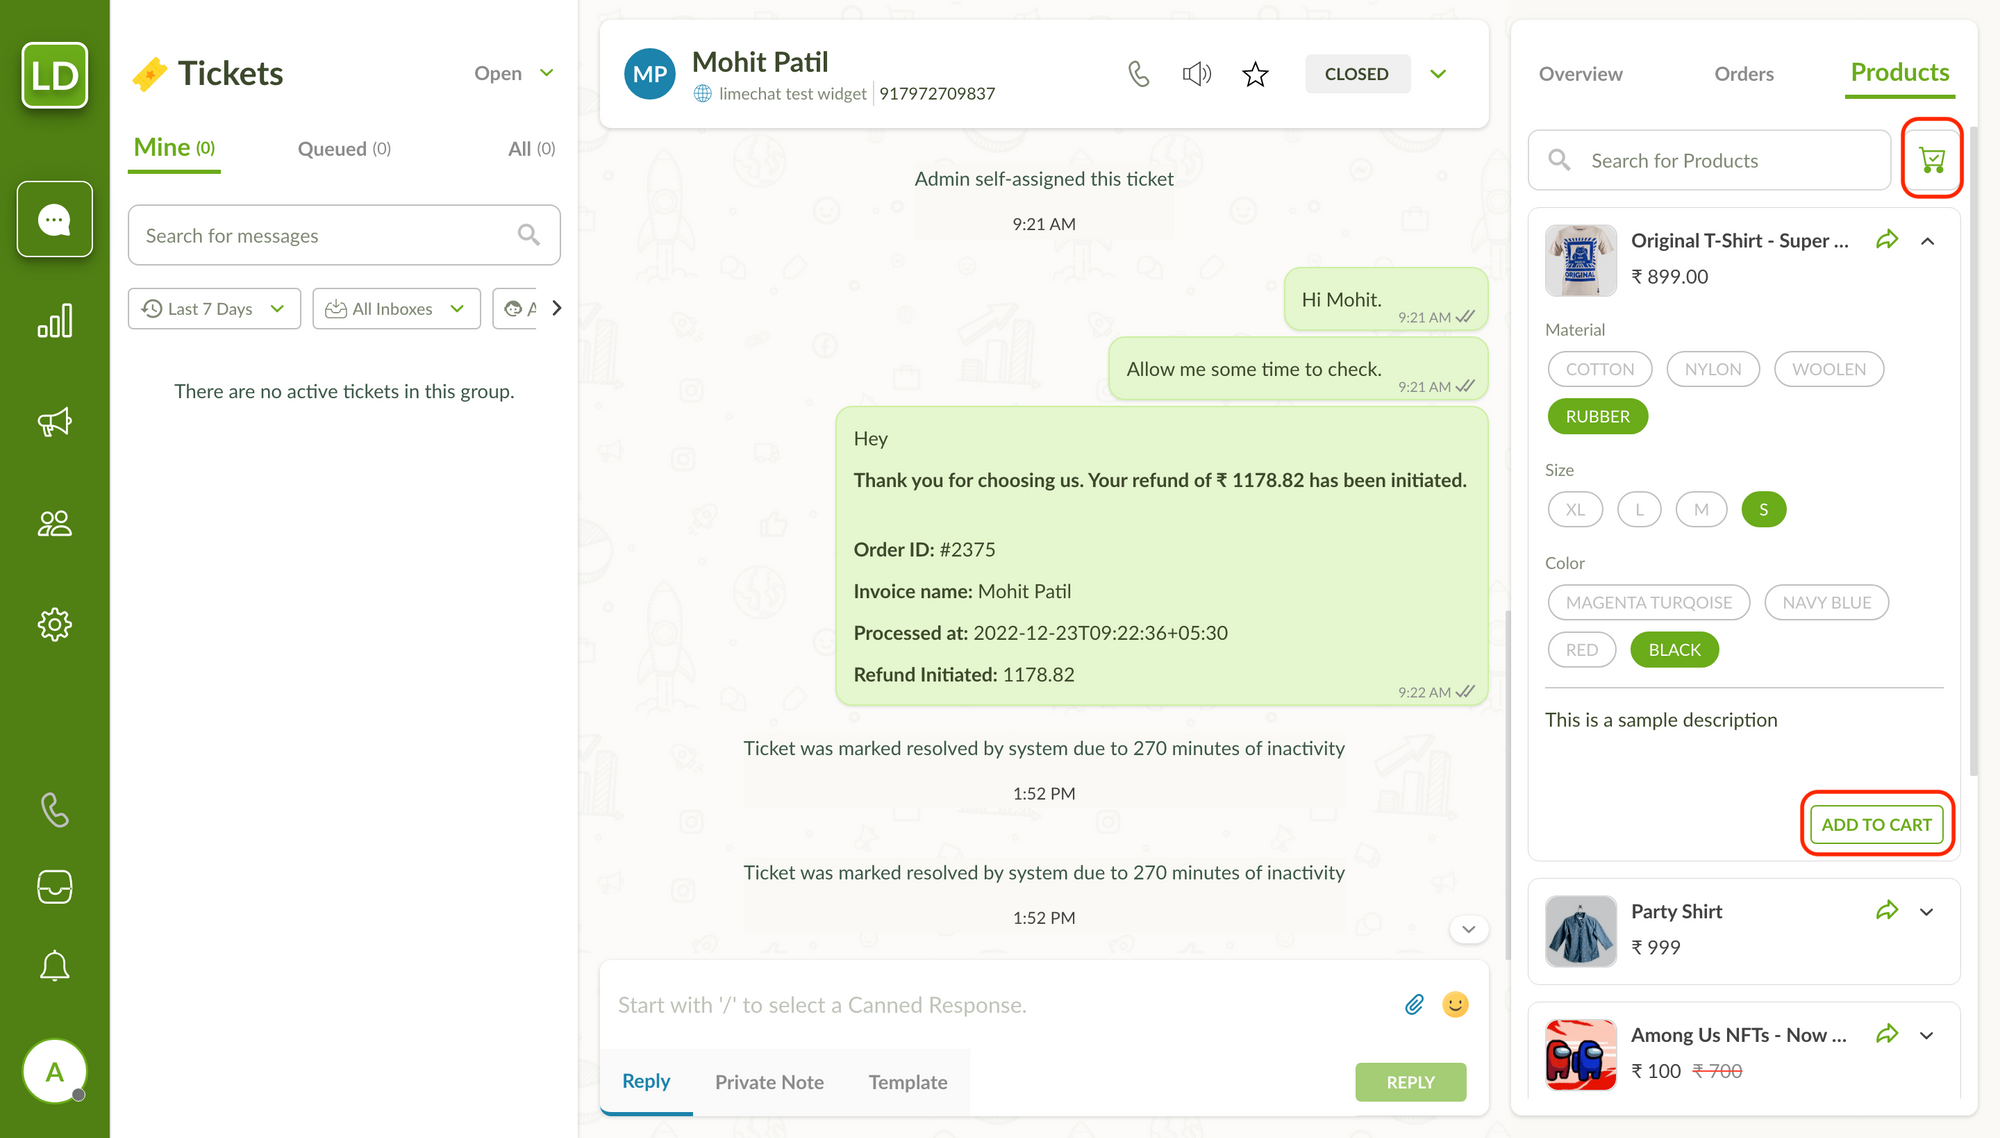
If you open any of your tickets, in the right side panel you can see the Orders and Products tabs.
- Products tab: All the products in your shopify store will be displayed here.
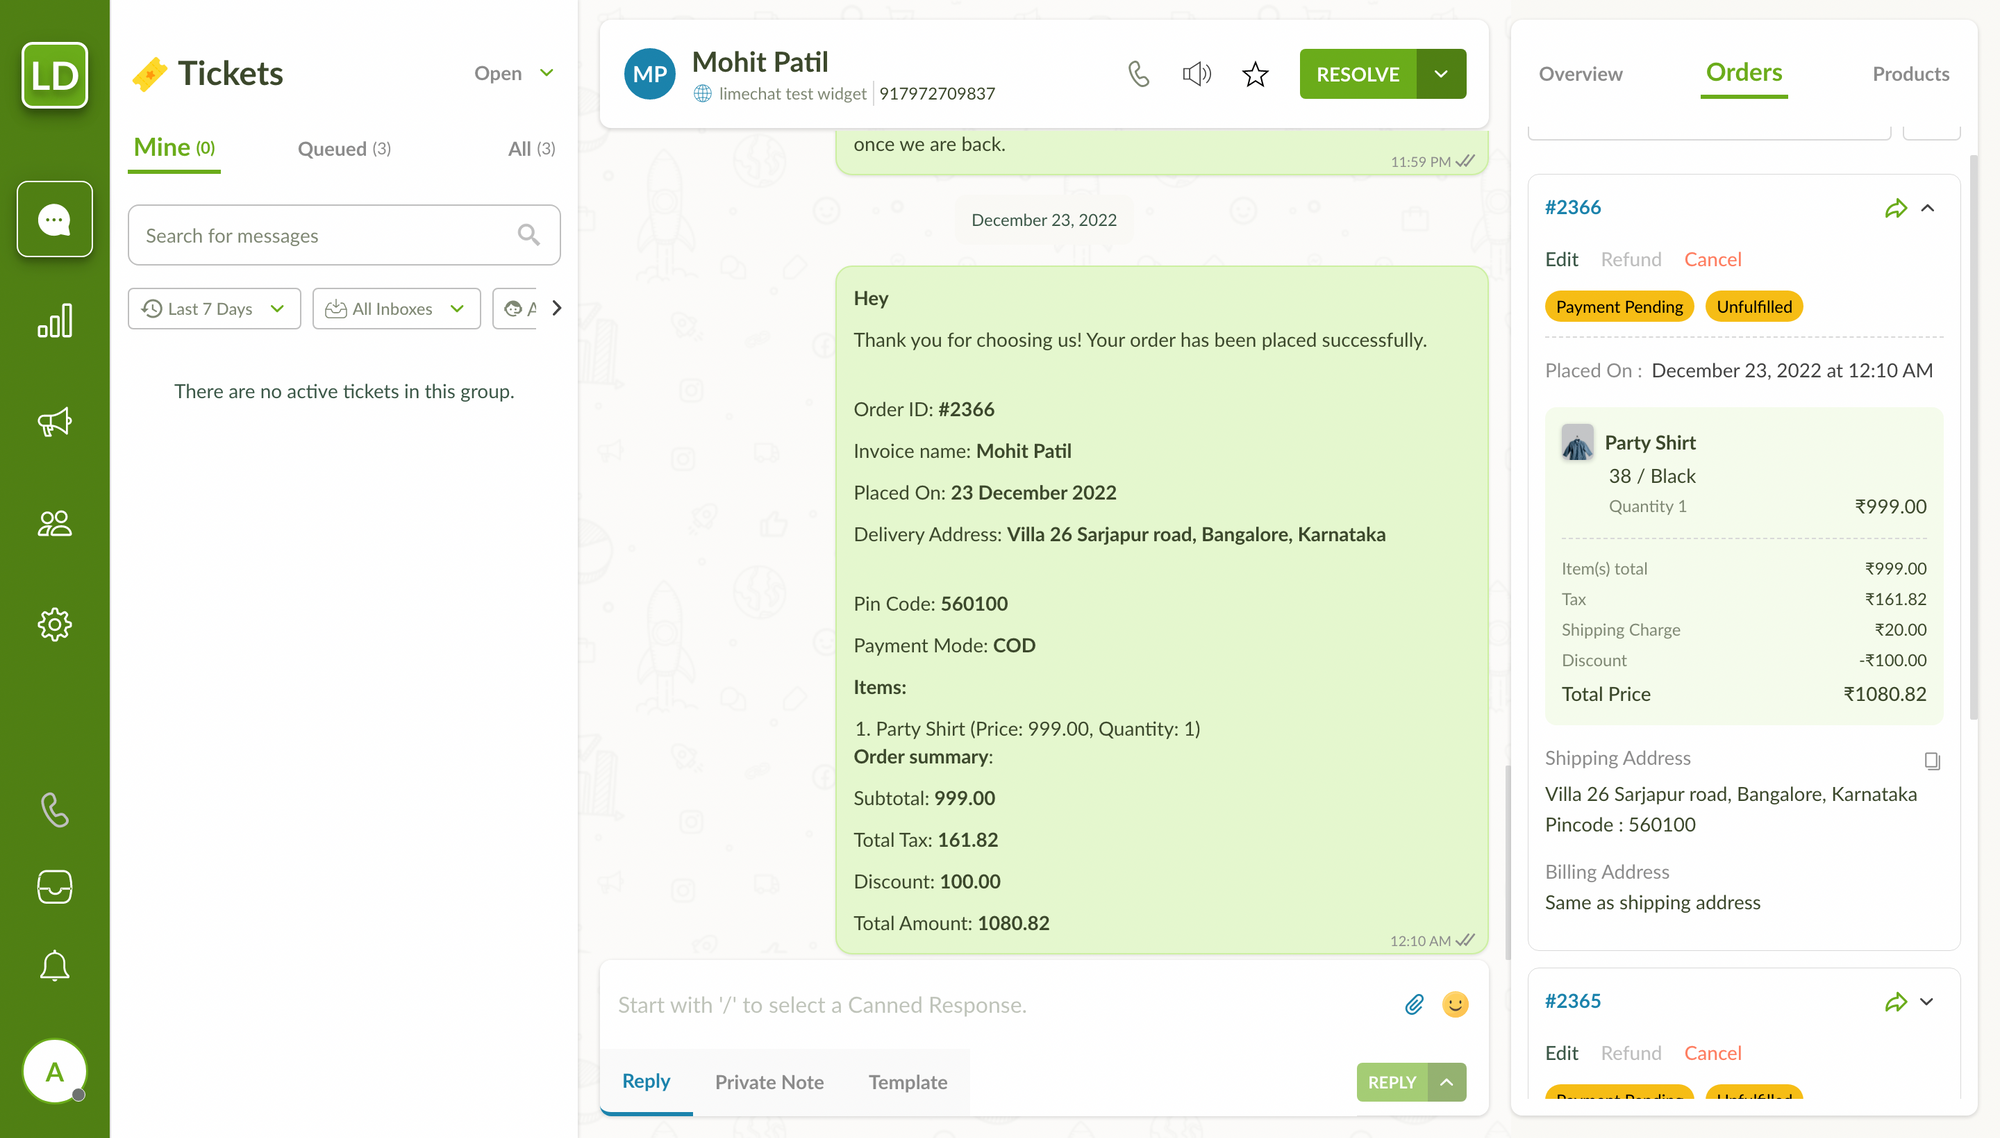
- Orders tab: If the customer has some past Shopify orders, you will see a list of all such orders. You will also notice a number of different actions which can be performed from this tab. From here, in just a few clicks, you can:
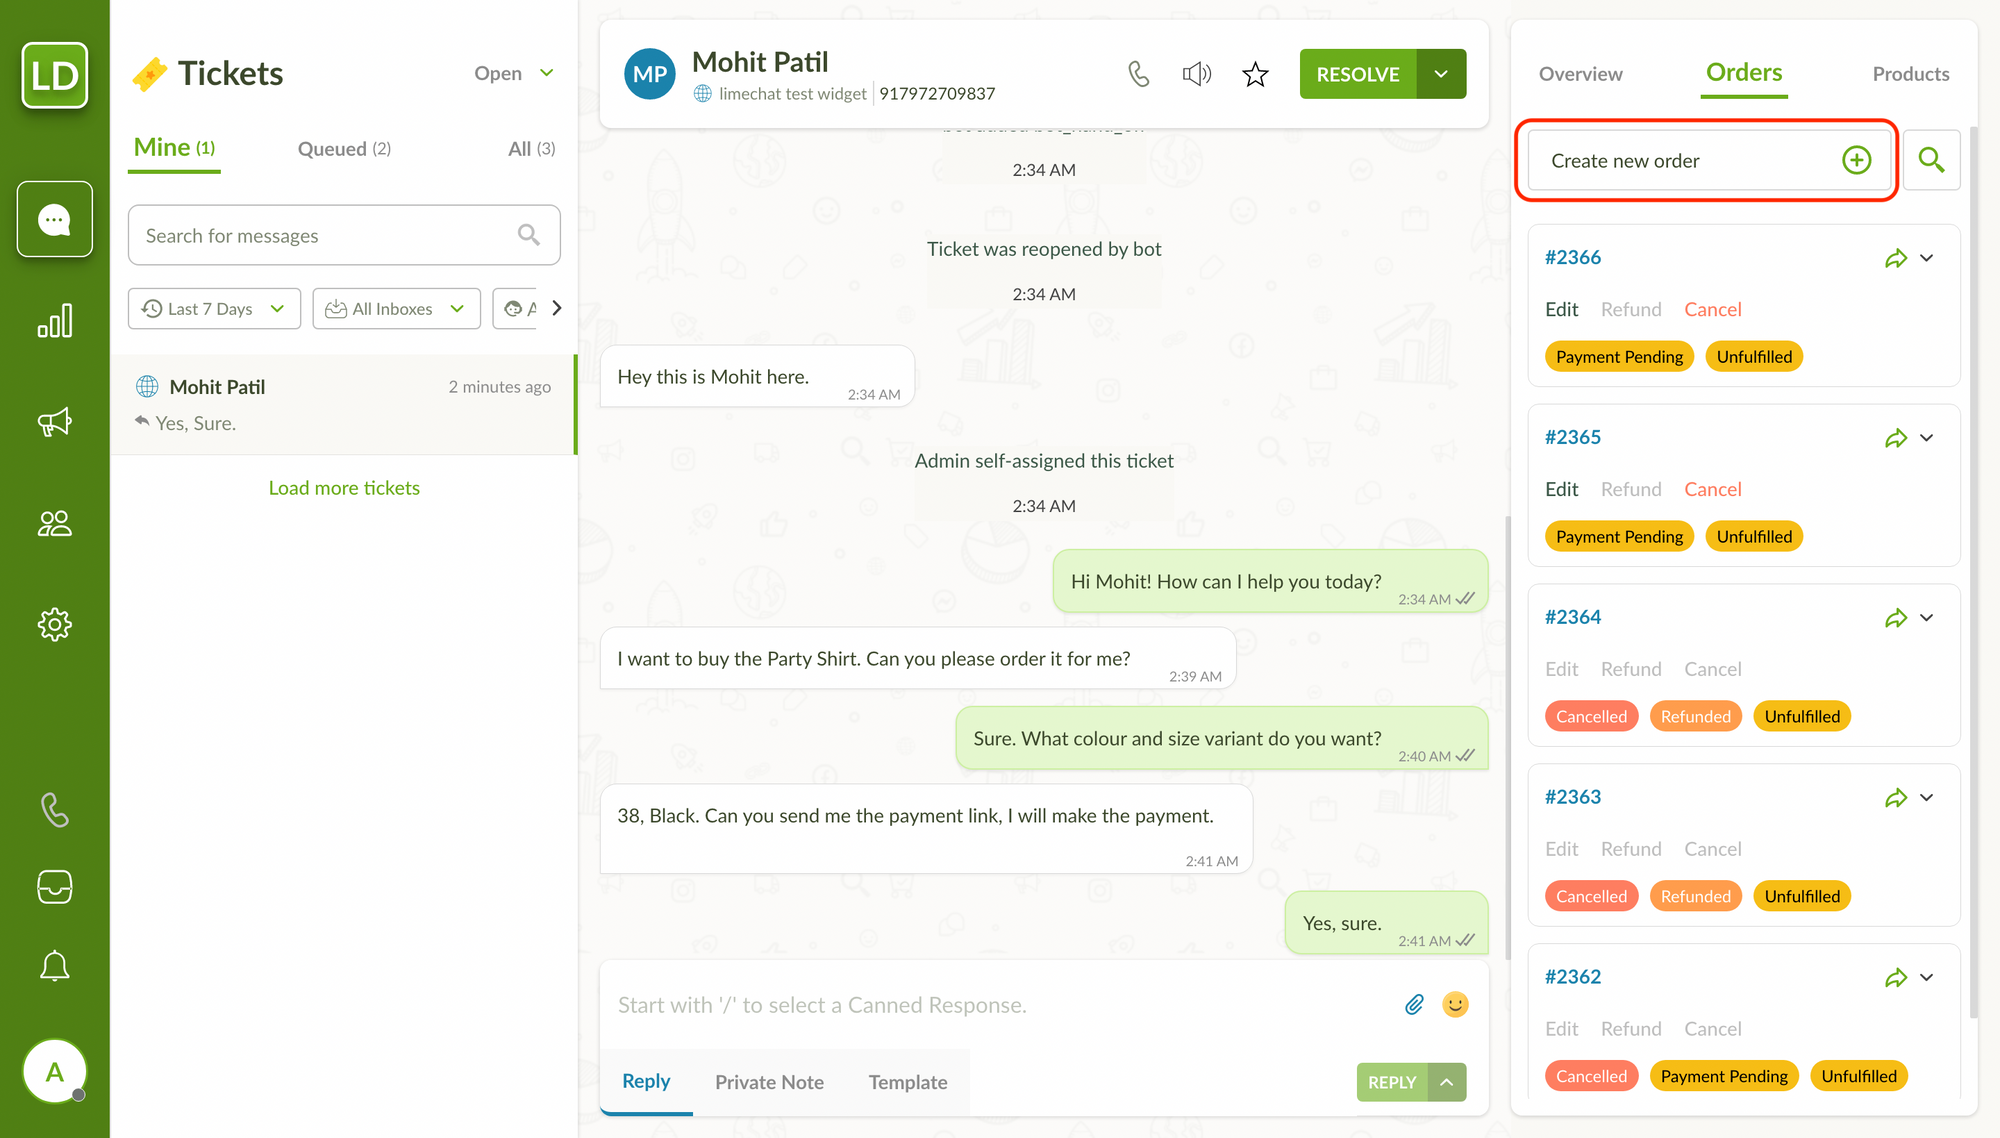
Create a new order
You can create 2 types of orders:
- Cash on Delivery
- Prepaid orders where customer is sent a payment URL via Razorpay integration
COD order
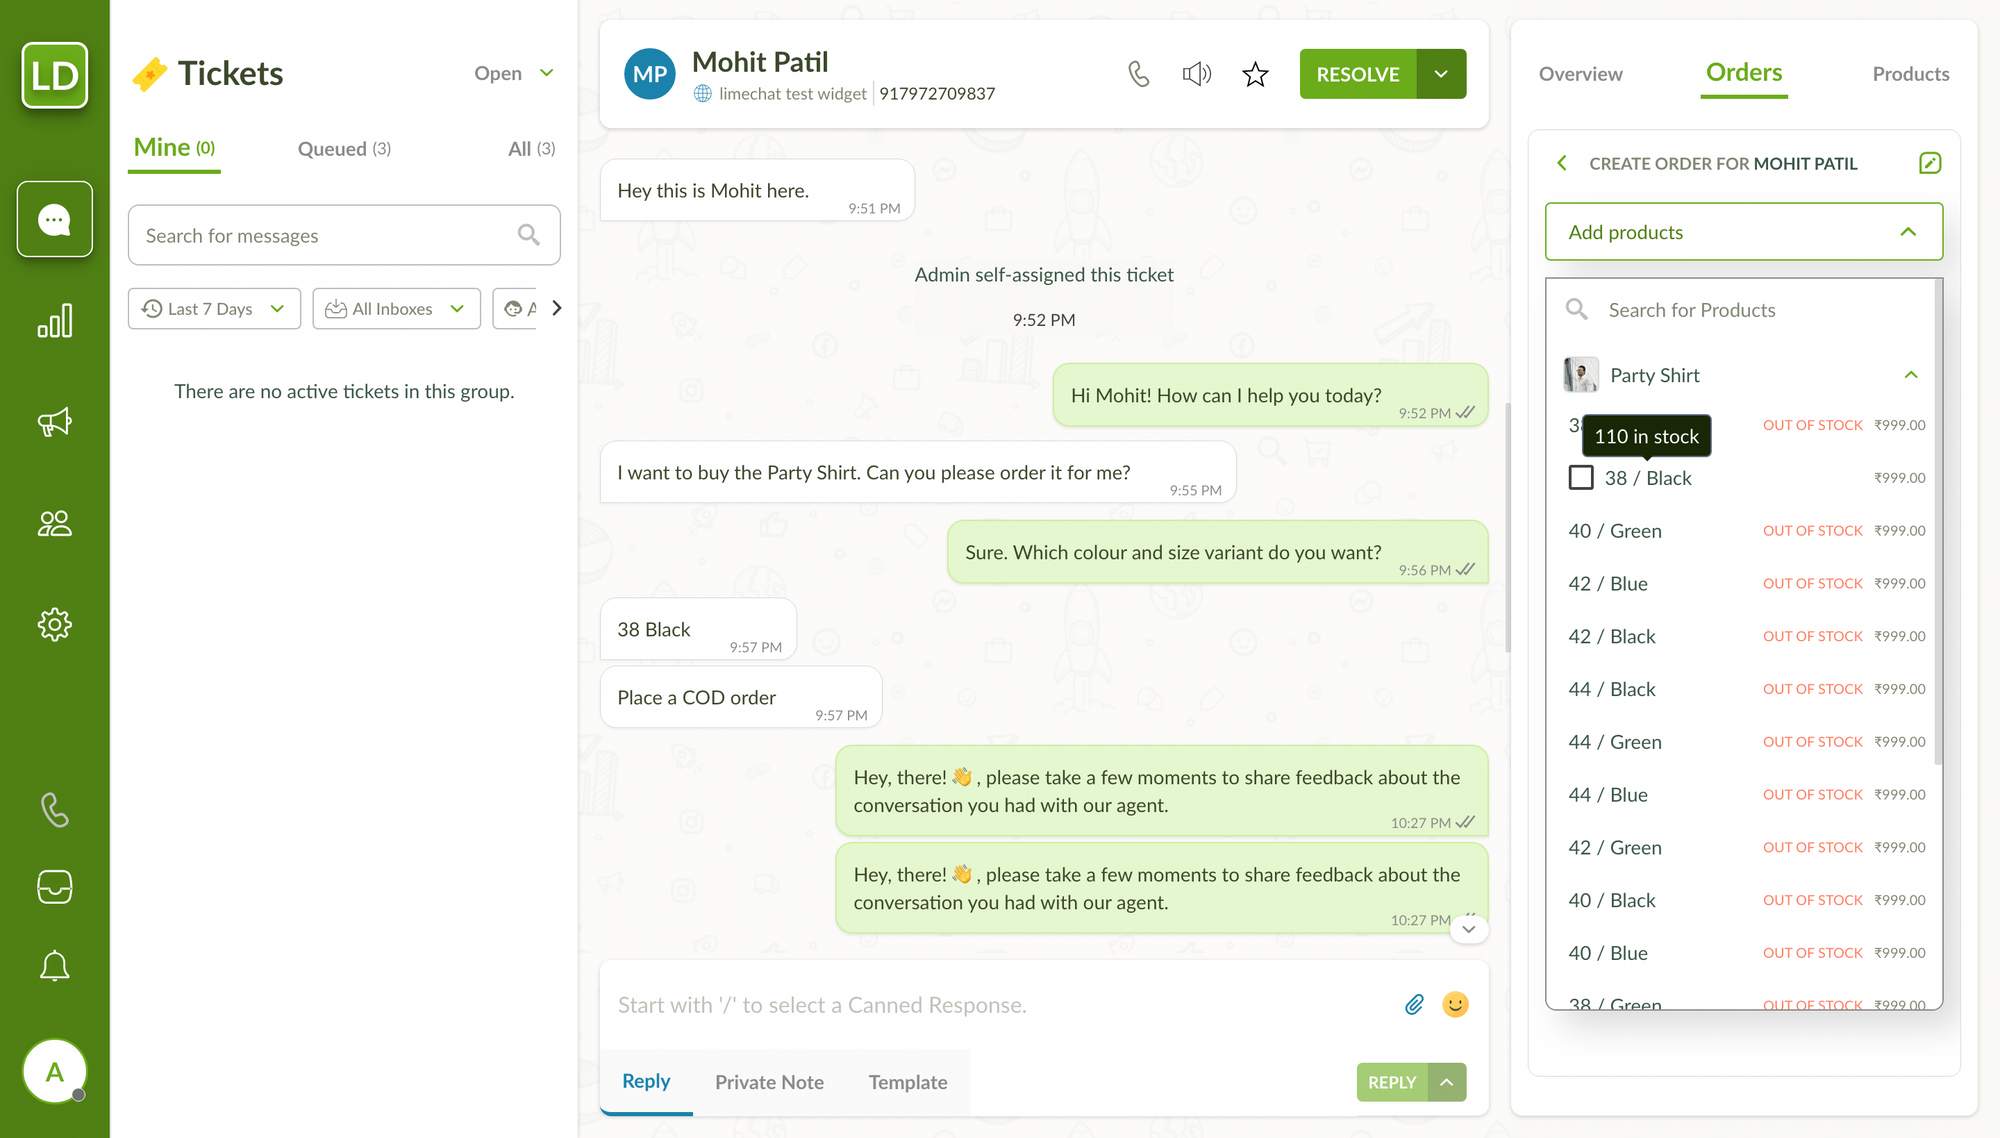
Click on the Create new order button.
Open the Add products dropdown to select the product of choice. Variants of each product are displayed. Hover on the variant title to check the inventory.
Once the product is added, you can add shipping charges and the discount by clicking on the respective titles. The final cart along with the product details and the price breakdown will be displayed.
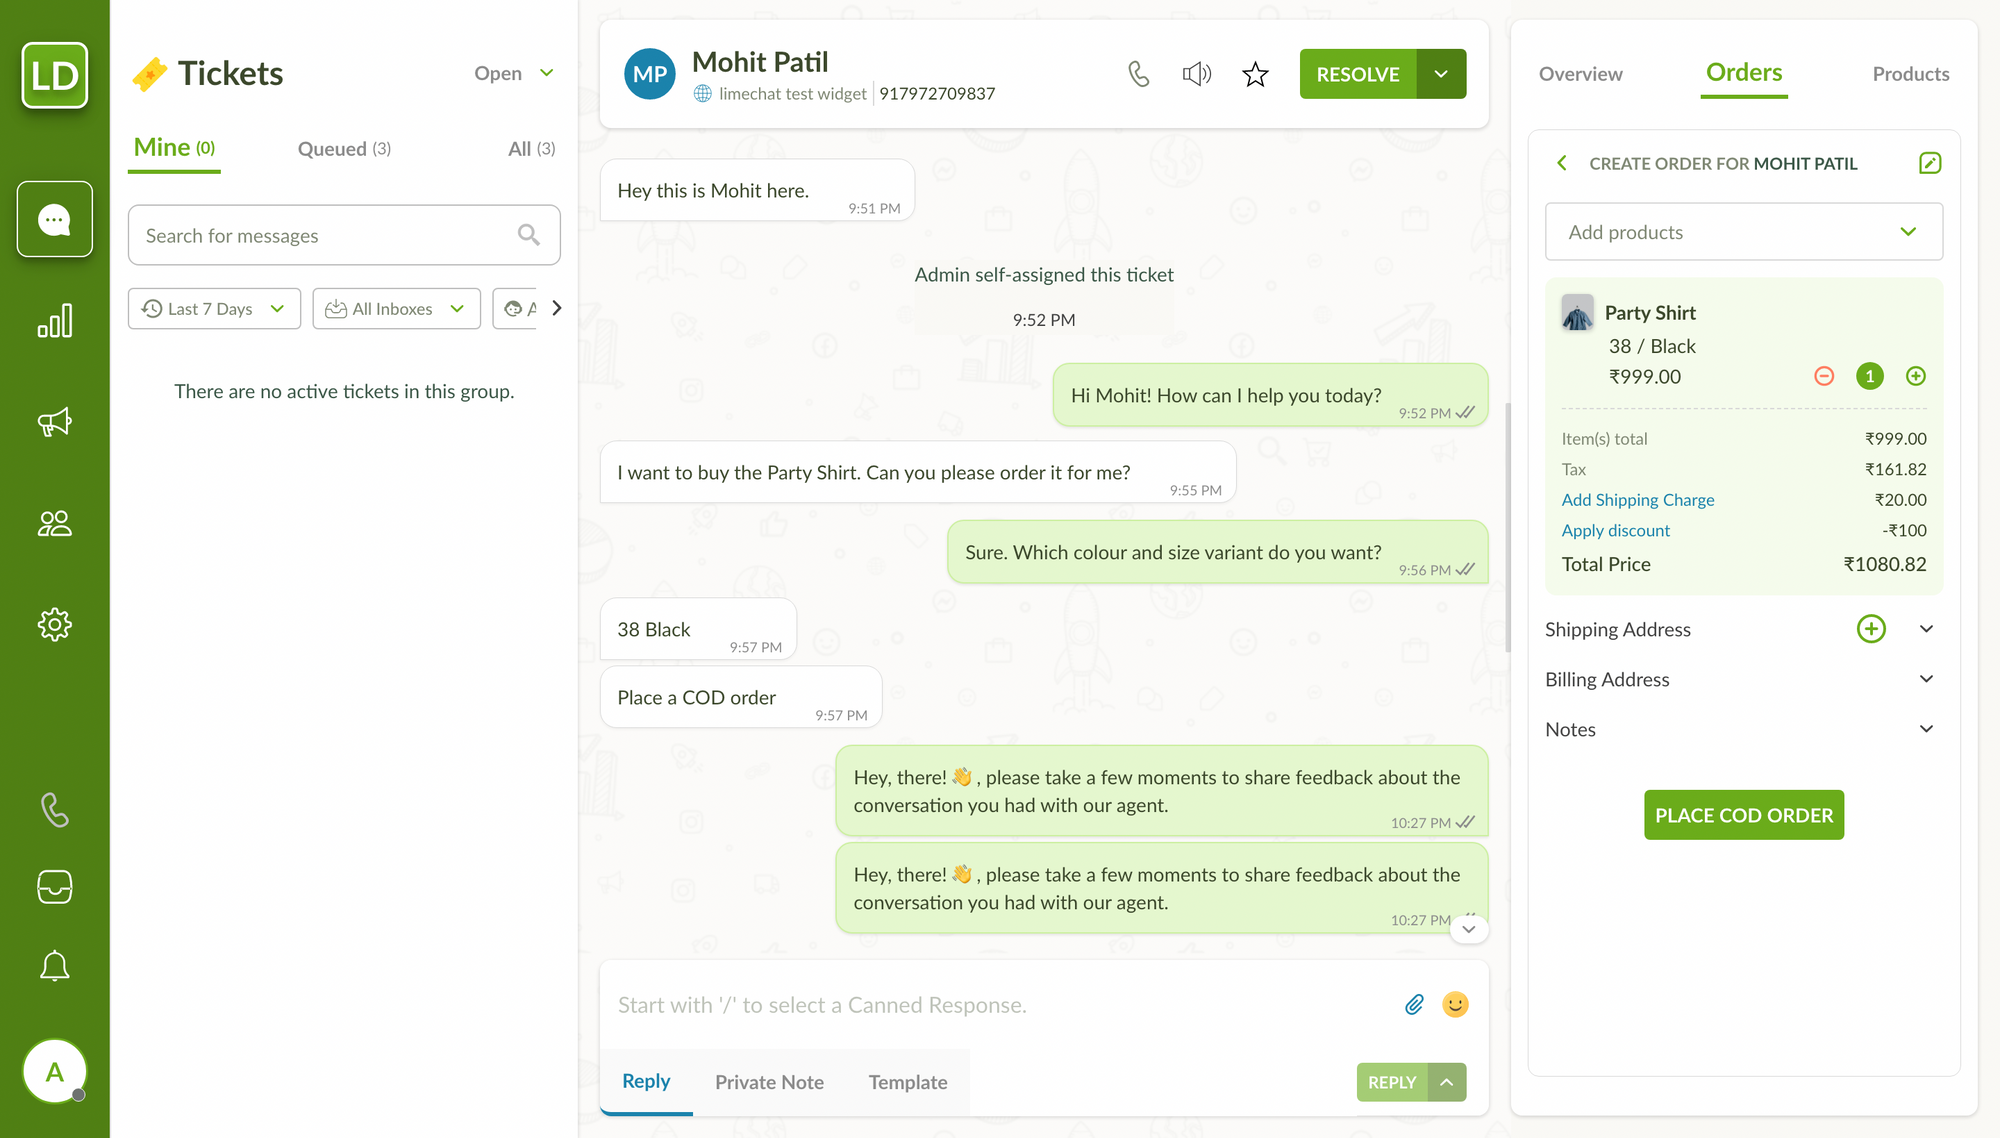
One of the addresses will be selected by default. Click on the Shipping Address dropdown to view the selected address and other saved addresses of the customer. You can change, edit and add a new address from here.

Billing address is by default selected as the shipping address. You can add a note to the order by clicking on the Notes dropdown.
Now, click on Place COD Order button to create an order.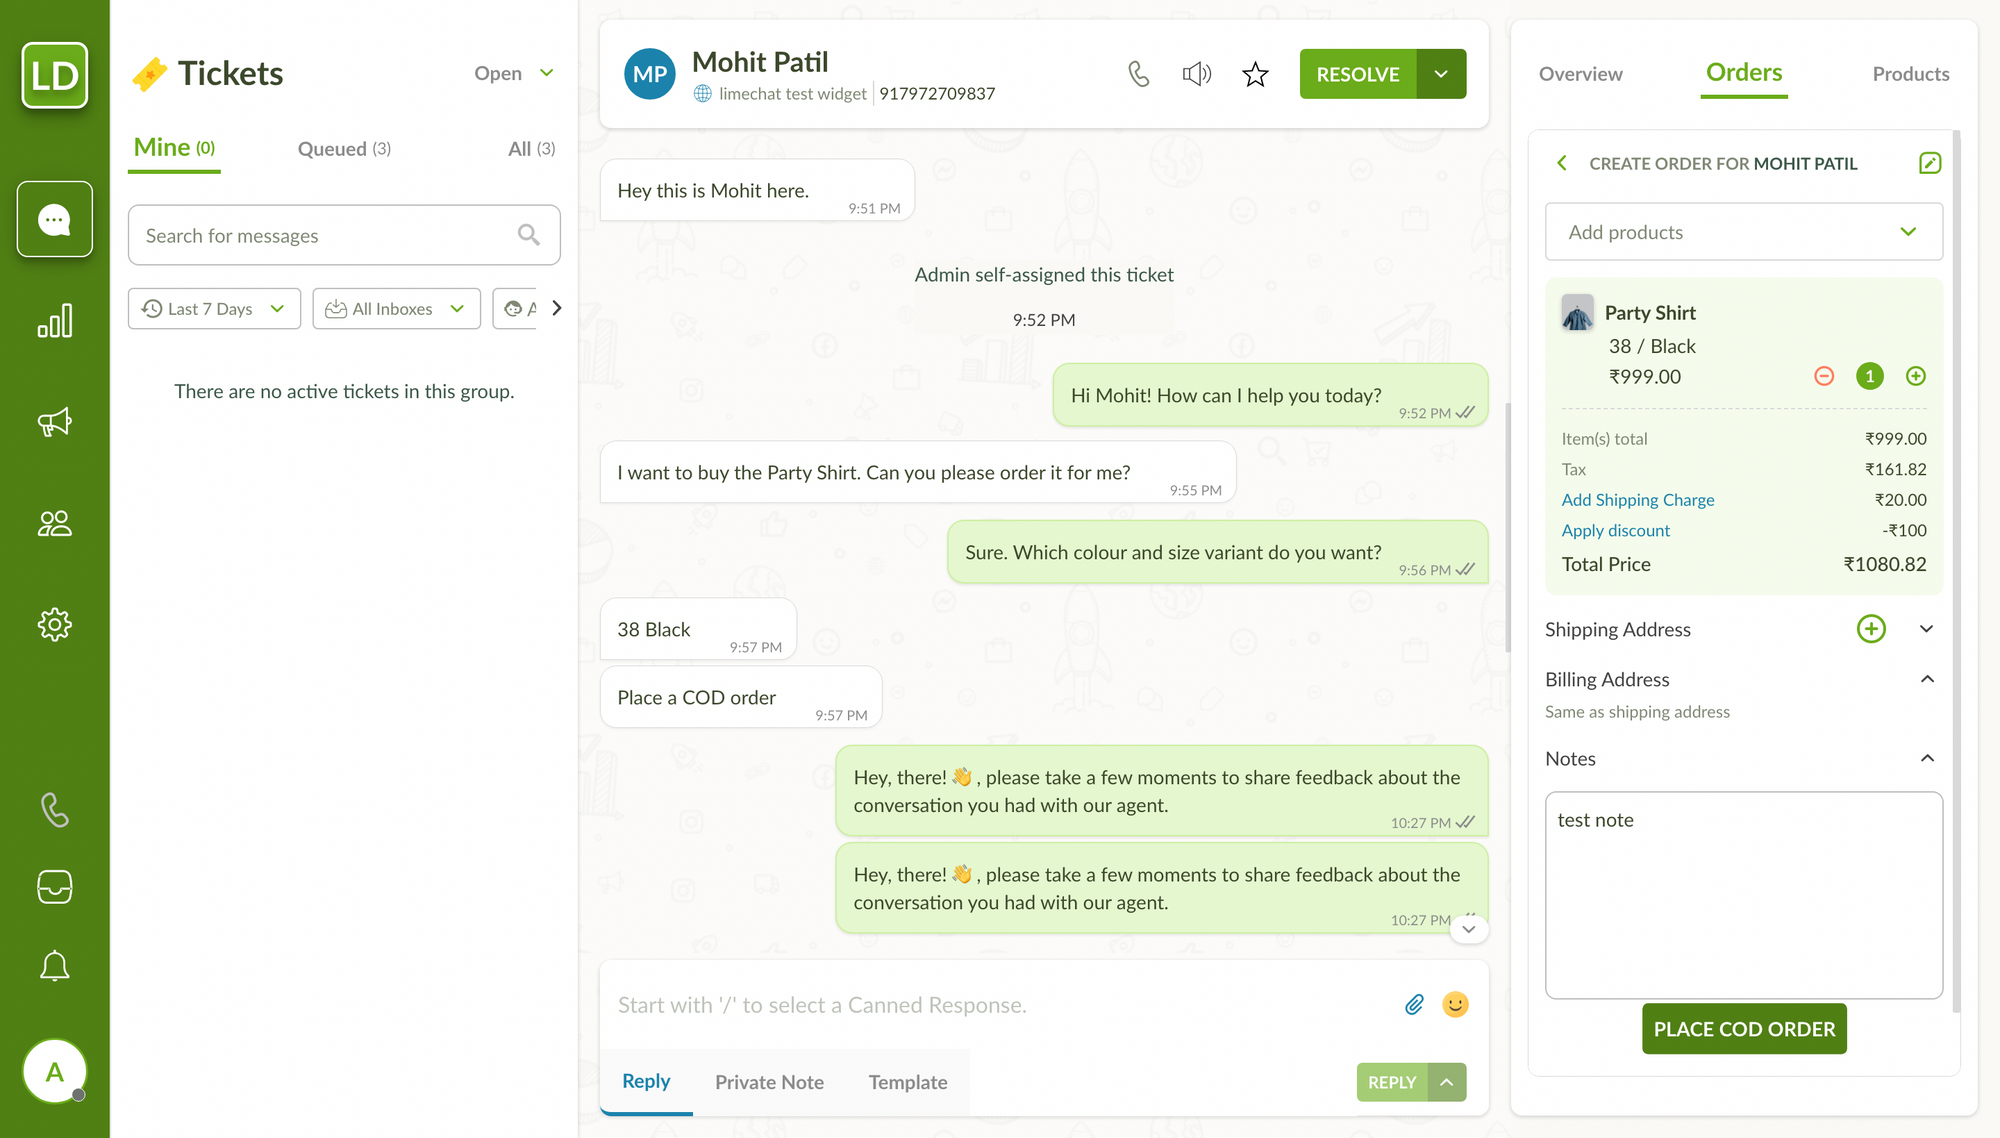
The details of the created order can now be seen at the top of the order tab. An order confirmation gets sent to the customer as shown below.
Prepaid Order
Click on the Create new order button.
Next, add the products, shipping charges and discount as required. Select the right shipping address as specified by the customer.
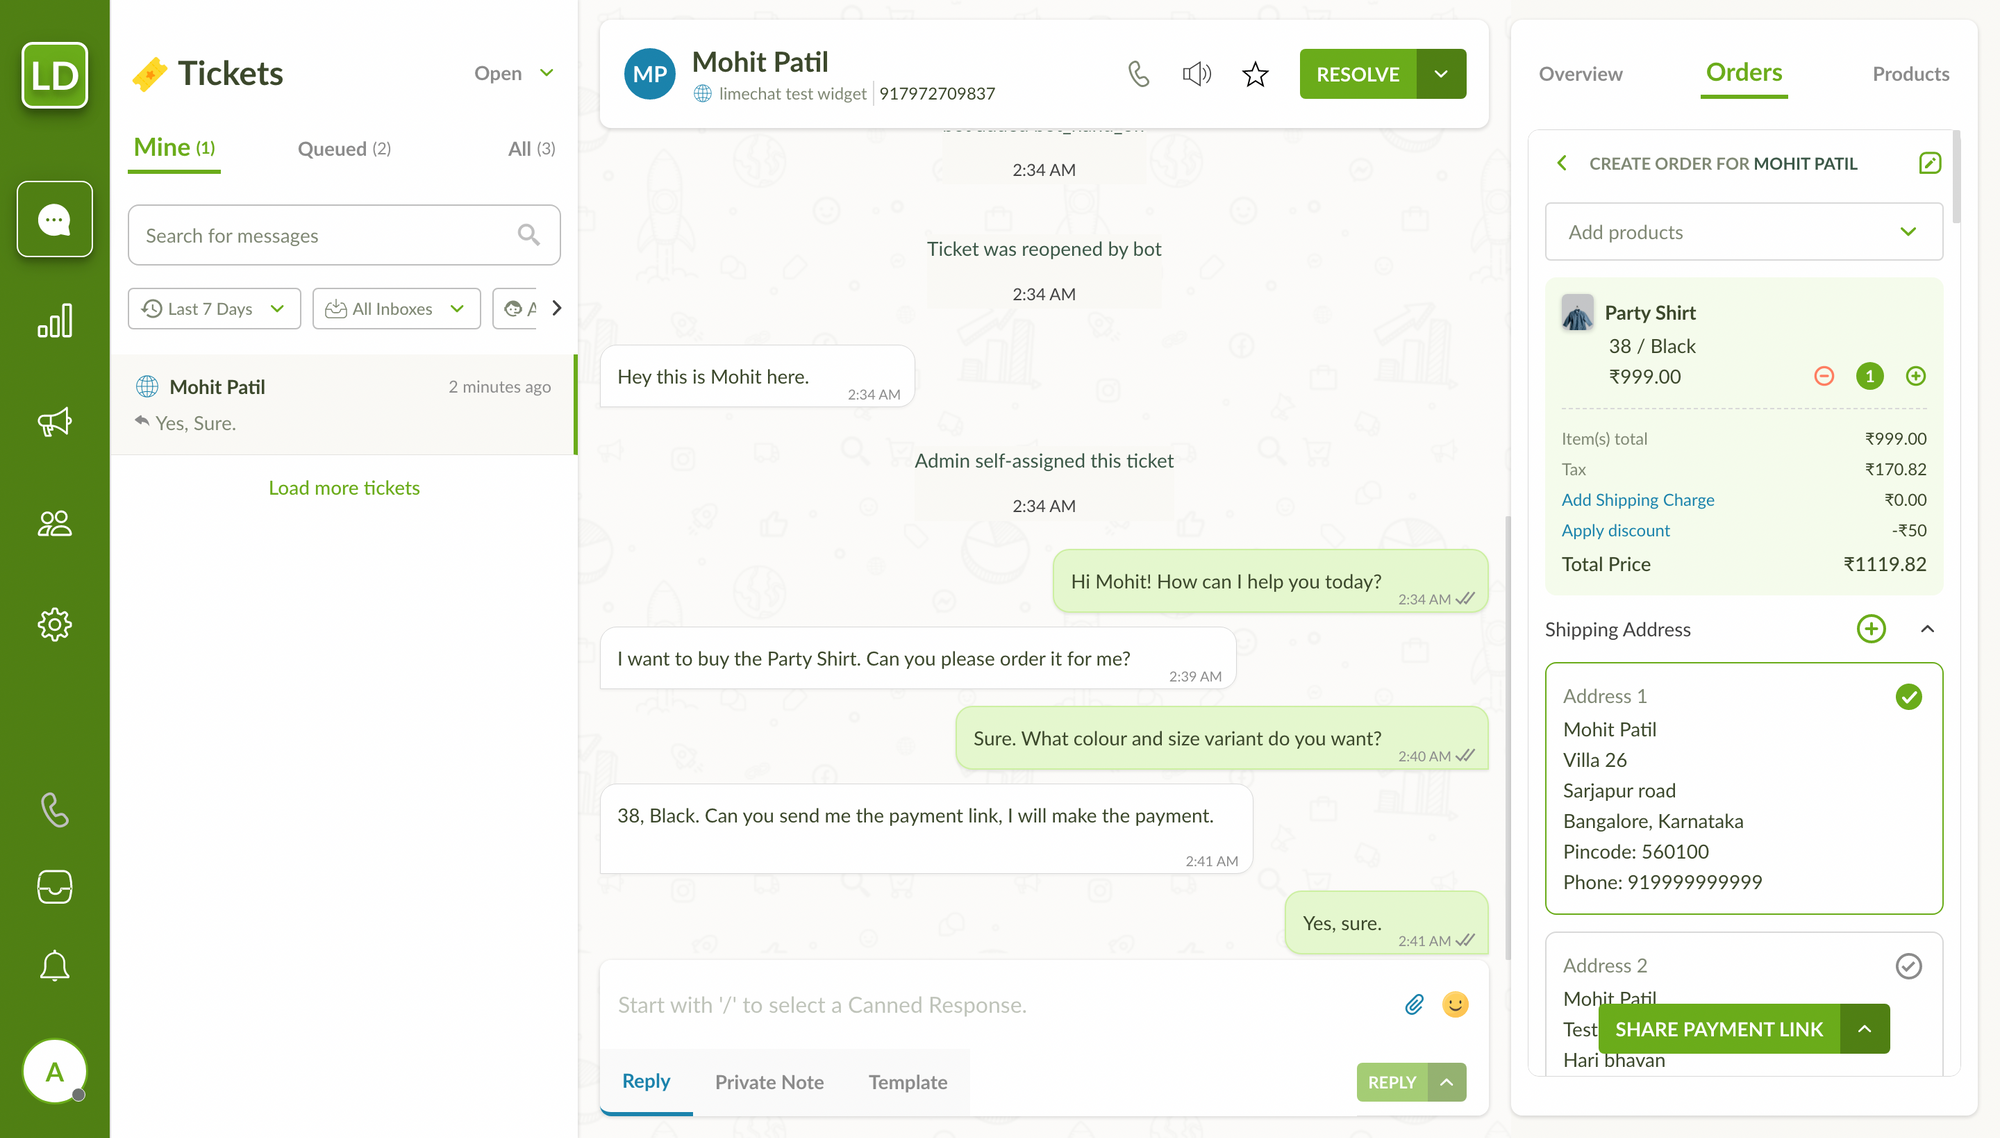
Once all the details have been rightly added, click on Share Payment Link button. This will send a message with cart details and the payment link.
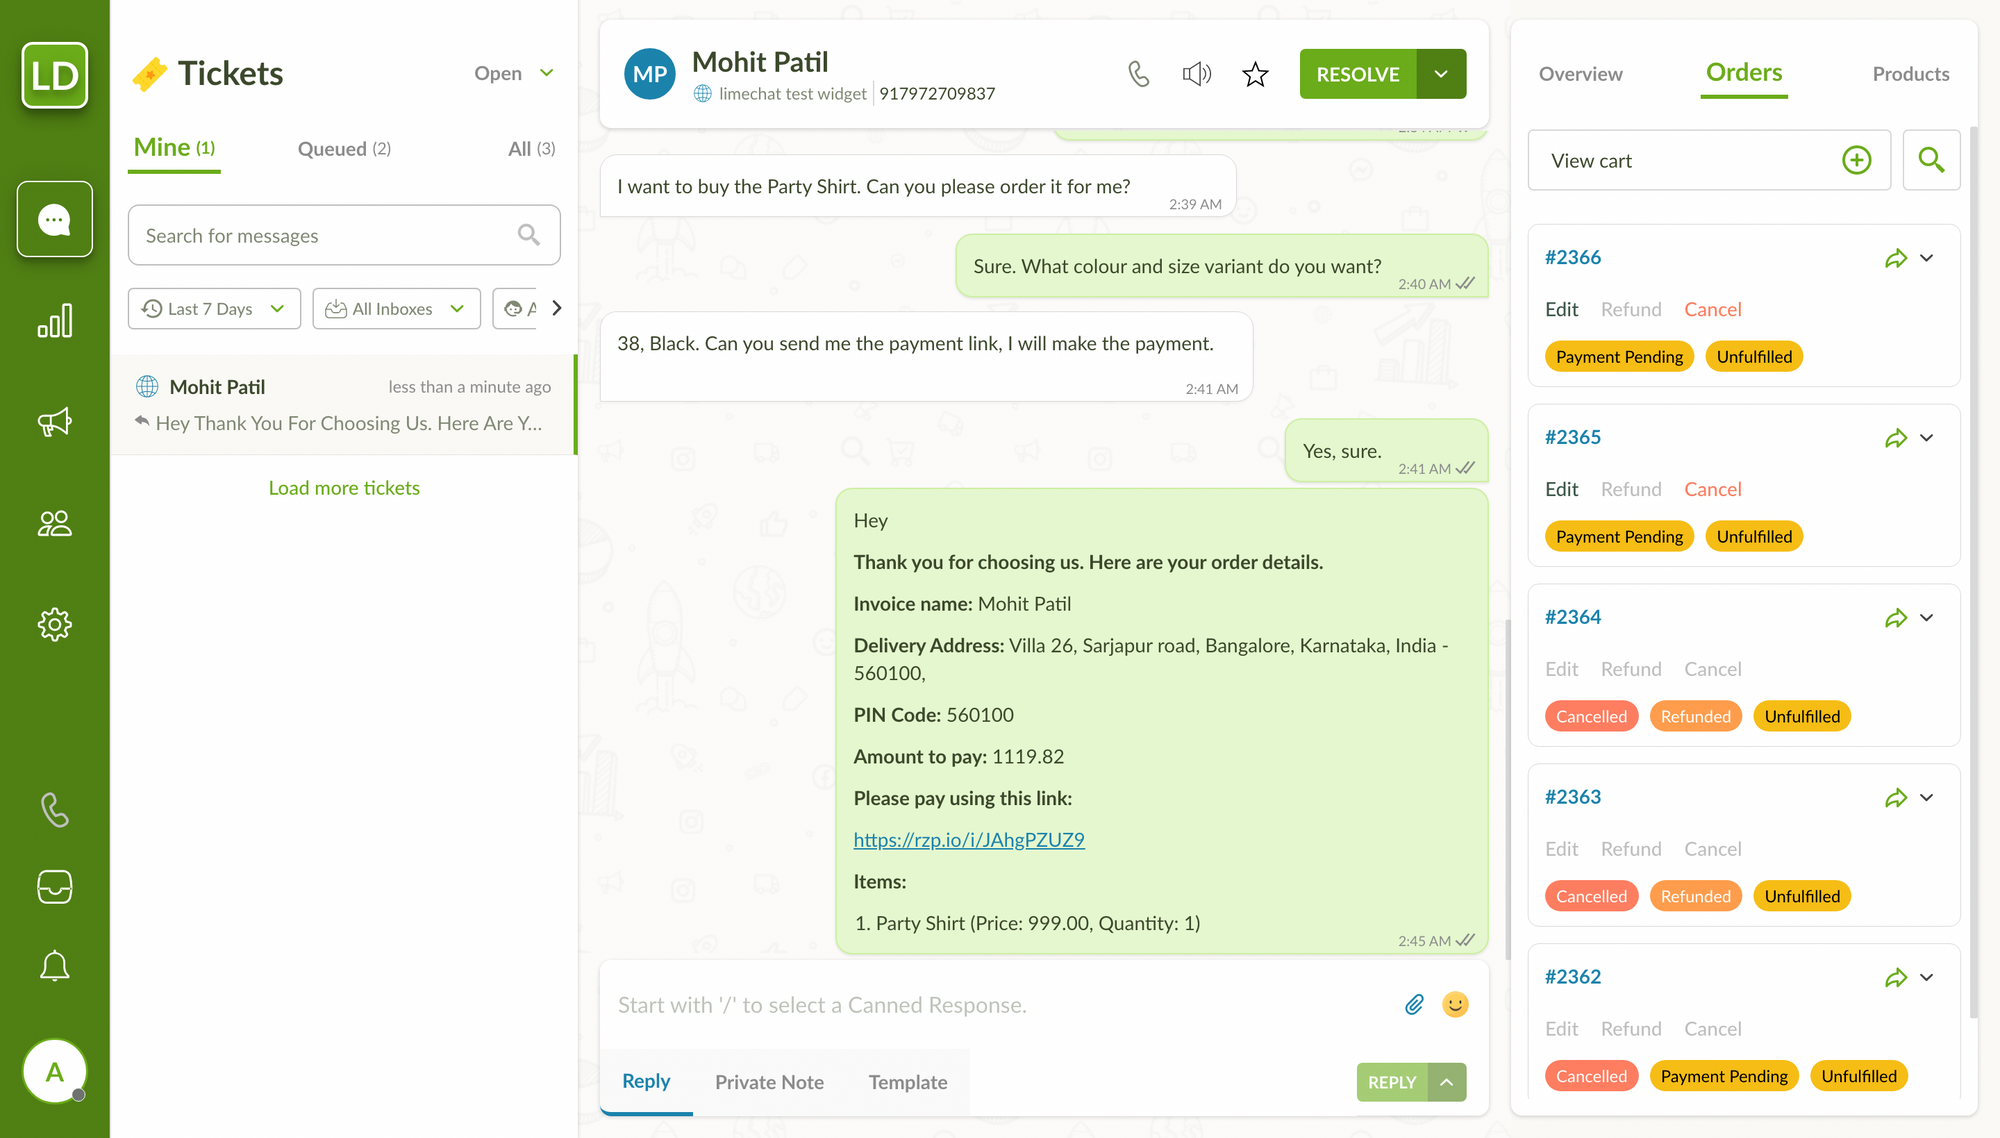
Once the customer completes the payment and we receive a payment confirmation from Razorpay, an order is created on Shopify.
The details of the created order can now be seen at the top of the order tab. An order confirmation gets sent to the customer as shown below.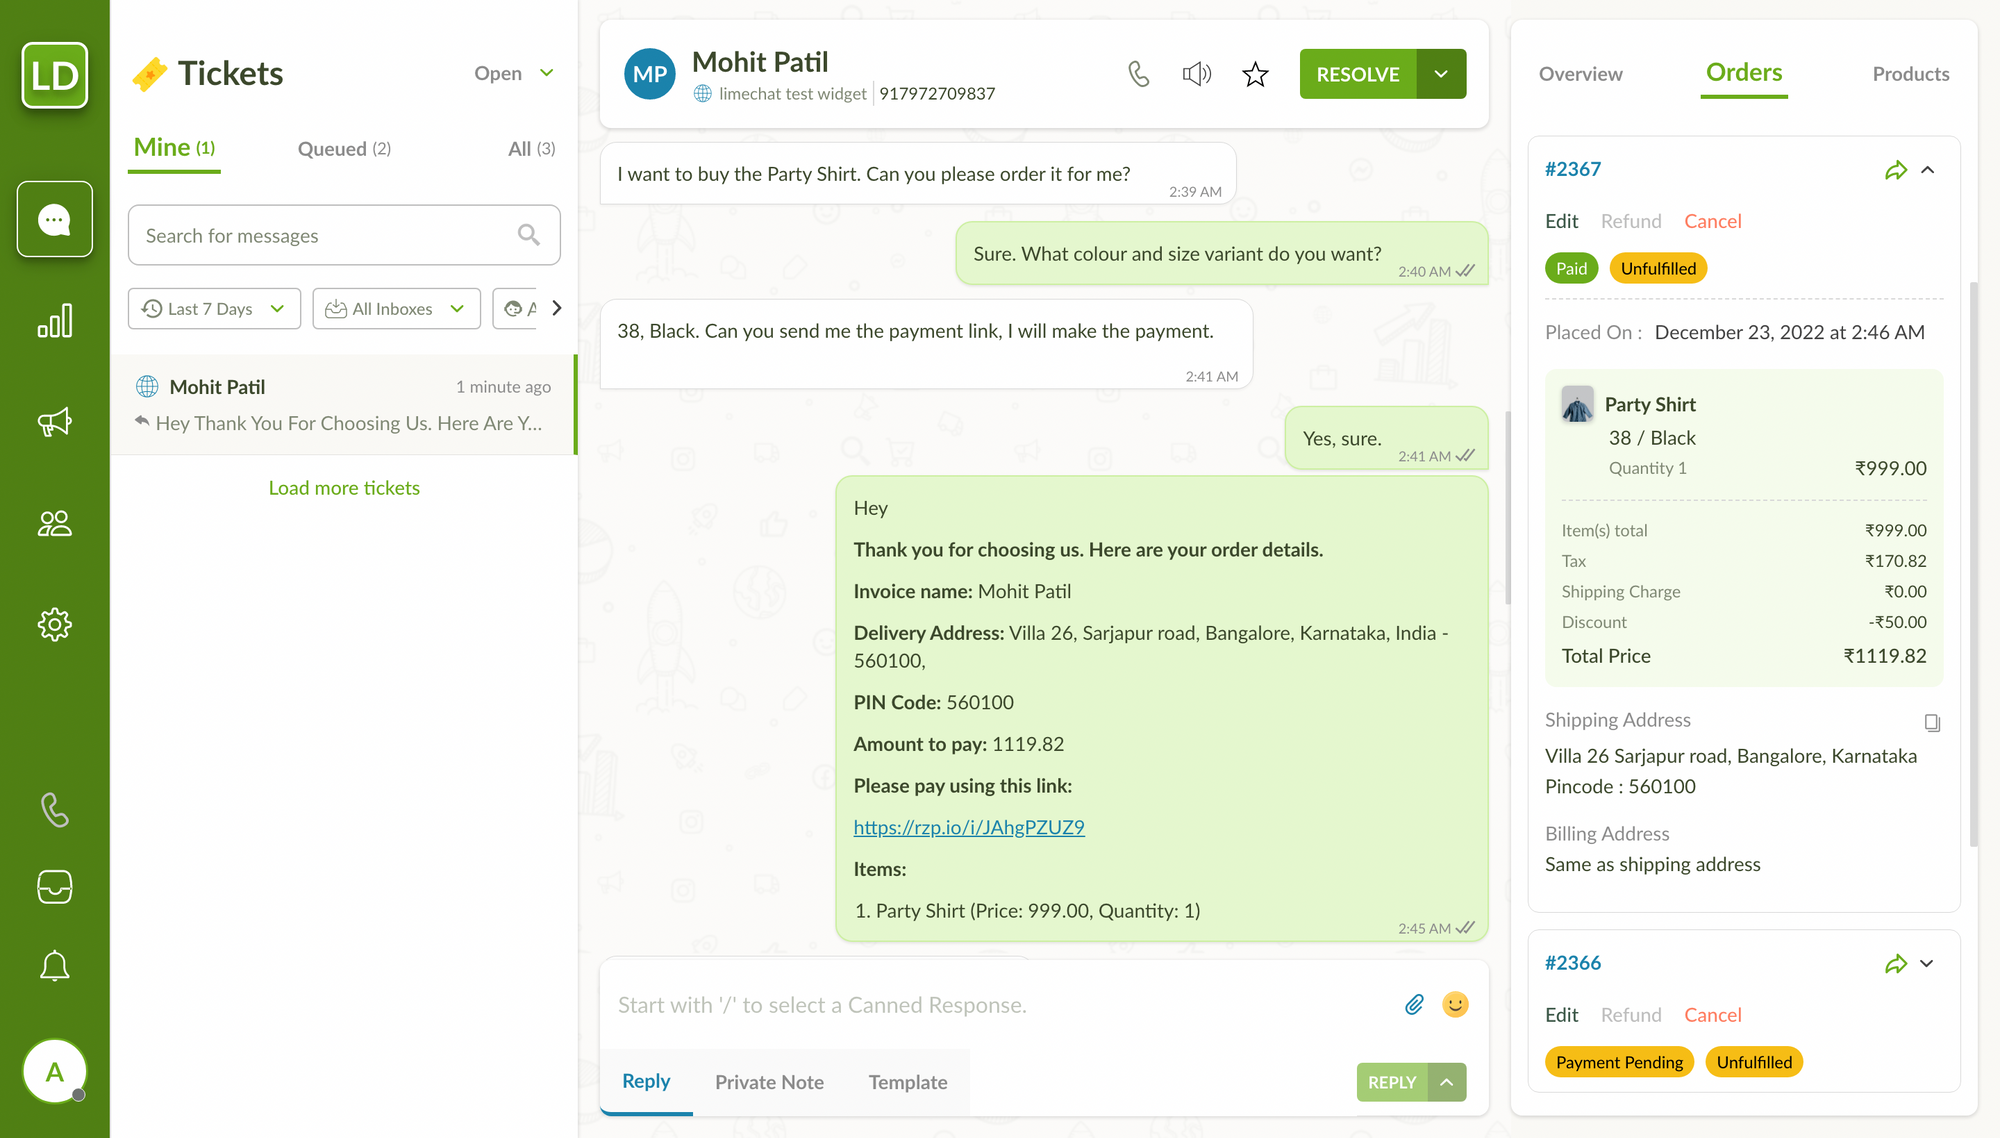
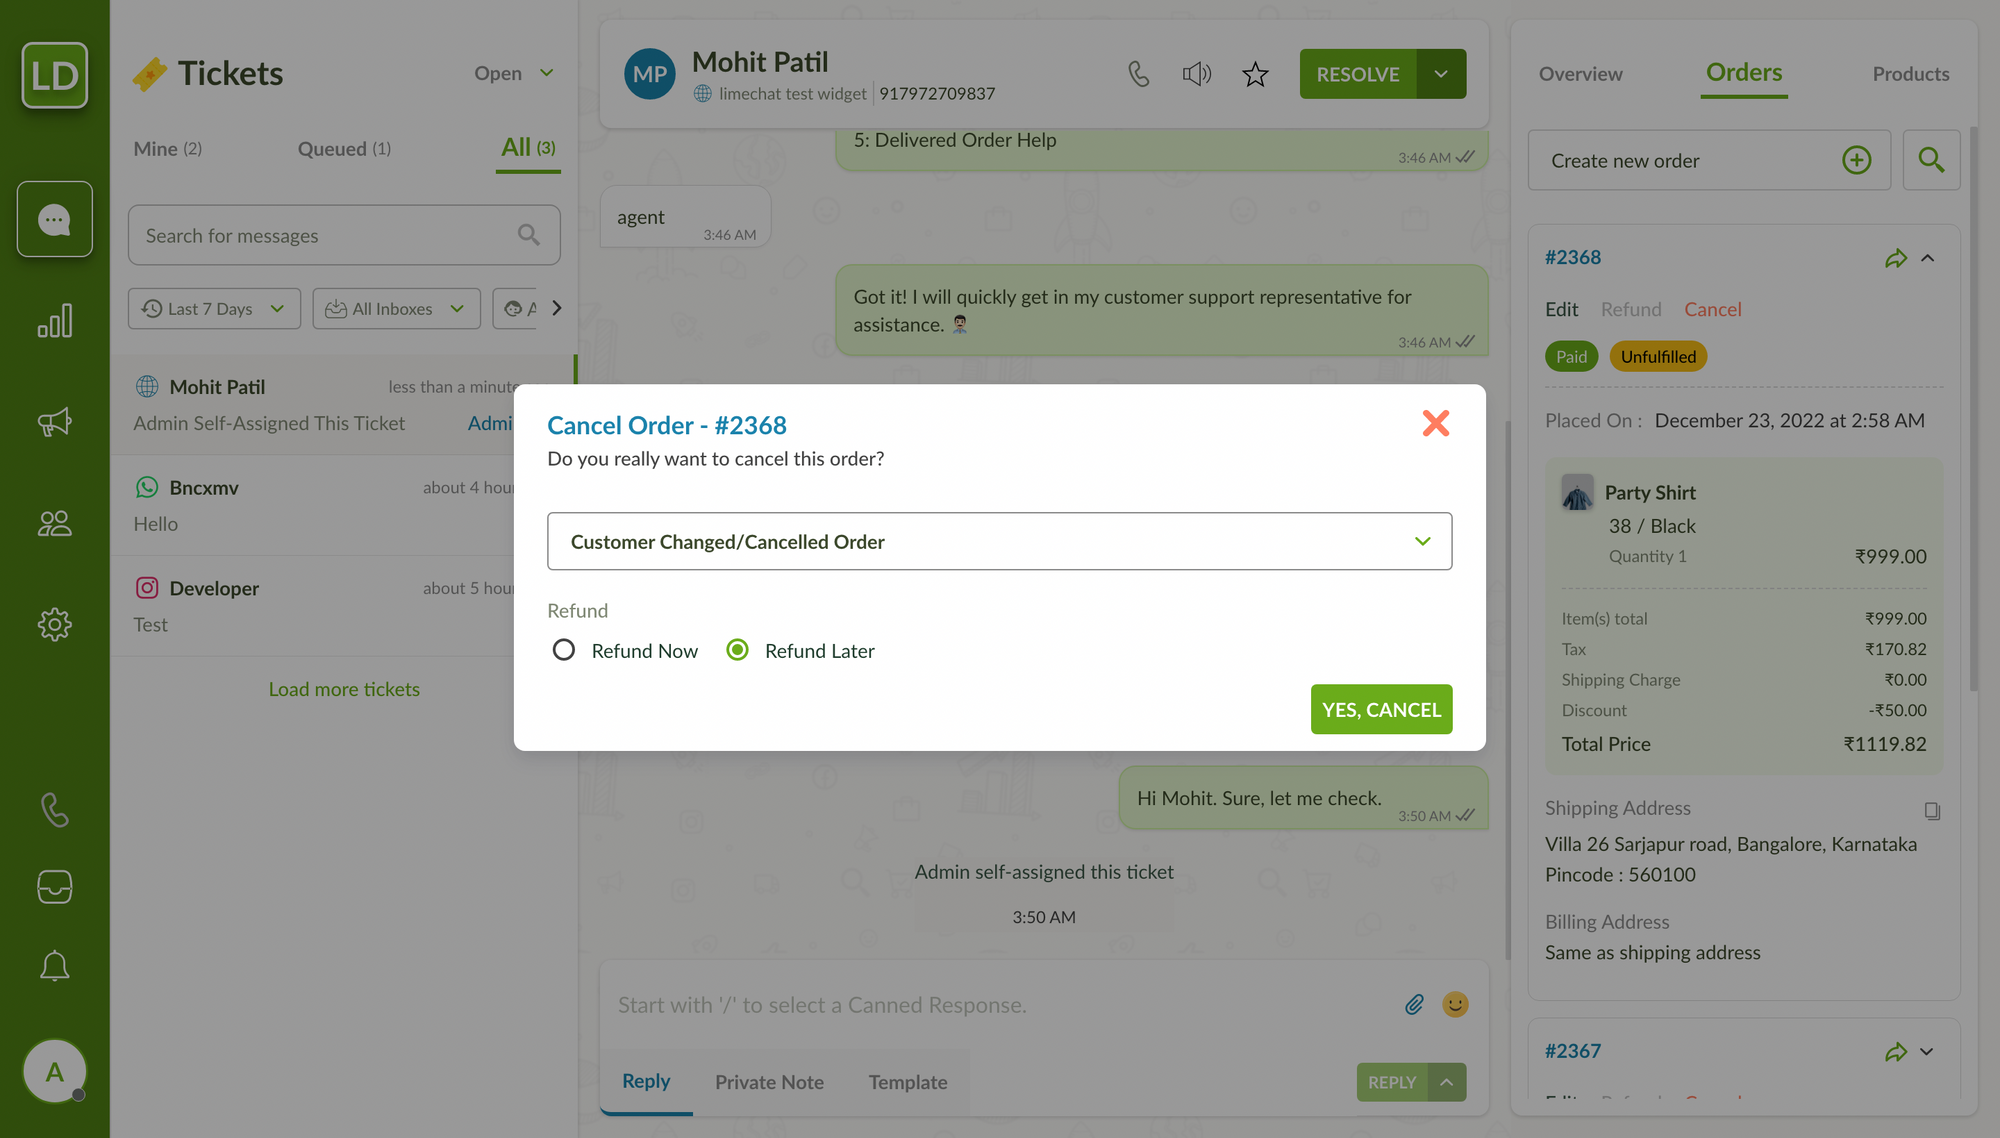
Cancel an order
For the order to be cancelled, click on the Cancel button below the order id.
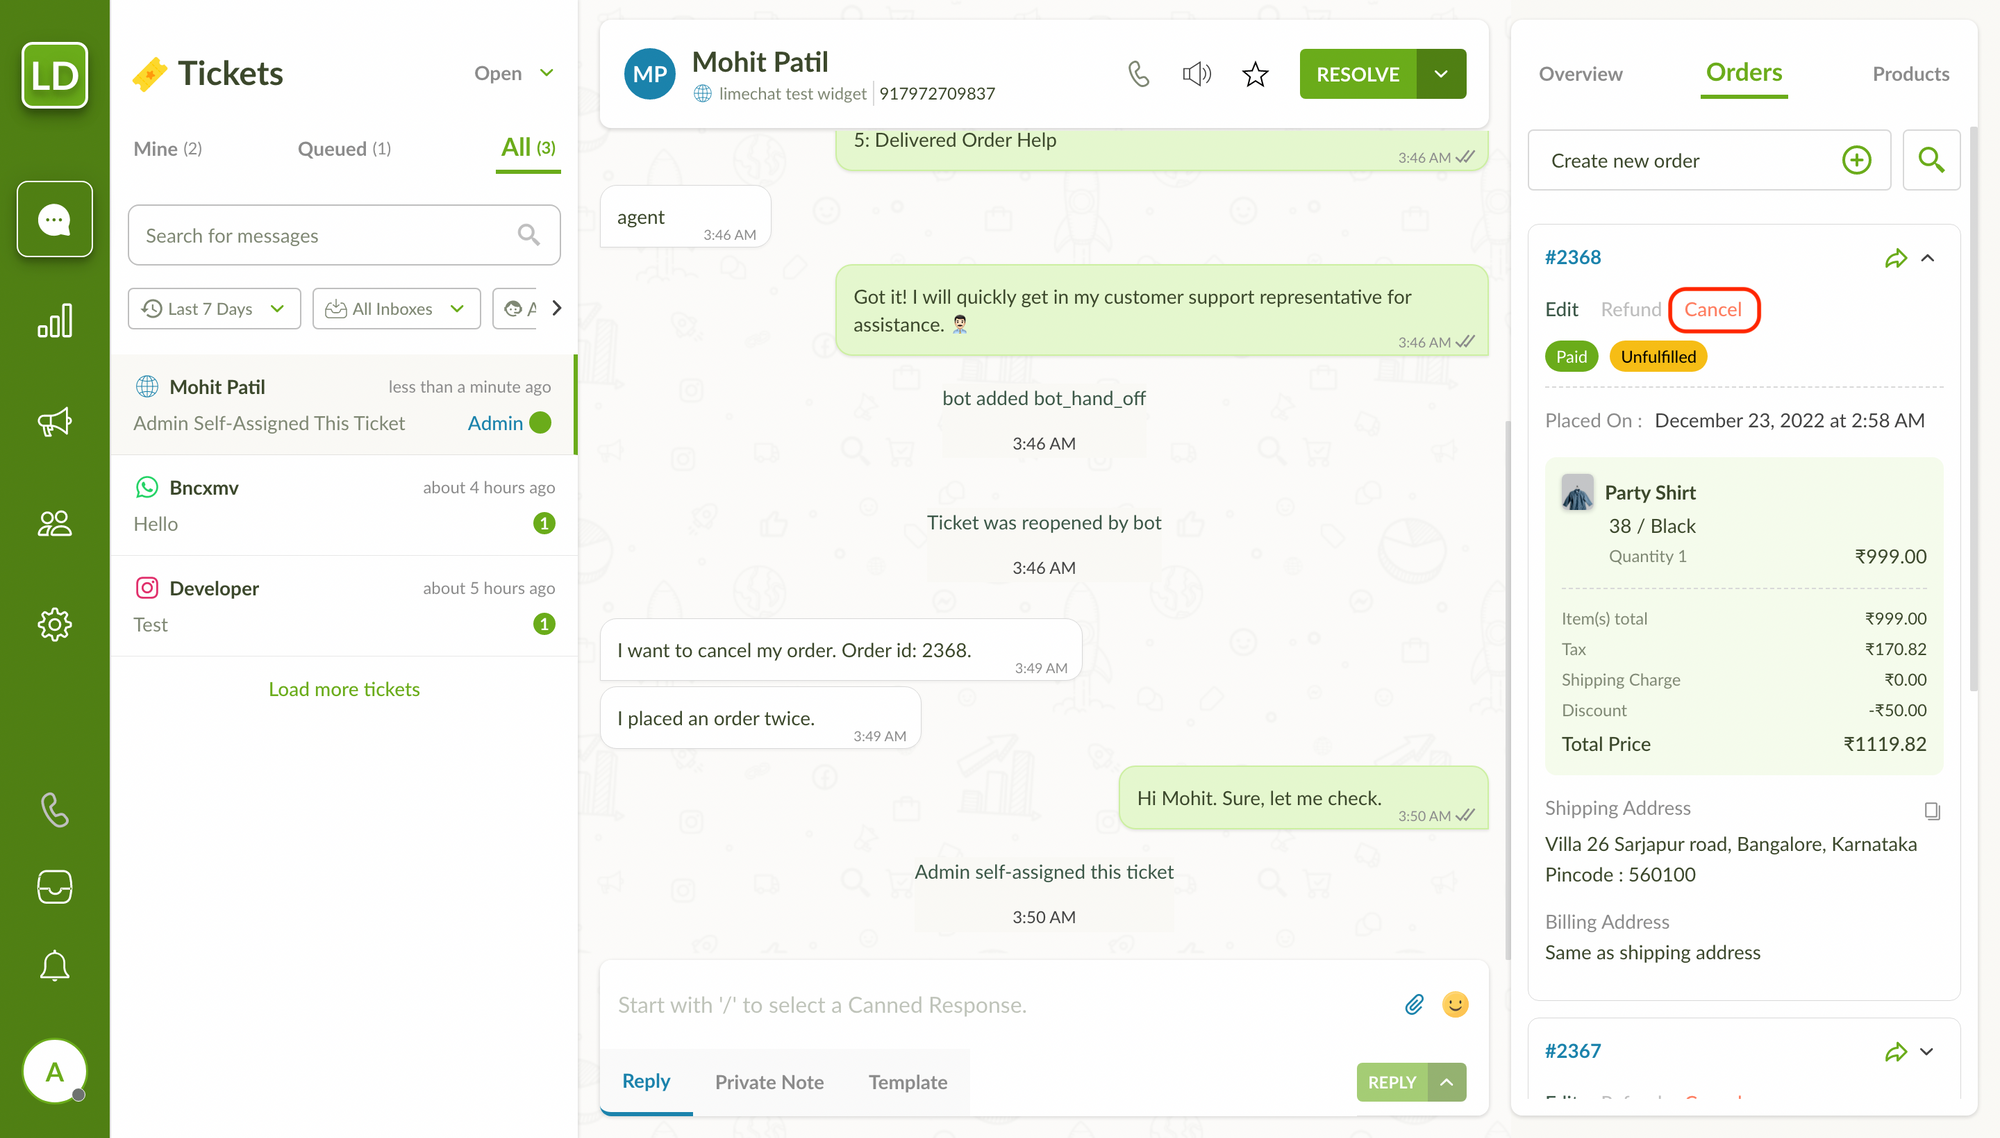
Clicking on the Cancel button will open the Cancel modal. The next step is based on the payment status of an order.
For orders with payment pending (COD)
Select the reason why customer wants to cancel the order and select the Yes, Cancel button to proceed.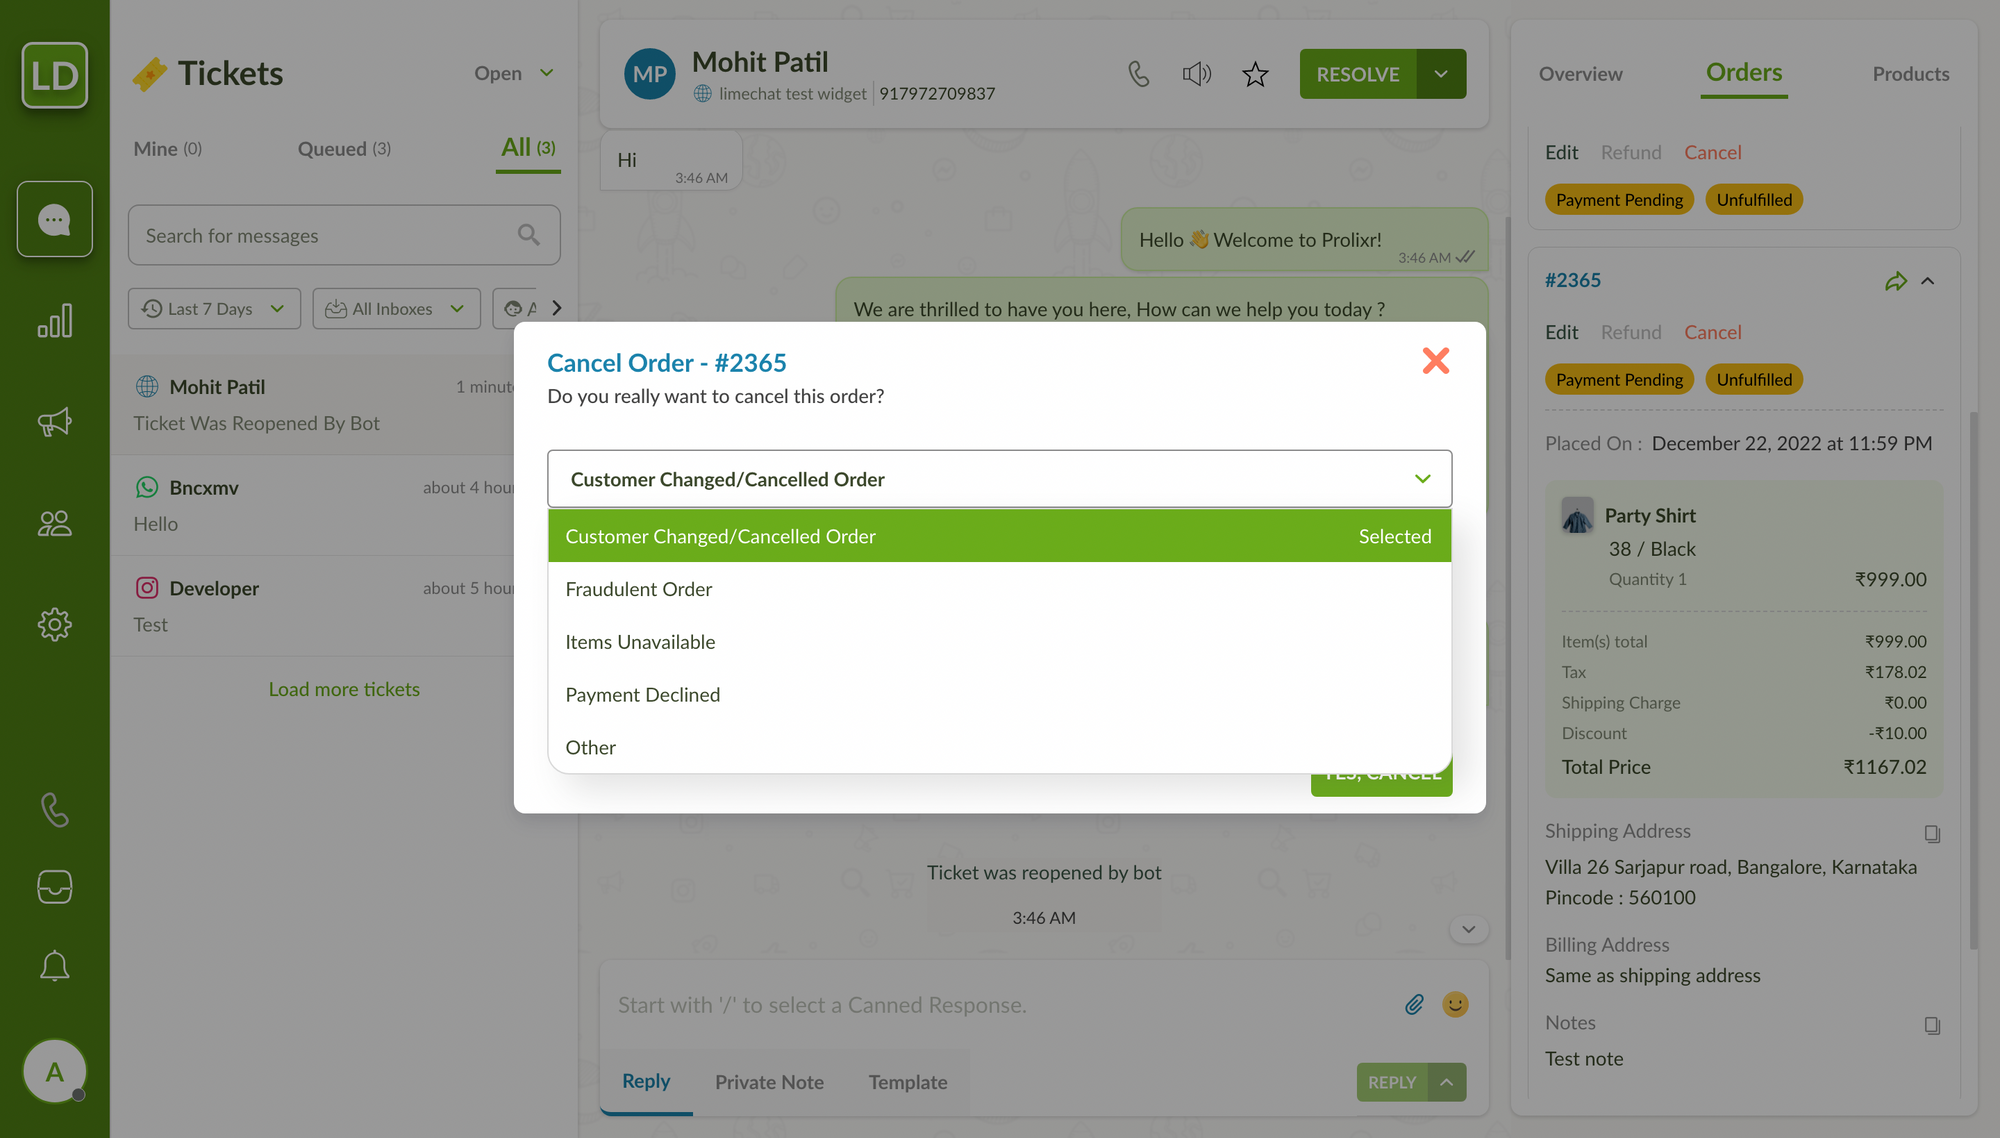
For paid orders
Select the reason why customer wants to cancel the order and choose between Refund Now or Refund Later
Refund Now: The maximum allowed refundable amount will be pre-filled in the amount field. You can change the amount value if required.
Clicking on Yes, Cancel will cancel and process a refund for the order at the same time.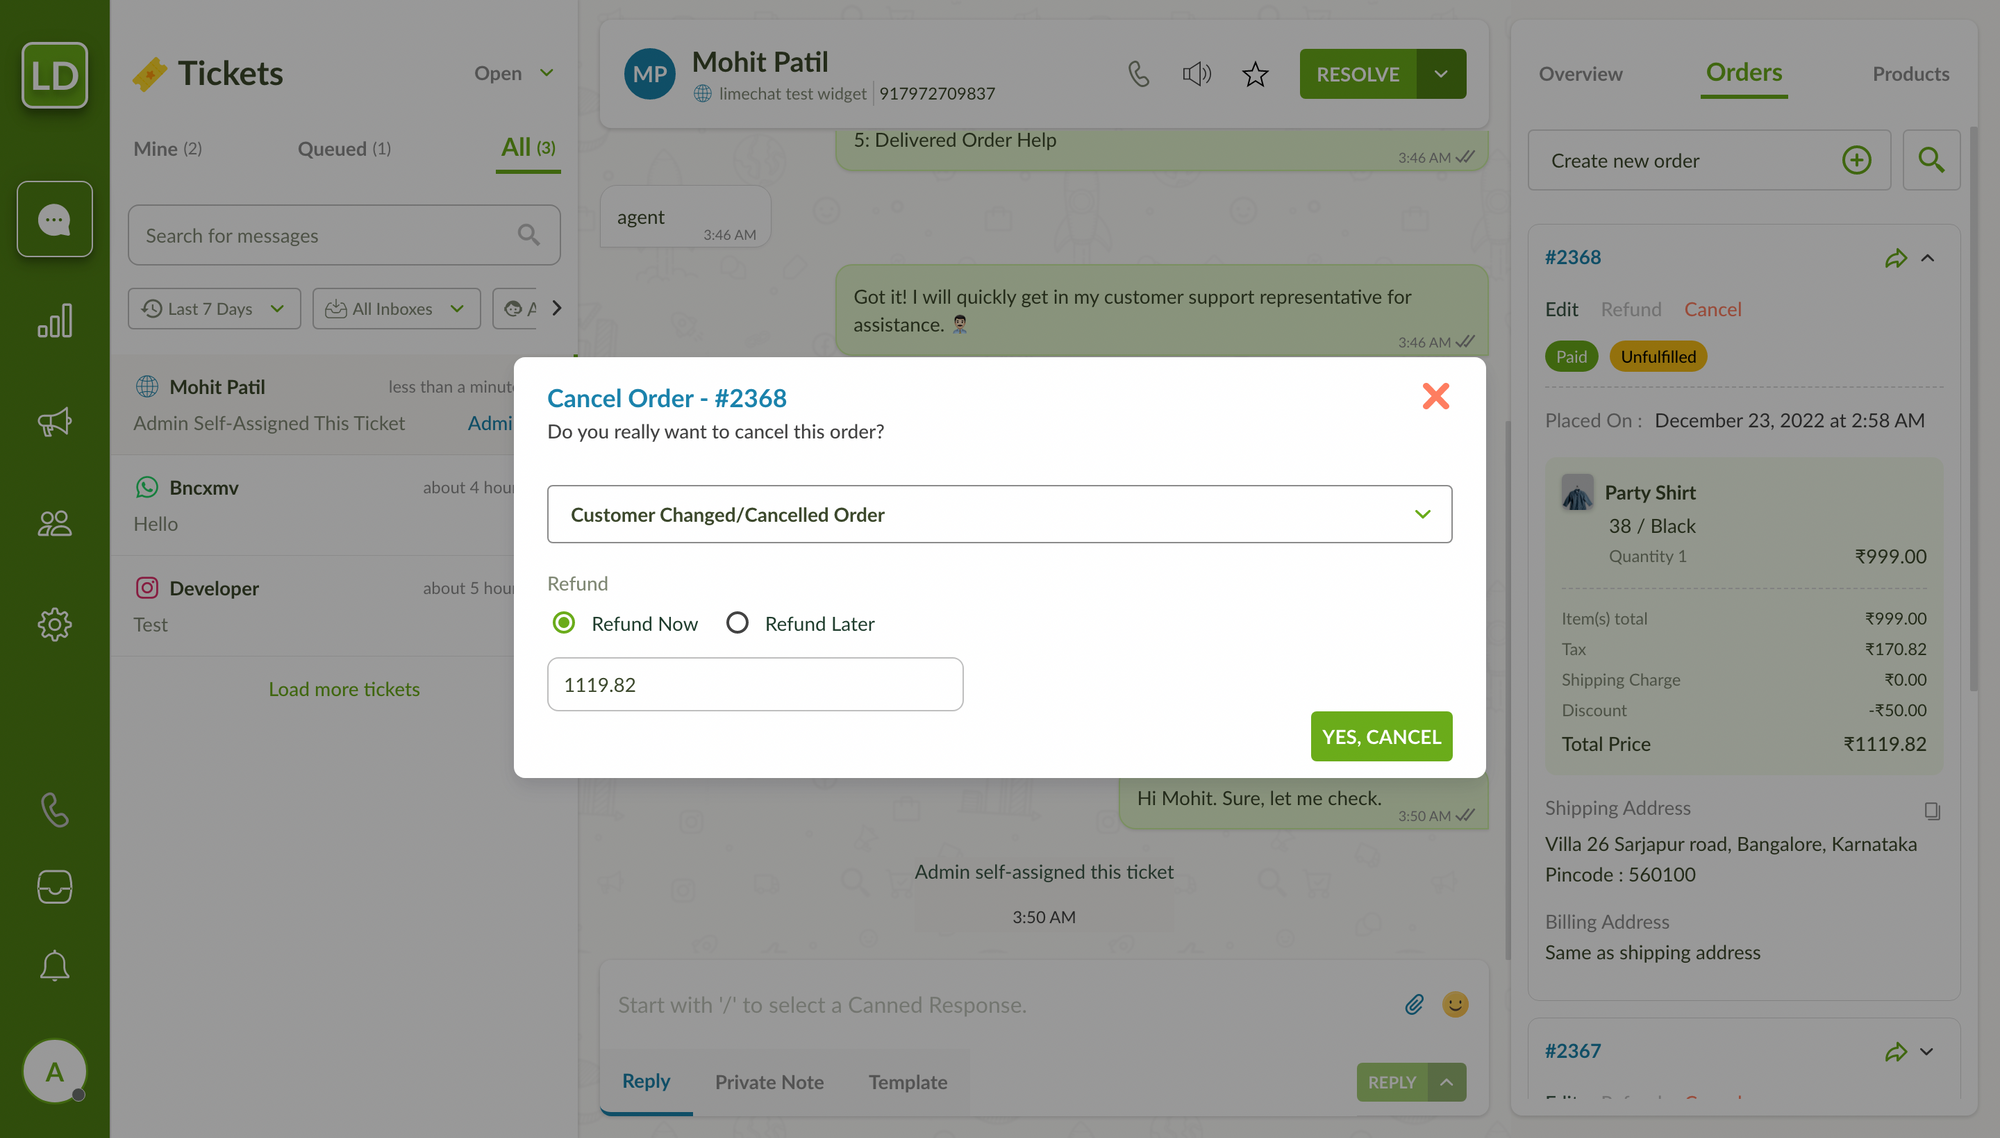
Refund Later: Clicking on Yes, Cancel will only cancel the order and activate the Refund button for the order.
info
💡 The Cancel order action is not available after the order gets fulfilled.
Edit an order
To start editing an order, click on the Edit button below the order id of the respective order.
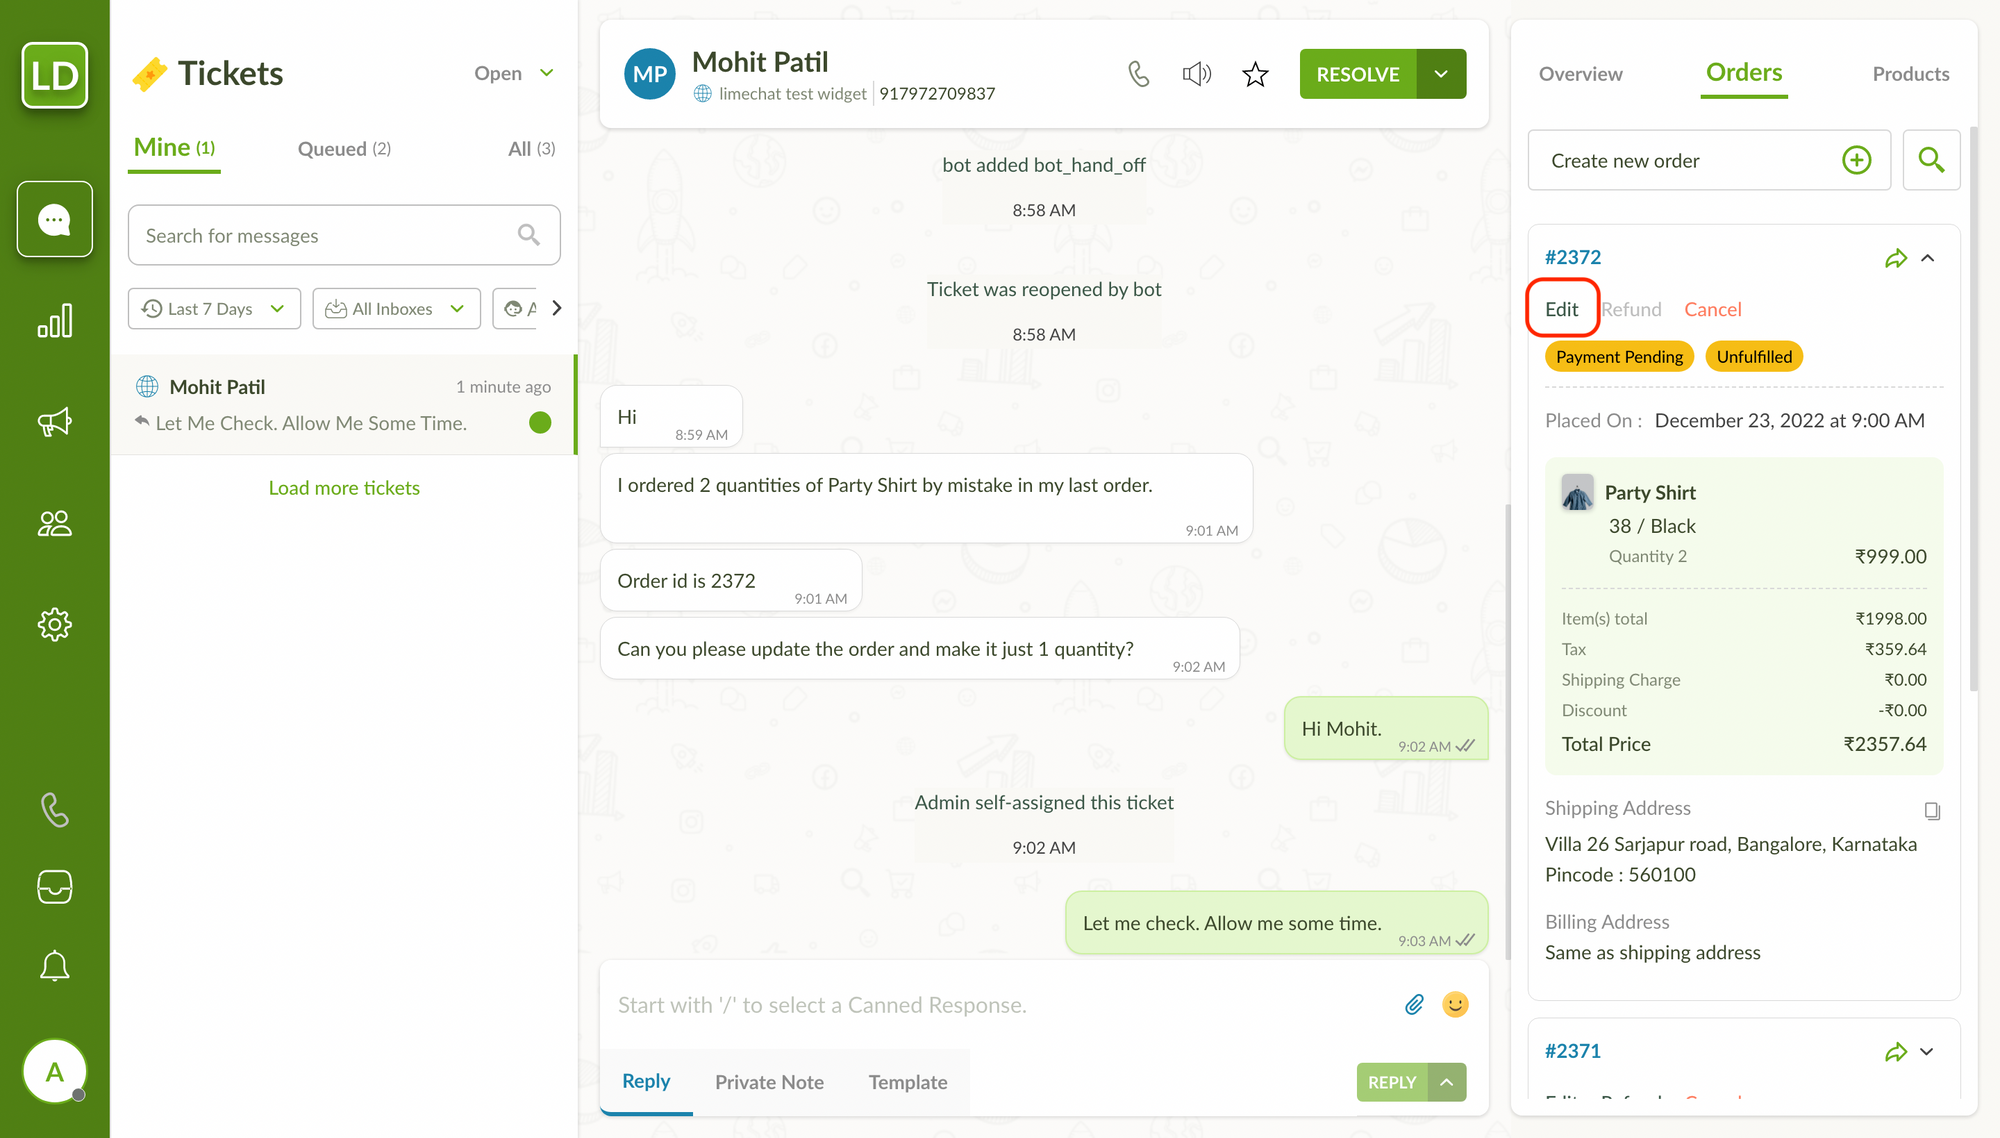
Clicking on Edit button will take you to the edit order screen. Here on the edit order screen, any changes/ edits done will directly update the order on Shopify.
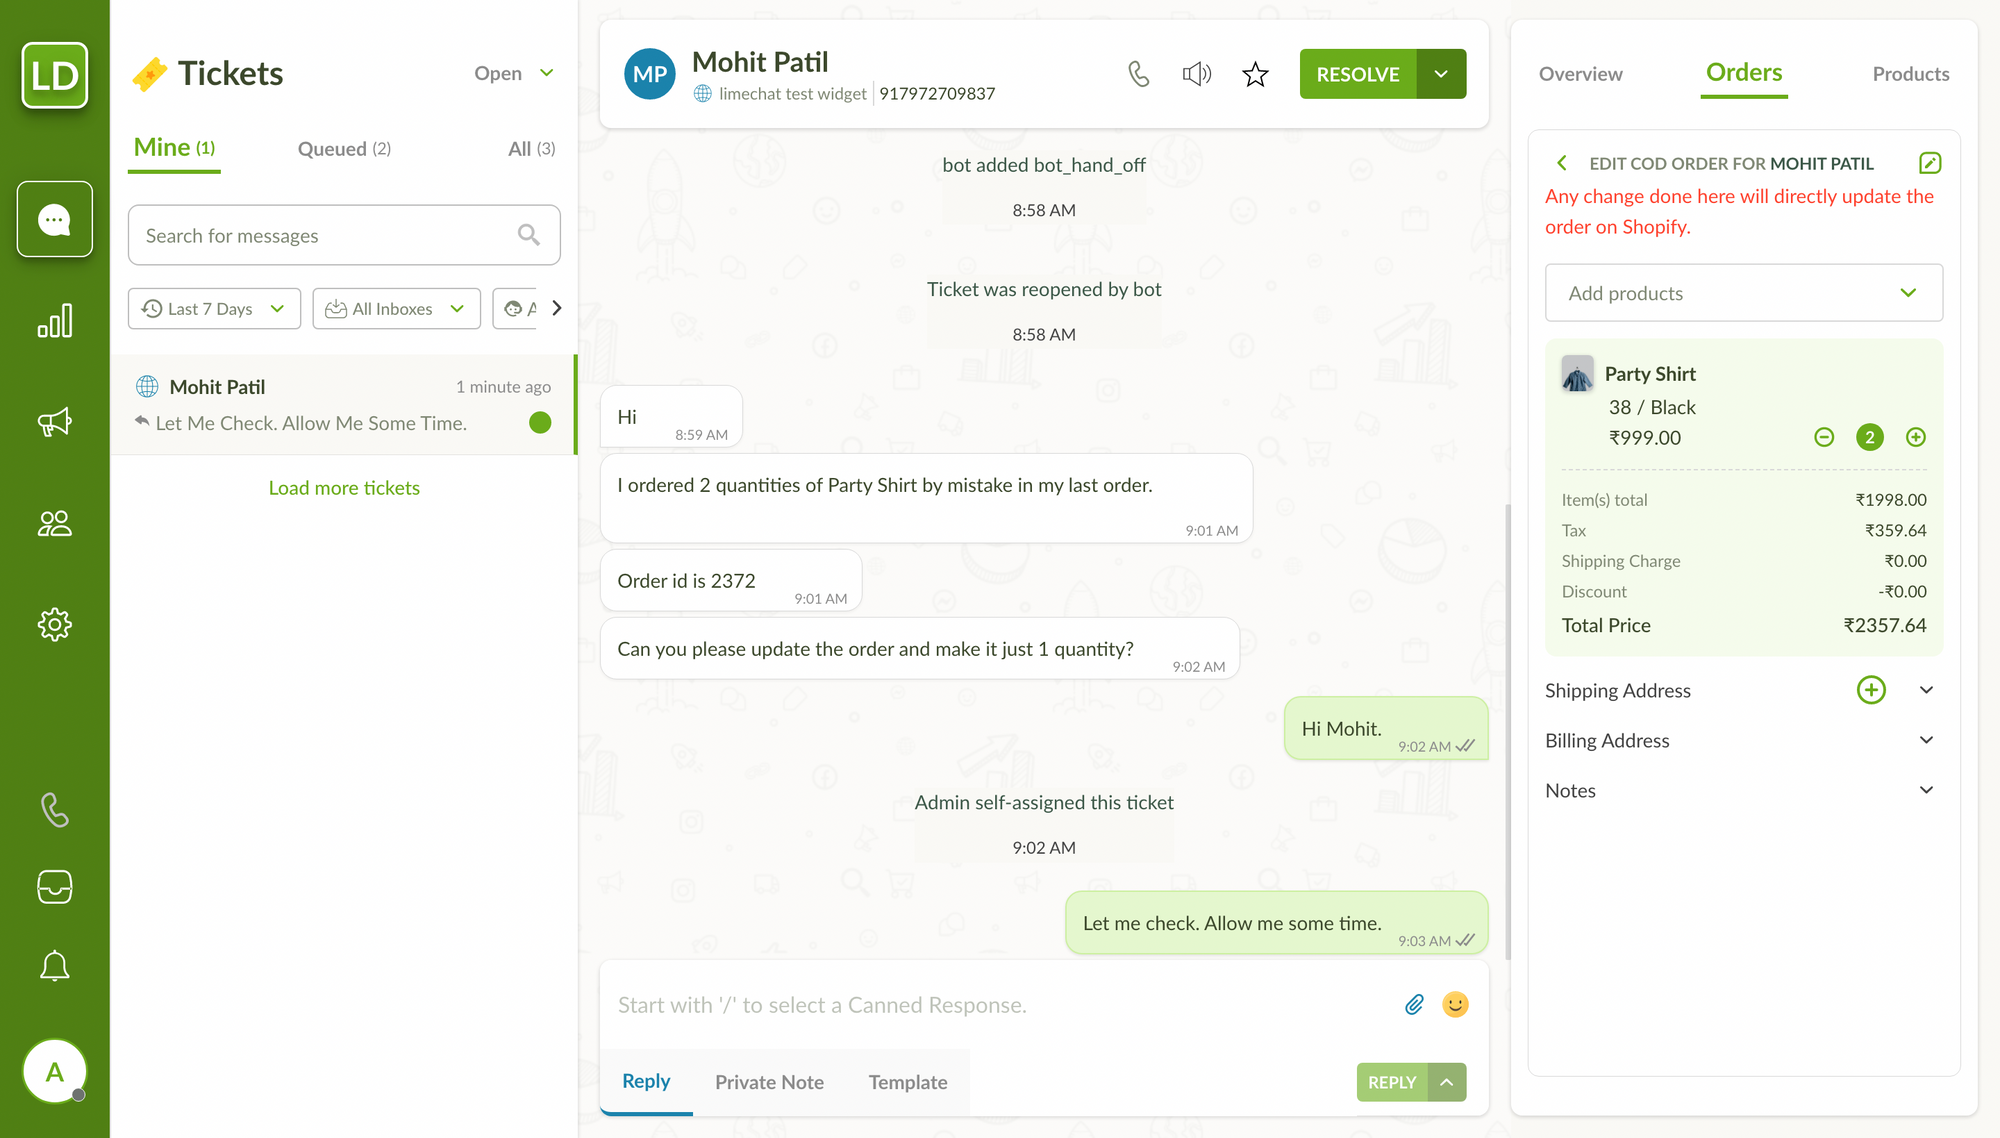
You can edit an order in multiple ways:
Change the shipping address of the customer
Click on the Shipping Address dropdown which will display a list of customer’s saved addresses. You can change the selected address from the list or add a new address by clicking on the + icon.
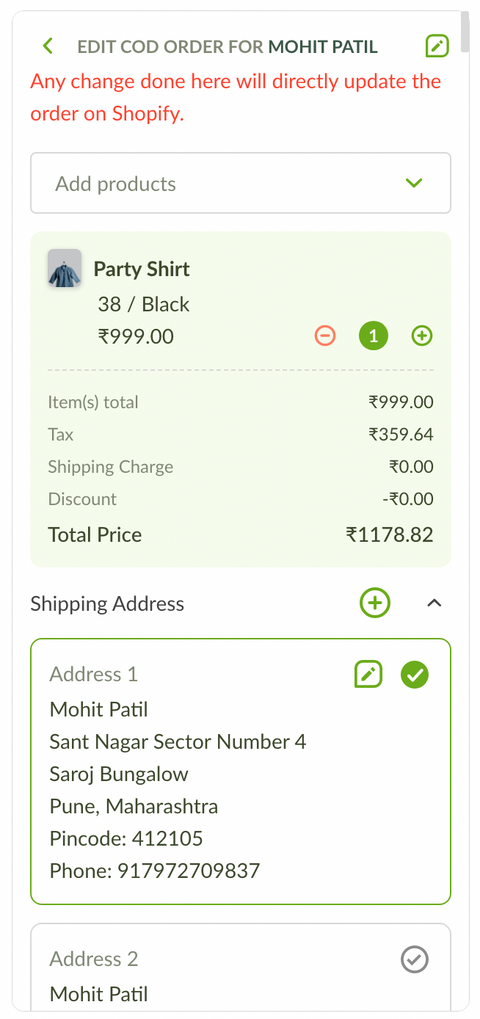
Edit the address, contact details of the customer in the selected shipping address.
Hover on the selected address and click on the edit icon. You can edit the address fields or change the customer’s phone number associated with the address.
Add/ Remove products in the cart
Increase/ decrease the quantity of the added products in the cart
info
💡 The Edit order action is not available after the order gets fulfilled.
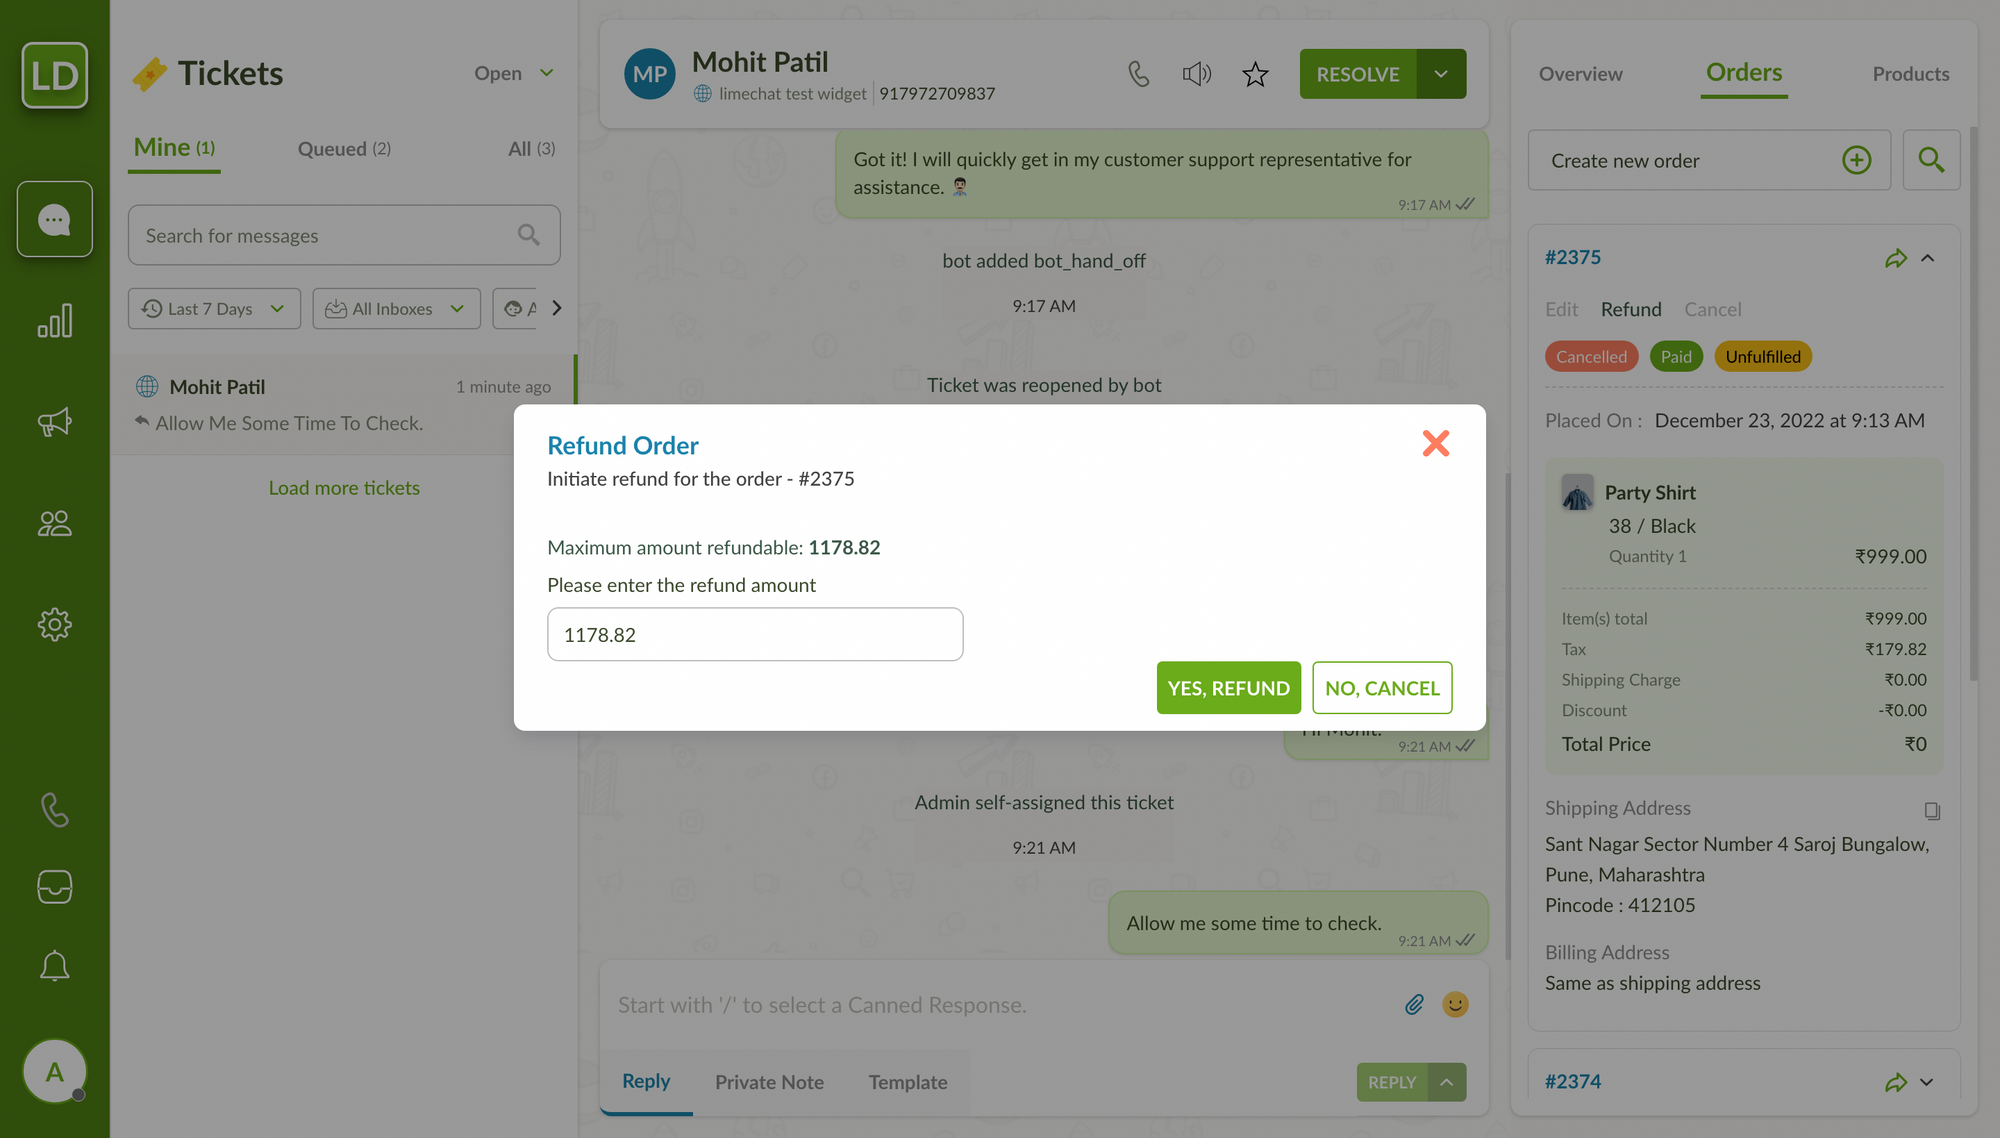
Refund an order
For the order to be refunded, click on the Refund button below the order id
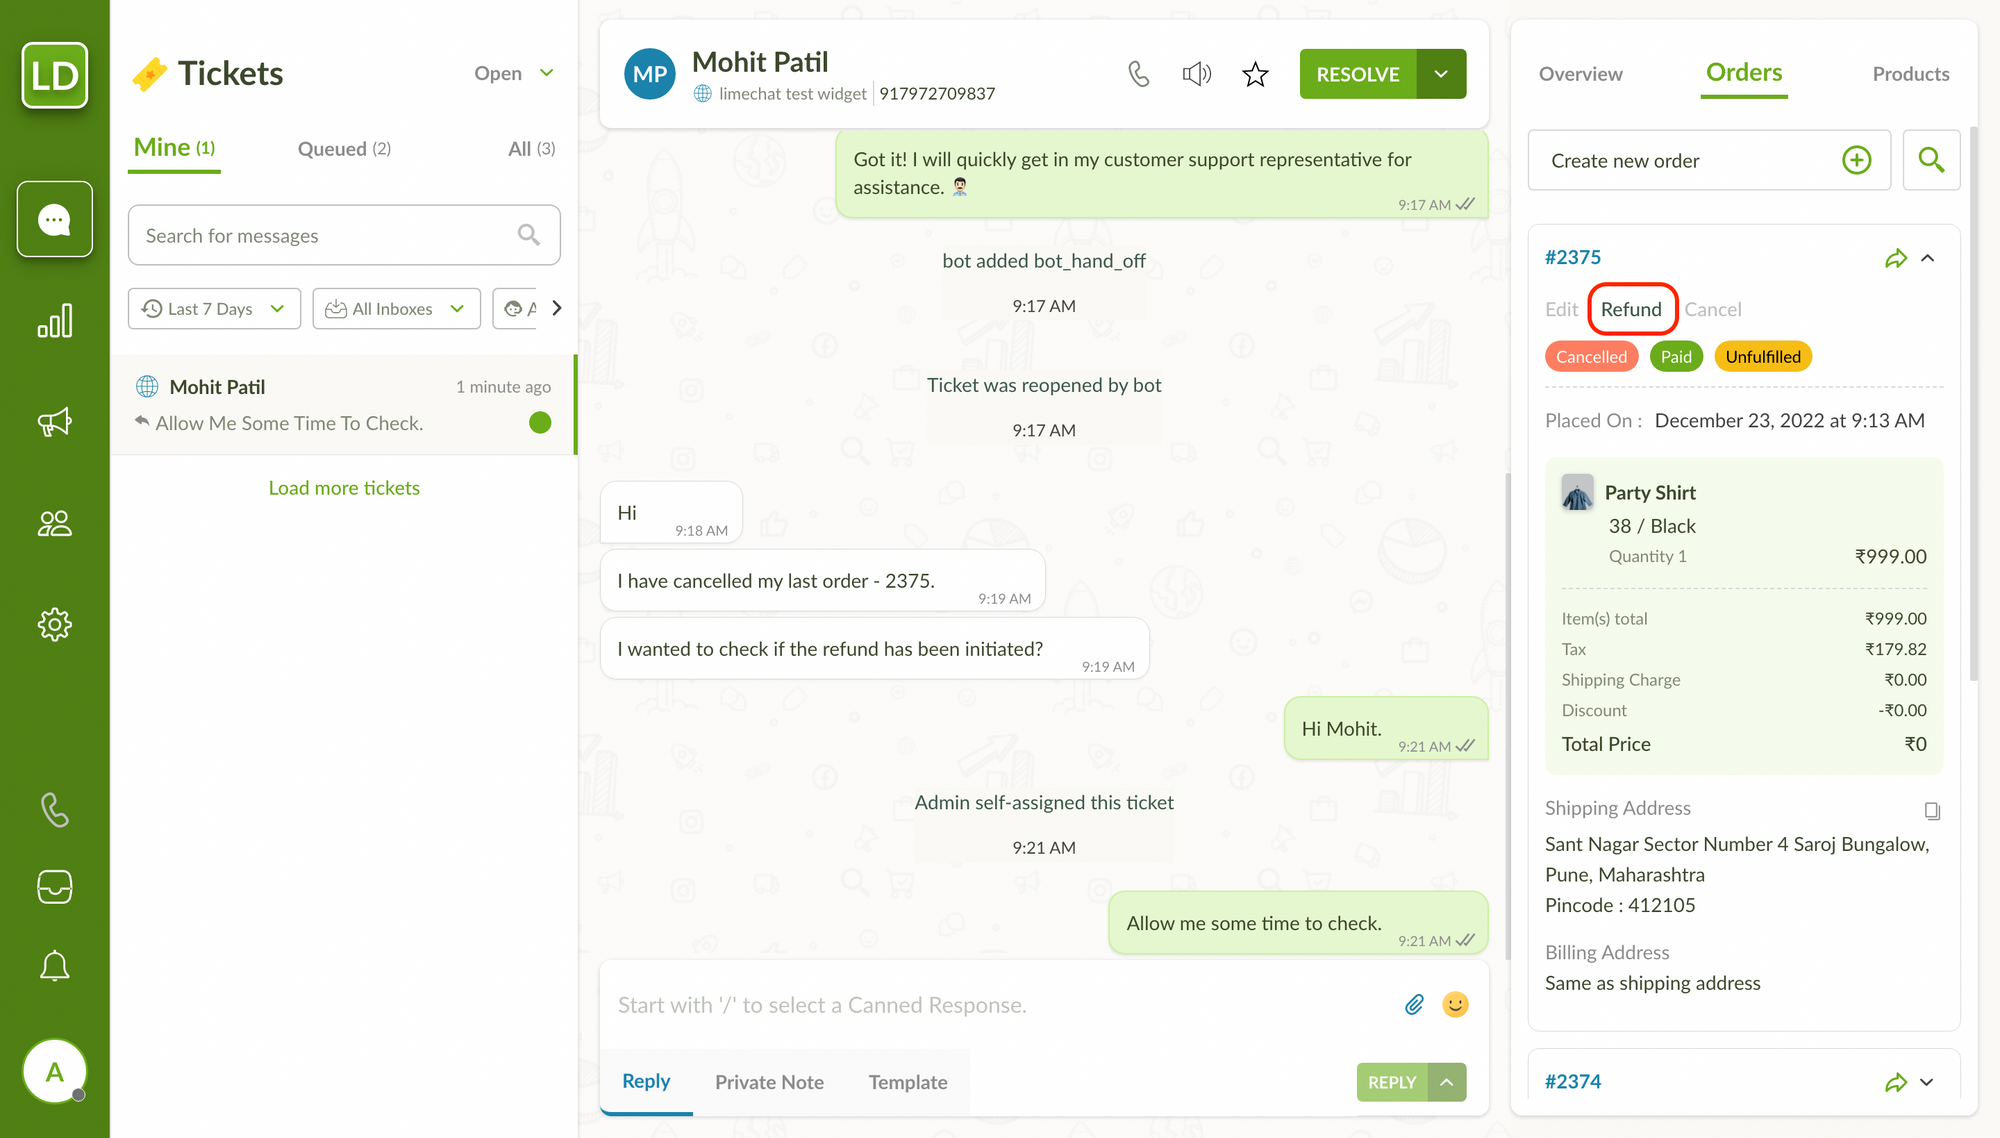
Clicking on the Refund button will open the Refund modal. The maximum allowed refundable amount for the order will be displayed for your reference. Enter the refund amount in the input field accordingly and click on Yes, Refund button.
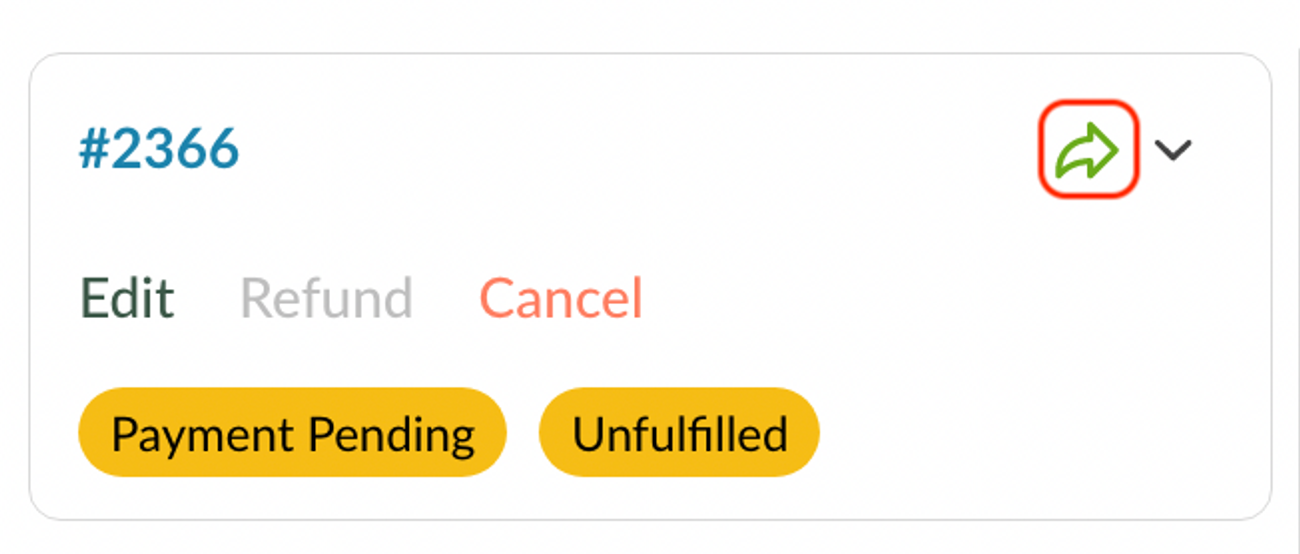
Share order details
You can share the order details with the customer for any order by clicking on the share icon on the right side of the order id. A message with all the relevant details will be sent to the customer.
Recommend Products
From the products tab in the right side panel, you can do the following actions.
You can share product details with the customer by clicking on the share icon alongside any product title. This will share a generalised message with all the variants information.
You can also select a specific variant and click on share icon. This will share a variant specific product details message.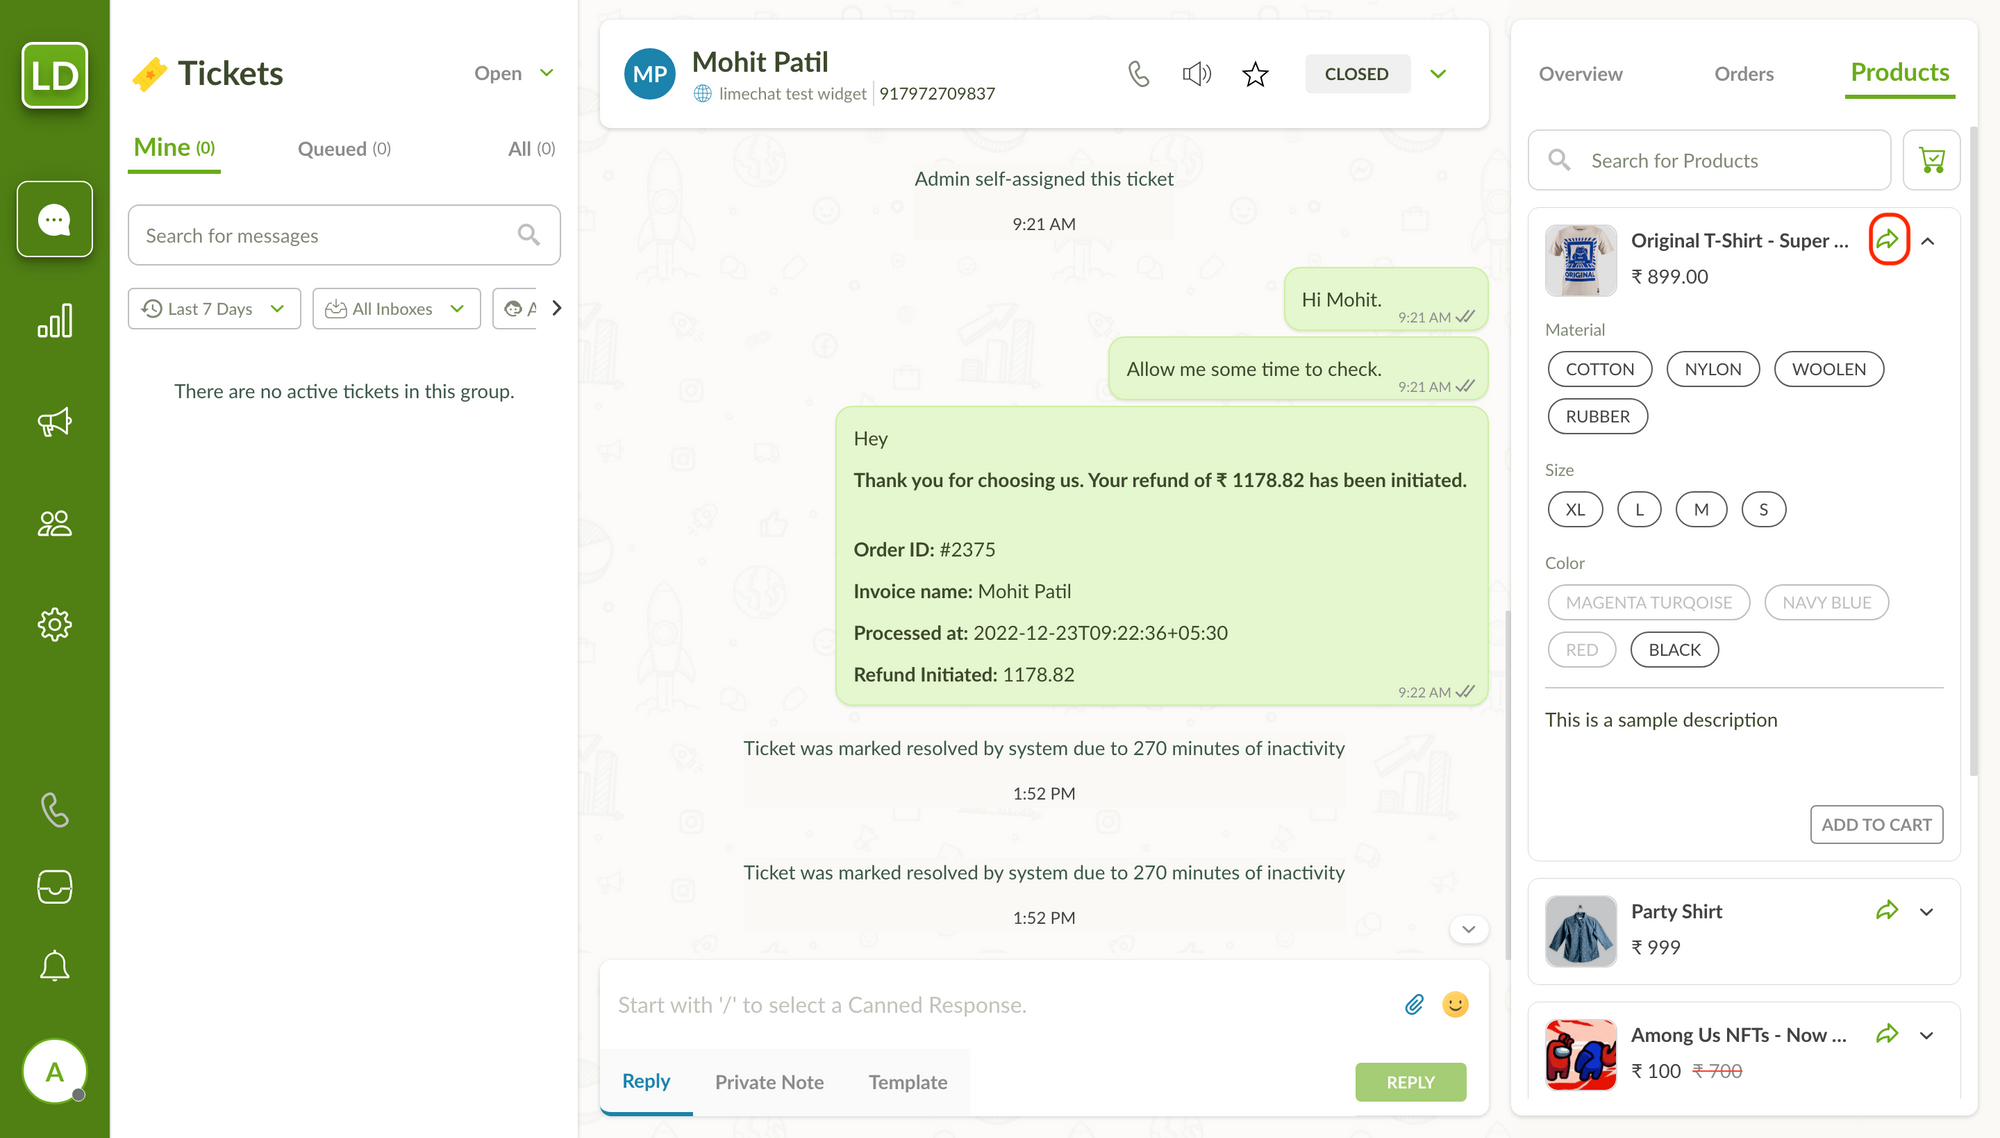
You can search for products and add them to the cart for creating an order by selecting the Add to Cart button. You can also check out the cart by clicking on the cart icon alongside the search bar.
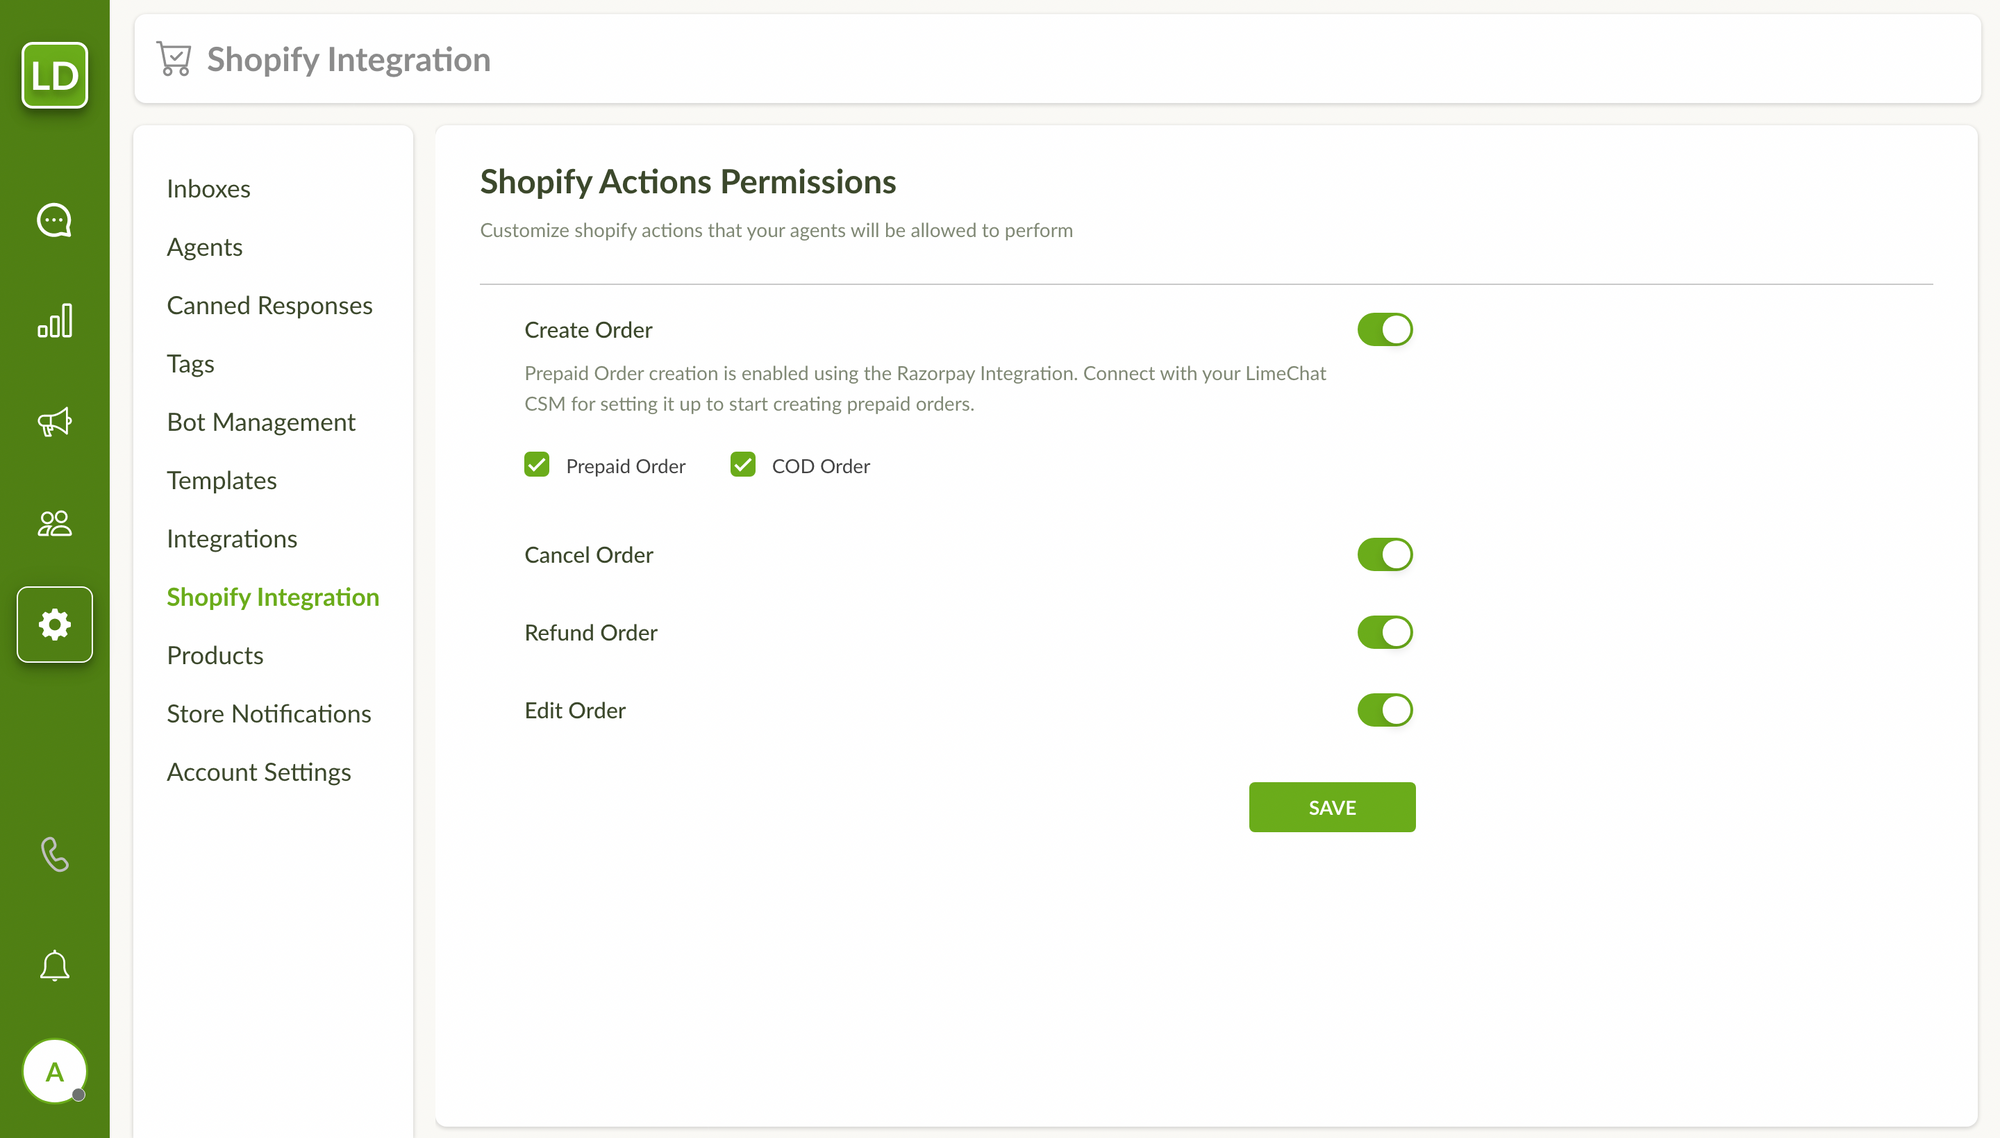
Shopify actions permission settings
Out of all the possible shopify order actions, you can select the actions that your agents should be allowed to perform.
- Go to Settings section from the left side panel and click on Shopify Integration tab.
- Just enable the toggle for the actions to be allowed and save your choices
Video References
Check this explainer videos guide to see the walkthroughs of all the shopify actions.